Skip to content

mk4 project

Featured Replies

hey

just some shots of what i have been doing on my mk4 polo

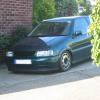
it used to look like this:

DSCF2582-1.jpg

but after i got forced to modify the front end by a nice lady who decided to do and emergancy stop for a fesant it look like this :-(

cleaned.jpg

it was back on the road within a few days but not long after the gearbox deciede to start making some choice noises so it was time for some tlc

first i started by removing all the sealer from the rear wheel arches but found a spot of rust

IMG_1139.jpg

so gave up on the rear for the time being and deciede to crack on tyding up the front wheel arches

IMG_1159.jpg

dirty

IMG_1162.jpg

cleaned

IMG_1168.jpg

painted

after doing this it was time to crack on smoothing off the top grills and towing eye cover on the front bumper so after perchasing a plastic welding kit off ebay i gave it a shot. i used and old rear bumer for the inserts for the top grill and welded them in (didnt get and photos was too kean to get the filler on)

IMG_1293.jpg

filled

IMG_1292.jpg

primed

IMG_1312.jpg

IMG_1313.jpg

finished

whislt i was cracking on with the bumer the car went off to have the rust repaired and get some bits and bobs deleted so after 10 hours of welding it looks like this

IMG_1306.jpg

rust removed

IMG_1309.jpg

smooth sills

IMG_1310.jpg

washer jets deleted

IMG_1299.jpg

tailgate badge and handle deleted

thats as far as the projects got atm, waiting for my garage to be ready then i can crack on with the body work

update soon i hope

chris

  • Replies 34
  • Views 6.4k
  • Created
  • Last Reply

Top Posters In This Topic

well done mate, some serious progress going on there, like the fact u cleand underneath where the wing is gonna go, lol i like. keep us updated. :)

LEE

  • Author

haha yea i did get a bit carried away

mmm clean arches, BUT i say do them cream ;) and random question but in the boot area are you smoothing or iradicating rust :lol: i couldnt work that one out haha

nice wok mate hope to seee it back on the road soon

the bucks dub meet is starting up again if your up for it

  • Author
mmm clean arches, BUT i say do them cream ;) and random question but in the boot area are you smoothing or iradicating rust :lol: i couldnt work that one out haha

inside the boot was where the rust was removed had a fair amount once you dug at it even needed the strut top reparing

cream?!?!?!?!?!?!?! na green will be fine i think less effort cleaning

hopfully the car will be finished in the summer next year but will we see depends how busy iam with racing ect

cheers for the comments

  • Author

ok done a bit more today started to delete the rear bumper towing eye hole

first i cut the towing eye recess out

IMG_1314.jpg

then i cut out a replacement section off my old se bumper

IMG_1315.jpg

then got my plastic welder out and stiched it in

IMG_1318.jpg

IMG_1319.jpg

then started to give it a fill

IMG_1324.jpg

thanks for looking more soon

chris

good stuff! i like your style....

get on the dub club oxford forum www.dubcluboxford.co.uk

  • Author

just another quick update

rear bumper finished (just need the primer flatting)

IMG_1325.jpg

when and stuck the front bumper on the plop to stop it getting damaged as it was just in my back garden

IMG_1326.jpg

then while i was over with the car i thourght i would crack on with the sills

IMG_1327.jpg

Mate, that's some serious progress there, well done :)

How hard was the boot and how do you keep the filler on where the badge was??

And where did you get them discs :o I want some. Do you have to change caliper or just the discs and pads??

  • Author

haven't started to fill the boot yet only been welded up and painted with primer as long as the area if well keyed when you apply the filler it should be fine

the dics are blackdiamond discs i got from rimstyle they do grooved (like mine) drilled or combi (with both)

also got there pads too they seemed pretty good

only changed the discs and pads calipers are std

Fair play to you lad, great work going on there! Keep us posted!

love to see people having a stab at it themselves great stuff mate!

  • 2 months later...
  • Author

thourght i would stick up some update photos of how its looking like now!

somehow iam still finding effort to go and work on it even when its about -1000 outside but iam pleased with hows it getting on.

IMG_1328.jpg

seams under rear lights smoothed

IMG_1329.jpg

rear bumper fitted

IMG_1332.jpg

tailgate handle on its way to smooth-ville

IMG_1363.jpg

final skim of stopper on tailgate

IMG_1366.jpg

primered ready for a wee flat

IMG_1368.jpg

finished

some other random shots of it

side exit exhaust anyone??

IMG_1370.jpg

started to fill washer jets

IMG_1371.jpgd to fill washer jets

comments welcome

chris

well done mate, its looking sweet!

Nice bit of DIY there looks good what you have done not pikey at all. Where have you relocadted your front washer jets to??

  • Author

the washer jets willl be relocated to the scuttle pannel under the bonnet

cheers for the comments

looking really good mate, can't wait to see it finished

Looks spot on mate keep us updated well done

looks good . i am doing mine almost the same at the mo just keep forgeting to take pics . did you weld the bits underneath the lights or just fill them

keep it up mate!!! good work!!! Cant wait to get back home and carry on with my project!! How much is a solinoid for the boot??

  • Author

hibbs: i had the seams welded you could just fill them but the filler wouldnt stay in there long and having it welded means you can use less filler which will be better in the long run

mc_tangus: i got the solidnoid form venom was only about £20 but still trying to work out how to fit it ect

cheers for the comments

should be having a friend of mine coming round during christmas to do all the tinnys on the car then need to get the glass removed and shes pretty much ready for a good helping of high build before some fresh colour

Carnt wait

chris

thanks man....what wheels are you gunna be runnning??

keep it coming 8-)

nice progress there mate

coming along nicely :-)

Create an account or sign in to comment

Recently Browsing 0

  • No registered users viewing this page.

Account

Navigation

Search

Search

Configure browser push notifications

Chrome (Android)
  1. Tap the lock icon next to the address bar.
  2. Tap Permissions → Notifications.
  3. Adjust your preference.
Chrome (Desktop)
  1. Click the padlock icon in the address bar.
  2. Select Site settings.
  3. Find Notifications and adjust your preference.