Skip to content

Danny6n's mk2vr6 project

Featured Replies

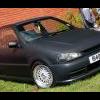
Was up at my mates breakers yard on saturday having a nose around, he had a mk3 VR6 in on a destruction order, while I was looking at it a friend of the lad's turned up and we got chatting, long story short, he was selling a mk2 GTI... My mate looked at me with a kind of 'are you thinking what i'm thinking?' look, next news, we're on the way to scarborough to view the mk2 :-) On arrival we were greeted by said mk2 a bit sorry looking with flat tyres, but apart from that, pretty clean. There's an area of rust on the rear by the tow eye, and it needs a new tailgate but that aside it was pretty clean, no arch rust, nothing in the bay or on the sills, not even the battery tray which I thought was pretty impressive for a 22 year-old car! Engine is good minus an ignition coil (which is irrelavant anyway given the conversion plans 8-) ) So we bought it and sorted recovery out for Monday, got a deal on that too as the lad selling the car wanted his corrado moving to Scar' from here. Anyway, here's some pics 8-)

DSC00353.jpg

DSC00351.jpg

DSC00352.jpg

DSC00350.jpg

Edited by danny6n

  • Replies 17
  • Views 2.5k
  • Created
  • Last Reply

Top Posters In This Topic

  • Author

The car arrived today and eager to get cracking, we began stripping out the rear, the ensuing frenzy lasted about ten minutes, we were then left with this:

DSC00358.jpg

DSC00359.jpg

and this...

DSC00364.jpg

We had a go at getting it started but to no avail - lacking a spark :lol:

DSC00360.jpg

Then we had a look undeneath, some surface rust but nothing major

DSC00362.jpg

Here's a couple more pics

DSC00361.jpg

DSC00363.jpg

And the donor vehicle (very dark by this point...)

DSC00365.jpg

Plans so far are:

Obviously, VR engine

Respray in matt white (been wanting to do that for ages)

unsure on wheels yet but banded steels or RMs are on the cards

VR seats

Mk3 dash

Cage

Single headlamps

And whatever else crops up along the way :-)

  • Author

Jeesus I need to learn to hold my phone/camera still :lol: but you get the gist...

wheels = defo Borbet A's 9" all round, But in gun metal grey :) to go with the Matt White :D

when you put the lump in (i assume you'll swap over the complete rack/ subframe/ brakes etc as 1 too) the only thing you need to look out for is the bottom pulley may well touch the chassis leg, everything else above bolts straight across.

look forward to seeing the progress.

Olly

GTIInternational2009083.jpg

GTIInternational2009082.jpg

:nod: :nod: :nod: :nod:

another mk3 golf off the road, the world is a better place for it well done mate :thumbsup::lol:

  • Author

Borbet A's have been ruled out by my partner in crime, showed him some and he hated them so I'm gonna have to compromise on that, they're pretty overdone anyway :-/

Yeah I've heard about having to dent the leg to clear the pulley, we'll cross that bridge as and when, cheers for the heads up :nod: Any advice is appreciated as I'm new to this and the other lad, despite being a mechanic hasn't done a conversion as such before. We're just going to take it slow and see how it goes, aiming for it to be finished by vw fest at the end of summer though...

  • Author
another mk3 golf off the road, the world is a better place for it well done mate :thumbsup::lol:

:lol: sadly the police take credit for that one - destruction orders FTW

apart from the notch, the rest is all bolt in, i put the lump with shafts/ subframe/ rack/ brakes+hubs still all joined together as one.

on the VR

if you undo the steering knuckle as it goes through the bulkhead

then unclamp the exhaust after the cat

then remove the front cross member

place a wheely board under the engine

undo the 4 subframe bolts that go up onto the chassis - 2 above the wishbones + 2 through the rear wishbone mount

the engine will now be free bar the hubs

undo the 4 hub to strut bolts - 2 each side

wheel the whole engine + box / down pipe / subframe with wishbones/ hubs and shafts still attatched out of the mk3 shell then wheel the whole lot straight into the mk2 - sooo easy to bolt in bud.

iirc you need to re-use the mk2 front cross member the front engine mount sits on but thats a simple bolt on too.

  • Author

Cheers for that mate, should prove helpful when we get to putting the engine in, just trying to sort a unit out as it's not really practical doing it at the yard as it needs pushing in and out every day and the place is filthy (not good for a white paint job!)

  • Author

Sorted a temporary unit out on friday, was full of shit so we got that cleared out and towed the cars down.

DSC00369.jpg

Whipped the doors off and stripped the window mech and windows out, handles, wing mirrors and plastic trim were all removed with a view to prepping and painting eventually.

DSC00370.jpg

DSC00371.jpg

DSC00374.jpg

Tailgate and lights off

DSC00379.jpg

Removed the drivers seat, carpet, headlining, sound deadening, bottom dash, centre console etc.

Floor was solid despite the soggy carpet :-)

DSC00384.jpg

Meanwhile the mechanical brains behind the operation got busy on the front end

DSC00372.jpg

Then we had to stop for a bit while some seriously questionable methods were used to gain access to the underside: It involved large blocks of wood, a trolley jack balanced precariously on a wheel, some truck axle stands and a lot of wobbling golf....

DSC00376.jpg

DSC00378.jpg

after half an hour and a bit of scrapyard mentality, out comes the gti lump. Now it wasn't the most graceful engine removal ever, :lol: I seem to remember the words "fuck using the crane, cranes are for gays, it's only getting weighed in anyway" being used. Either way, its out now and thats what counts.

DSC00385.jpg

DSC00386.jpg

Pretty productive four hours really imo :-)

haha ye looking good

when iwas up at sams place he had a frontera engine out within litterally 10 minutes involving the gas cutter large bars and general banging about haha

should be out in no time

  • Author

Ye it took him a while to get used to using real tools today, he looked lost without the oxy cutter and stihl saw!

haha i bet it did

shunt take long only took me and craig a weekend to rip my spi 1.3 out of my polo and put the gt engine in its all good fun

  • Author

don't think we'll have the vr engine in for a little while yet, there's a few bits of welding and quite a lot of bodywork and painting to be done yet, then we need to get the mk3 dash to fit :?

i like your mates mentality :lol:

will you be fitting the mk3 rear axle as well? i was talking to a lad today that had converted his mk2 to mk3 vr6 running gear to give it a wider track and he said it had made a noticeable difference to the handling :thumbsup:

  • Author

yeah it does get the job done :lol:

Yeah we're going for the wide track option too, using all the mk3 running gear. Seems to make more sense as we have all the parts on the VR available to us and the brakes etc would need upgrading anyway if we stuck with the mk2 gear, so we may as well bolt the whole lot on together like polo6n2g40 said above.

Create an account or sign in to comment

Recently Browsing 0

  • No registered users viewing this page.

Important Information

We have placed cookies on your device to help make this website better. You can adjust your cookie settings, otherwise we'll assume you're okay to continue. Terms of Use Privacy Policy Guidelines

Account

Navigation

Search

Search

Configure browser push notifications

Chrome (Android)
  1. Tap the lock icon next to the address bar.
  2. Tap Permissions → Notifications.
  3. Adjust your preference.
Chrome (Desktop)
  1. Click the padlock icon in the address bar.
  2. Select Site settings.
  3. Find Notifications and adjust your preference.