Skip to content

Guinnane's '94 1L Coupe

Featured Replies

  • Author

Update:

Fitted my sills and rear arches.

Was a fit of a fiddle but with some waxoyl, pop rivets, siroflex/tigerseal, a drill, plenty of clamps and some autoglym bumper care it looks a whole lot better IMO as the arches had some dents and surface rust before. Just need to find another front arch as I stupidly cut it too short haha FAIL!

Let me know what you think

Before:

19042010775.jpg

After (just the same on the other side):

07082010863.jpg

07082010864.jpg

07082010865.jpg

  • 2 weeks later...
  • Replies 123
  • Views 25.1k
  • Created
  • Last Reply

Top Posters In This Topic

Posted Images

  • Author

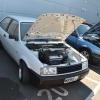
Wee pic from DC10.5 on sunday

DSC_0364.jpg

  • 2 weeks later...

looking good mate. has the air filter made much difference?

  • Author

It has slightly mate, it sounds a whole lot louder and more raspy than before. In terms of performance its not very noticable. considering its a 16 year old 1.0L engine with about 45/50bhp standard you're not going to notice very much of a difference in terms of bhp by modifying the air intake.

  • Author

A few pics from ScottishVAG Glasgow meet last night:

45818_464427102811_646337811_6444992_425

45818_464427097811_646337811_6444991_477

45452_146968005325722_118975441458312_30

41007_146967621992427_118975441458312_30

hi m8 i tried to fit the golf elbow to my carb and the 3 threaded studs are too short any help on how i can still fit the elbow plz i really want it on the carb as it looks great on yours

  • Author
hi m8 i tried to fit the golf elbow to my carb and the 3 threaded studs are too short any help on how i can still fit the elbow plz i really want it on the carb as it looks great on yours

Yeah you take them out and put some longer bolts in place. There's a few ways of doing it but I just locked two nuts together and undone the studs, only takes 5-10 mins.

  • 2 weeks later...

thanx mate it is now fitted i and it sounds great and my polo is single point injection i did not know untill i saw it said bosche on what i thought was the carb and bosche are electronic so i knew it injection and i found the ecu, and is yours carburettord mate

Edited by sparky123

  • 1 month later...

update?

  • Author
update?

No updates yet mate, started a new job so I've been pretty busy. I should really give the car a good clean and take some pics soon.

The O/S/R brake cylinder is leaking so I'm going to replace both and do the back drums and shoes soon. I also need to do the ARB bushes (and while I'm at it I think I'll fit a 5-speed one and g-laderslide blocks -excuse the spelling- If I can get them) and put the windscreen washer tank back in for practicality in the winter so I'll need to get my finger out. I've also been toying with the idea of dropping a GT lump in and Making up a Ged bar and getting some strut braces but we'll see. I'm pretty skint at the moment. Any ideas on what I should do to it next?

tinted rears again and slight camber + slight lowerage?

+ slight tint on headlights and indicators?

Edited by VW+SWFC=:)

  • Author

Sold my tinted rears mate, they looked good in the pics but the finnish on them was like orange peel and they just looked chavvy. I think I'll tint my windows next, that's an option, nothing too heavy though. I can't go any lower on the back mate , the wheels rub too much as it is but I could go another 10mm down at the front no problemo.

if the rear wheels are scrubbing the arch get it cambered, if its scrubbing suspension etc.. space them and then camber :D

  • Author

I'm not into camber at all mate IMO it's ridiculous and impractical. For a car like mine all it's going to acheive is increased wear on the tyres.

  • 3 weeks later...
  • Author

Well I'm getting fed up of shitty brakes on the polo so I'm going to do my back brakes at the weekend, new drums shoes and cylinders :D And I'll be fitting a 22.2 master cylinder and vwII front brakes within the next month or so..finally a decent brake pedal!!

Lol wicked mate.

Thinking of a conversion anytime soon?

Or some propper engine mods?

Max

  • Author

Yeah mate it's definately on the cards, I thought I'd be better off upgrading all the brakes on the car first that way at least it'll stop a bit better with more power.

After that I'll do all the front bushes and fit a 5-speed, maybe ladersite blocks and a ged bar aswell.

I'm just wondering what engine to put in though. Wouldn't mind a gt engine but only If I could get a conversion for decent money that's close enough, that one in forsale would have been perfect but it's knocking and I'm not prepared to spend loads getting it bebuilt if it needs it.

Is It Hard to remove the side bump strips ?

loving this Polo! keep up the goo work !

Looks awesome mate!

personally i think it looks like one of the best around!

  • Author

CMG - Not really mate but you need to be carefull when you're doin it. Hot water and thinners is how I did it. The actual removal is easy its trying to get the glue off thats har.

adam f - Cheers mate, I dunno about one of the best around but I'm cfertainly happy with it!

Ok so I did the back brakes and what an improvement! New drums, cylinders, shoes and bearings and stopping is not a problem (on the back anyway)

Got the wrong handbrake cables but I'll get them swapped soon.

Also bought a set of VWII calipers the other day so within the next 2 weeks I'll be upgrading the fronts to wII calipers with 239 vented disks and a 22.2 master cylinder, job done.

Edited by Guinnane

  • Author

To give you an Idea of how bad my rear brakes were...here's a pic:

061120101033.jpg

Basically, leaky wheel cylinder + brake dust = grease covered shoes = no brakes.

It wasn't as bad on the other side but you get the picture.

nice job! Would a Heat Gun help remove it easier ? Just wondering what mpg ye geting ? i have a red 1.0 Gen Lined up and just geting to you the stuff before i Start the project :)

  • Author

no way! dont toutchit with a heat gun you could easily melt the paint and will definatily damage it. If you use the search button there's a guide to removing them, think it's in the bodywork faq section.

Absolute perfection! I'm looking for a mk3 coupe, and I would be over the moon if i could find a white one! And those wheels are perfect. How much did you pay for them?

And the subtle touches like getting rid of the roof guttering and the shorter no. plates make such a big difference!

Nice work :)

  • Author

Cheers mate, it's came a long way from the way I bought it.

Smooth boot plinth under construction. :thumbsup:

Decided to make one after a while of reading the how to guide and wondering how difficult it would be i decided to bite the bullet and go ahead.

All I used was:

1 x Tub of P40 Fibre glass

1 x Tub of P38 Filler

1sqm of fibre glass paper

1x Pair of scissors

1 x can of primer

1 x can of plastic paint in black

& several sheets of mixed grade sand paper

101120101036.jpg

After reading the How to guide I decided I'd give it a bash but using my own method. Instead of plastic welding a new section in to replace the lock gap I bridged it with fibre glass and smoothed it with filler.

I cut a section from the boot plinth where the lock will sit in it's new position and began to bridge the slot where the current lock position is. First time I had used fibre glass but it was relatively easy. Cut a peice of fibre paper to size, about an inch longer at either side of the gap to give it strength. Brushed the paste on and placed the layer of paper down and brushed over it letting it absorb the paste and so on until a good enough layer was built up. I wasn't worried about being too heavy becuase it would be getting sanded and filled anyway. Only thing to watch for is keeping the layer flush with the rest of the panel.

101120101037.jpg

After it had all set i trimmed the excess off with the scissors and began sanding until the plinth was relatively level. I used heavy grit paper as the fibre glass is quite hard. I then mixed up the filler and began applying. Again, I hadn't used it before and probably used slightly too much but just made sure everything was smoth enough to work with and all the bumps were filed out.

101120101038.jpg

Then I waited until the filler had hardened and began sanding again beginning with a coarse paper and working my way down untill smooth. I then use a little filler to level the panel out and do the edges and small pitting in the plinth and repeated the process again.

I'll update this later when I've taken more pics but I'm really pleased with how it's going so far - although it might look rough in the pics and the pic quality is crap it's looking better now that It's been sanded down.

Create an account or sign in to comment

Recently Browsing 0

  • No registered users viewing this page.

Important Information

We have placed cookies on your device to help make this website better. You can adjust your cookie settings, otherwise we'll assume you're okay to continue. Terms of Use Privacy Policy Guidelines

Account

Navigation

Search

Search

Configure browser push notifications

Chrome (Android)
  1. Tap the lock icon next to the address bar.
  2. Tap Permissions → Notifications.
  3. Adjust your preference.
Chrome (Desktop)
  1. Click the padlock icon in the address bar.
  2. Select Site settings.
  3. Find Notifications and adjust your preference.