Skip to content

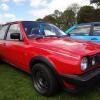
Karl's 1986 Coupe S

Featured Replies

  • Author
nice thread mate!

if your gonna scrap the bottom end... i'm interested in the bare block

pete

I might just take the sump off it for the replacement engine, as it's a little less crusty, but otherwise it's good to go whenever. I'll give you a shout.

I've got a clutch and pressure plate new you can have for a tenner dude I should be down this werkend tograb some suspension. Safety mr karl

The OE clutch looked to be alright. One of the springs on the friction plate was a bit loose, but wasn't going to fall out anytime soon. If I can source an 8P before it goes back in, I may well take you up on that clutch. I'm up at the folks this next weekend though, so I'll miss you on this occasion.

woop - good man K... love those rocker covers! you got an aim for a road date yet?

If I can sort the wiring out for the tailgate I would hope next month. I suspect it may fail an MOT on top mounts, but I don't want to do them just yet, and find it comes back with a page of other things I've missed!

  • Replies 224
  • Views 30.4k
  • Created
  • Last Reply

Top Posters In This Topic

  • Author

Small update.

Gathered a few parts up from work, and headed down to the unit tonight.

Must have spent around 2 hours cleaning and degreasing 20-odd years worth of crap off the engine and gearbox.

I hope you'll agree it looks a lot better.

Before:

157f7885.jpg

After:

fffe2a21.jpg

Also fitted the cambelt and waterpump, and auxilliary belt, and made a start tarting up the crusty bits.

e69ec578.jpg

Just waiting on the cambelt cover to dry, and I'm thinking of doing the rocker cover and upper gearbox mount in the same gloss black.

great looking build here so far, some serious bodywork gone into that ! I've just bought a red coupe S myself so I'm looking for some inspiration! :D

  • Author

Thank you. I honestly didn't realise the work that lay ahead of me on this one, but then again, I did buy it blind, seen as it was down in West Sussex, and I was up in Southport at the time.

  • Author

So just a little bit to report, as I only get the odd few hours here and there after work if I'm busy over the weekend.

I finished tarting up some of the crustier looking bits with a lick of black gloss enamel, and proceeded to refit everything:

1d4e360c.jpg

Engine back in.

6251c01b.jpg

Bolted in on 2 of 3 engine mounts (how it still stands).

23e0ebb0.jpg

Radiator plumbed in, and clutch cable, speedo cable and some of the wiring.

Next task is to get under things on the underside sorted, engine mount, exhaust manifold, driveshafts, etc.

Hopefully have some time at the weekend to do that.

Woop Woop Karlo... done for show season???? cheers for that dollar btw dude... spent it already lol... oil cooler bits for bluey are on their way!

  • Author
Woop Woop Karlo... done for show season???? cheers for that dollar btw dude... spent it already lol... oil cooler bits for bluey are on their way!

No worries dude. I had forgotted to send it you last month :oops:. Damn my scatter brain!

I'm hoping so. Just need some bolts that hold the carb to the inlet manifold now, and to buy some coolant and oil. Beyond that, get the wiring sorted out and its good to go!

By the way. That dollar was in fact to purchase a ticket for a passenger ride in Bluey :wink::-p.

cool stuff man engine is much better keep it up :)

passenger ride welcome anytime dude...

I have the carb mani off an HB enigne if that is any good to you?

  • Author

I've got the inlet sorted, its just the three bolts that hold the pooberger to it that have been borrowed. I might have a mooch around Looms on Sat and see if theres any small block Mark2 Golfs in that I can pinch said bolts from.

Thanks for the offer though!

  • Author

And some more progress made last weekend, and last night:

Engine bolted in properly, bonnet and grille fitted. At this point was just waiting for some bolts to bolt the carb to the inlet.

566fd49e.jpg

And finally it looks like an engine once more! Many thanks to Liz for sorting me out with the bolts I needed. Its all wired up bar the starter motor, but I'll have to crawl about on the underside once more to sort the gear linkage and driveshafts (hopefully this weekend)

b78a5157.jpg

And there was some more progress too. Thanks to Steve (86C) we got some wiring for the tailgate wiring loom sorted. I had had to cut the plugs off to allow the loom to come out of the quarter panel. They're all soldered and heat shrinked now, so thats one less job.

Jobs left to do:

Bolt up driveshafts

Fit gear linkage

Connect wiring to starter

Fill with coolant

Fit battery

Refit interior trim

Fit Mark1 Golf GTi clocks

Sort number plate light wiring loom

Then it can go for an MOT. I'm dubious about the front top mounts, but we shall see. I have some ready to be fitted if needs be.

Also, there is some bad news. The drivers rear quarter has blistered in some places. This will need to be repainted, so the rear arch trim and B-pillar vinyl will be staying off that panel until that is rectified.

Hopefully be able to cros a few things off that list this weekend :-).

  • Author

Well, what a game of dickheads yesterday turned out to be!

Worked my way through that list, with the exception of interior bits, as, as soon as I filled her up with coolant a nice pool started to form underneath.

The problem... The waterpipe where it bolts to the block wasn't sealing correctly.

So, after I managed to get it going, I noticed a very high idle, and the fact it's still firing on 3 cylinders!

Off came the inlet manifold, and I sealed up the waterpipe leak. Quite by accident I had a look at the inlet manifold flange and head, and discovered the high idle... There was remnants of a cardboard gasket on both. With this scraped off I refitted everything, and discovered an oil leak...

That turned out to be the breather pod not quite sealing in the block.

Rectified the oil leak, and by the time it came to try things out again, it'd run out of petrol :lol:.

Might have another play this afternoon in the hope I can get it running normally, and maybe, just maybe get it running on all 4 cylinders!

  • Author

[Ace Ventura]It's ALLLLIIIIIIVVVEE!![/Ace Ventura]

Many thanks to Char and Andy for their help in diagnosing a crappy Halfords dizzy cap.

Timing isn't too far off, but I'll need to set it up properly with the vacuum advance disconnected. With that done I can tweak the idle (though I don't think it'll want much), and the waterpump needs slackening off just a touch. The oil leak has also reared its ugly head again, but only appears to occur when the engine is running now, and the oil has thinned out.

Next job is sort the number plate light wiring, and off it goes for an MOT. Fingers crossed after a 3 year absense from the road it'll be allowed back on with little or no rectification required.

  • Author

So I set everything up on the new carb and set the timing correctly. The result is this:

th_baa1823e.jpg

I ran it by Evil Edna the computer to see what she reckoned:

e29ec6ee.jpg

She reckoned it was running pretty well to say its made up of 3 different engines :lol:.

To celebrate this new found life, I gave her a bath, as it gets mighty dusty in our unit.

c61587e0.jpg

The rear bumper is back off, whilst I wait to get hold of some electrical connectors to remake the number plate lamp loom.

Nice work sir! That looks mint! 8-)

Looks great Karl- I love a nice red coupe 8-)

So close.

I'll get wiring when I'm up there in the week.

  • Author

Cheers guys :-).

And finally... The last job on the list done! MOT time next.

d44a0442.jpg

7a1a1764.jpg

  • 8 months later...
  • Author

So, this ones been a bit of a slow burner as other things have had to take priority.

I had yet more carb troubles, so set about sourcing another Pooberg from a car that I was lucky enough to find in my local scrap yard. I got there pretty sharpish, as within 2 days the car had been raided of anything useful.

The only problems I encountered were someone had properly messed around with the settings on the carb (I expected trouble when I noticed the car in the scrap yard was running a dizzy without vacuum advance. Needless to say the fuel mixture was unbelievably weak, and the idle had been cranked right up to compensate for the car hunting due to the weak mixture. I gave it a tweak using the gas analyser as before, however, I think I have it running a little bit too rich, having only managed circa 70 miles to £27. I plan on heading up to the unit tomorrow, so I will look at adjusting that!

The MRS is now road legal. I submitted it for an MOT in December and it failed initially due to low headlamp aim on the offside and the handbrake being imbalanced. They also advised me on the foot brake only just meeting minimum requirements. A weekend taking all four corners of the braking system apart, cleaning and copper greasing the necessary parts, as well as getting the headlamp aim sorted saw it pass the 2nd time around.

Whilst I was waiting to get it MOT'ed I did a few little odds and sods. Purchased a radio and installed that using ISO blocks I got from a Mark3 to replace the untidy bullet connectors fitted previously. I also renewed a few bits of trim and added a few more decals such as the B-pillar black-outs and the Hella stickers for the front grille spotlamps.

dsc00685qu.jpg

Uploaded with ImageShack.us

I didn't take too many pictures, about the only one I got is this one (midway through installing black-outs). Big thank you to 86C for helping me fit them. He has the patience of a saint!

10092011656.jpg

Uploaded with ImageShack.us

Hopefully coming to a show near you sometime this year :-D!

Car looks great! Its funny to see that its just exactly the same as a european GT except for the name XD

Also great that yours was Mars red, the people who orderd mine decided to go with tornado red instead, but the rest is the same, same striping, interior, en MH engine. Are you still gonna put the striping back on?

  • Author

Over here they only offered Mars Red up to around 1986, so mine is one of the later Mars Red Coupe S's. I have seen some that were registered in 1987 that were possibly old dealer stock.

Over here they re-badged them S as we only got 55bhp engines due to VW not being able to fit a brake servo when the car was configured for right-jand drive. They thought 75nhp engines with no brake servo might be a recipe for disaster :lol:.

My plan is to get the pin strips re-fitted. Now its all road legal, I can drive it to a signs and graphics place to get a proper quote for the work. I have had 2 places say they will happily take it on though, one of which we use at work, so I know the standard of work is good.

Ah ok nice :) Yea mine is a 55hp version aswell and here tornado red wasnt a choice either XD The owners payed extra to get it sprayed that color haha

I see you got indicators in the fenders, was this required or?

But nice to see you are getting the stripes back on it ;)

Gonna follow this closely ;)

Edited by C1Rob

  • Author

In the UK in early 1986 they passed a law that said all vehicles had to have side-repeator lamps for the indicators, or atleast have indicator lamps that were visible from the side of the vehicle.

As this Coupe S was registered in May '86 it got the indicator lamps in the wings to comply with the new laws. Ideally I would have liked to delete them, but the thought didnt occur at the time I was doing the bodywork.

Looks like a nice resto. Where did you get the Hella decals from?

  • Author
Looks like a nice resto. Where did you get the Hella decals from?

Our very own Dan Knight sells them at volkswagenstickers. I stumbled across them by accident. Rarely see them fitted now, as most fade with age or get peeled off. Just another little OEM touch I quite liked.

Create an account or sign in to comment

Recently Browsing 0

  • No registered users viewing this page.

Account

Navigation

Search

Search

Configure browser push notifications

Chrome (Android)
  1. Tap the lock icon next to the address bar.
  2. Tap Permissions → Notifications.
  3. Adjust your preference.
Chrome (Desktop)
  1. Click the padlock icon in the address bar.
  2. Select Site settings.
  3. Find Notifications and adjust your preference.