Skip to content

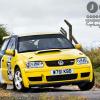
Berg Cup (rally Car)

Featured Replies

wow man! its looking good, good luck with it!

  • Replies 410
  • Views 101.4k
  • Created
  • Last Reply

Top Posters In This Topic

Most Popular Posts

  • cheers should be ready with in the next month now.

  • ye ticks over lovely and it revs so clean I'm really happy with it i was having thoughts that i would have to but mbe or some managment for it after it run last time but the way forward is late spec c

  • Author

cheers. I cant wait to get her in paint now.

Looks good :-)

Am going to see a man about your parts this weekend, will catch you on MSN when I know prices etc :thumbsup:

  • Author

the car got sandblasted today and as Iam writting this is being sprayed in undercoat.

pics will be up later when finished.

  • Author

well what a difference 9 hours can make

had the car sandblasted this morning then painted her in undercoat this evening.

here it starts at 10am this morning

CIMG0825.jpg

sandblasting begins

CIMG0826.jpg

CIMG0827.jpg

sand blasting complete

CIMG0831.jpg

CIMG0832.jpg

painting begins

CIMG0833.jpg

in undercoat

CIMG0834.jpg

CIMG0835.jpg

CIMG0836.jpg

CIMG0837.jpg

CIMG0838.jpg

CIMG0839.jpg

CIMG0840.jpg

CIMG0841.jpg

CIMG0842.jpg

CIMG0843.jpg

CIMG0844.jpg

CIMG0845.jpg

CIMG0846.jpg

CIMG0847.jpg

and there she is at 7pm

Excellent work Hywel.

This is gonna be a very impressive car in the end me thinks. :nod:

very nice!

  • Author
Excellent work Hywel.

This is gonna be a very impressive car in the end me thinks. :nod:

I hope so :unibrow:

fantastic work!

you are a very skilled gent! :D

  • Author

cheers but I cant take all the credit this is very much a joint effort

between my Dad and me.

shot blasting is soo good! its not when it bounces bac at you though! but other than that its great! looks bloody good mate!

very talented family there, gna be awesome when its finished

how it should be done. :thumbsup: keep it up.

Looking good.

Rally Yellow again?

Always dreamed of taking a car and stripping it down to the bare chassis and building it up like new from there, it's threads like this that make me wish I had a garage!! Top work and keep us posted!!

Edited by Chris_McCartney

  • Author

it wont be going rally yellow it was a very hard choice but went for a very light blue and a white combination. hope

it goes well.

looking gd coming along very nicely look forward to seeing it in paint

luke

  • Author

well she wont be in paint for a bit as we are going tyo basically build the car makesure it all works and then take her apart again then paint her

then put her back together and she will be ready.

nice work feller :thumbsup:

mmmmm :badgrin:

just wondering about the rear arches. have u just cut the outer arch off then welded it to the inner?

Superb project going ahead .

I think you have made a good idea putting it all back together and making sure it is 100% how you want it to run before you paint it .

Would be such a shame to chip or scratch paintwork fiddling with things when you havnt tested everything .

I'm definatly going to be keeping my eyes on this thread !

  • Author

yep rear arches have been cut then reshaped the inner arch and welded them together. thats basically it.

outer cut

CIMG0333.jpg

then inner shaped and welded back together

CIMG0331.jpg

looking sweet, can't believe the whole shell was blasted and no panels warped or got damaged, normally the rear quaters and roof warp. top job on the rear arches, they look very well done.

Jealous bump

What arches have you got to put on the car?

Are they the same as these or very similar?

As ill be cutting out my front and rear arches and will need to re weld the rears. How did you find the easiest way to do it? (tbh i can only think of one way to do it just want to seehow you did it.)

pirmer.jpg

  • Author

ye that looks like the same kind of arch to me.

fit the arche mark wher is comes to them cut the outer away thrn seperate the inner from outer leaving as much metal as you can on the inner so you can shape it to met the outer at its new location. then trim so they match and weld back together is basicaly what I did.

hope that helps.

Create an account or sign in to comment

Recently Browsing 0

  • No registered users viewing this page.

Important Information

We have placed cookies on your device to help make this website better. You can adjust your cookie settings, otherwise we'll assume you're okay to continue. Terms of Use Privacy Policy Guidelines

Account

Navigation

Search

Search

Configure browser push notifications

Chrome (Android)
  1. Tap the lock icon next to the address bar.
  2. Tap Permissions → Notifications.
  3. Adjust your preference.
Chrome (Desktop)
  1. Click the padlock icon in the address bar.
  2. Select Site settings.
  3. Find Notifications and adjust your preference.