Skip to content

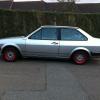
Loki: Silver Twin Weber Saloon

Featured Replies

So... have posted a few times, but never quite plucked up the enthusiasm to stick up any pics of what I've been working on for the last 12 months or so.

photo-11.jpg

The spec is as follows:

  • 50K genuine miles
  • Twin 40 webers
  • Stainless 2" exhaust with single centre box
  • 1272CC cross flow hydro head
  • flame thrower coil & 10mm magnacore HT leads
  • fast road cam
  • SS 4-1 manifold
  • facet fuel pump & uprated fuel system / filter king
  • G40 clutch
  • G40 front callipers black diamond discs, black diamond pads
  • header tank delete
  • MK1 GTI wolfsburg steering wheel
  • washer bottle relocation to boot
  • VDO gauges & senders installed
  • Supersport suspension kit 60/40 (I think), G-laderseite ARB blocks, Full polybushes.
  • engine bay wiring tidied & extended
  • Various interior chromey bits (but not too much!)
  • passenger side wing mirror delete
  • 104bhp on the rolling road, and lots of LOUD. See here for loudness proof:

Last year I bought a silver saloon, and I set about tidying up a few things.

IMG_0003.jpg

IMG_0004.jpg

It looked pretty respectable when I picked it up - but I soon realised that under the plastic arches was a world of rust - so have spent most of the last few months de-rusting and spraying stuff.

The rears were much worse than the fronts, but all the arches had been 'broken in' with an angle grinder, and the front arches stuck back on with silicon sealant and no-more-nails...

IMG_0021.jpg

I've still not managed to get round to doing anything with the rears - really they need new arches, but finding some will be interesting... and as a result, for now, the plastic rot catchers have been left off.

So one of the first things I did was whip off the front arches and get some replacement ones on - but before I could do that, I set about cleaning things up to see if there was any more rust on the inner wings. Thankfully it was all pretty good - and what there was was treated to a nice coat of Bilt Hamber Hydrate 80.

IMG_0071.jpg

IMG_0081.jpg

IMG_0085.jpg

IMG_0088.jpg

IMG_0092.jpg

IMG_0093.jpg

Once that was all tidied, I set about sorting the rust on the sills (which also had some rusty holes from the plastic sill covers which I decided to fill):

IMG_0075.jpg

IMG_0080.jpg

IMG_0079.jpg

IMG_0073.jpg

Sills done, wings done (no pics of the wings just after they were done, but it took a lot of swearing.)

Recent pic of the wings:

photo.jpg

Needs doing professionally really - but it's OK for a rattle can job.

I swapped the G60 steelies it came with for some smaller ATS Classics I got off ebay. The 15s rubbed so much, and the steering was so heavy it just wasn't worth the frustration. It handles better on the 13s and the ride is a million times better.

Next I set about fiddling with the engine bay. On the list was:

- Relocate washer bottle to the boot

- Delete the header tank and install new rad with powder coated radiator cover

- clean up the engine bay and give it all a thorough gunking

- Clean up the wiring loom - removing all those connectors that were no longer needed after the weber conversion

- I also relocated a lot of the wiring by extending it and running it down the side of the engine bay and back up again.

- Relocated a lot of the fuel system for a neater install and replaced all the fuel pipes

- No pics of this, but replaced the fuel tank as it was rusty and leaking.

- Replace the dipstick tube with a chrome one I had in the shed

- install a remote oil pressure sender, and sump-plug temperature sender for some VDO gauges

- install the wiring and the VDO gauges (this sucked as I had no wiring diagrams, but got it all figured out in the end). The gauges themselves came from a friend's scrapped Audi Coupe, and I had to hunt around the internet for the senders. The oil pressure sender is a proper VDO one, and the temp. sender is an obscure VW part from an Audi 2.7 V6... but it works, and is correct for the 180 degree C temp dial.

Here's how the engine bay looks now:

photo-4.jpg

I also sanded down and sprayed the slam panel as it was going rusty, and thoroughly waxoyled anything I couldn't get to.

...and the VDO gauges installed in the stereo hole:

photo-6.jpg

I installed an amp to the underside of the rear shelf, replaced the shelf speakers and ran a set of RCA cables to the front so I can plug my iPhone in. Now I control the volume from the phone - works a treat. Still need to find some way of mounting a dock for it though... Considered using the centre speaker grille but can't think of a sensible way of doing it.

Another thing I did was replace the analog clock with a rev counter - much more useful. That was an interesting afternoon.

photo-8.jpg

it's relatively simple to do if you know how to do it, but for me it was a bit of an adventure. I started with my clocks. Having removed them from the dashboard I took them apart piece by piece so what I was left with was a separate load of VDO dials and gauges, plus the plastic circuit board.

I then butchered a set of mk1 golf GTI clocks, and stole the rev counter. Once I had swapped it into my clock set (and relocated some things like the fuel gauge and digital clock), put the whole thing back together AND IT WORKED!. Result.

I've also got a Coupe S clock surround in there.

The steering wheel came with the car, but it's by far my favourite VW wheel of all time - I've had one before in an old Mk1 and never realised at the time how rare they were so dead pleased with this.

Interior shot (done nothing much other than scrub at it very hard, removing 21 years of filth):

photo-5.jpg

...and finally a couple of random outside shots:

photo-2.jpg

photo-1.jpg

that's about it for now.

Still on the list for this summer are:

  • - fit reconditioned rear drums with new cylinders (all recon'd just need fitting)
  • - Fit powder coated Polo 3 GT rear beam (as it has the all important anti roll bar built in)
  • - Fit a chrome wing mirror to the drivers side - working on fabricating the wing mirror mount at the moment. If anyone has a spare old wing mirror they don't want, Let me know.

Comments appreciated :)

Edited by louisv6

  • Replies 41
  • Views 8.1k
  • Created
  • Last Reply

Top Posters In This Topic

Posted Images

Looks awesome mate ! :-D

loving this. bett shes thirsty though

Twin 40's :drool::drool::drool:

This is dead smart!

Love it

Oh god, that's sweet

Looks really great! Did you mask or replace the sticker on the fan shroud? I love it when people pay attention to little details like that!

  • Author

Thanks for the comments :)

I don't tend to go to many shows any more so nice to hear good comments. The grass is always greener though - I'm pretty jealous of some of the cars in the build threads!

erixtar1992 - Yeah, I guess it is thirsty but I'm not using it as a daily (with the twin 40s, it doesn't like idling much anyway) so doesn't matter too much to me. I can get away with filling it up once a month or so depending on how much I use it. As for MPG, who knows (but sort of who cares as well).

MattLoaf - The radiator cover is powder coated, so what you can see there is a sticker. Managed to find it on ebay here - he has loads of other stickers too: ebay sticker man

Will get some better pics of the engine bay up at some point.

The downside of twin 40s is that the left-most trumpet gets in the way of the master cylinder, so I need to do something about that (for now the trumpet's chopped, but that leads to some interesting noises and idling issues). Looks like either a master cylinder from something else where the tubes point in different directions, or I'm going to have to get a pedal box with the MCs and reservoirs built in - but that's £500 I don't have. Nobody seems to have much experience of webers in a polo these days as everyone's going with bike carbs.

I also want to get the PPP suspension mods on the front too, but that's yet another £500 I don't have... :? really needs it though with the power and the lowness.

105bhp is an awesome figure for just a tuned 1272 on 40's!

Nice work.

  • Author
105bhp is an awesome figure for just a tuned 1272 on 40's!

Nice work.

Engine's not really down to me - the previous owner did the hard work there, but I'm happy to take the compliments :) I just want to get it up to as good a condition as I can and sort out the last few things like the master cylinder problem and generally tidying things up.

Surprising how much time the last 20% takes up ;)

Cheers for the link :thumbsup: How easy is it to get the fan shroud off? Mine could do with a coat of paint.

  • Author
Cheers for the link :thumbsup: How easy is it to get the fan shroud off? Mine could do with a coat of paint.

Piece of cake to get the shroud off. Just unbolts with 4x 10mm bolts from memory.

You probably won't be able to get it off unless you remove the rad completely though, so you'll need some spare coolant - at least I wasn't able to get mine off without taking the rad off.

You probably won't be able to get it off unless you remove the rad completely though, so you'll need some spare coolant - at least I wasn't able to get mine off without taking the rad off.

Oh joy, I'll pick some up from Halfords (if they even have it) when I go tomorrow. (Yeah yeah, Halfords is shitty I know but I have nowhere else local).

  • Author

So finally got the rear beam fitted by a local garage. Has been sitting in my garden for months as I don't have anywhere sensible to do major work like that.

Finally bit the bullet.

  • Polo 3 GT rear beam with anti-roll bar fitted.
  • Reconditioned, drums fitted, painted matt black inc. new cylinders.
  • New handbrake cables fitted
  • New rear beam bushes
  • New copper brake pipes mated to the braided hoses that were already on there.

Beam:

photo3.jpg

photo2.jpg

photo-10.jpg

photo-1-1.jpg

I also finished my wing mirror...

I "Engineered" (sat there with a hacksaw a pot of QuickSteel, and a file for hours on end) a blanking plate for the passenger side mirror by butchering an old wing mirror for the base.

For the driver's side I got a chrome mirror thanks to polohmadness and another old mirror thanks to prankstar2003 and made another 'blank', with a hole in it, and painted both sides up in satin black. While I was there I also painted the plastic base surrounds as they had gone pretty manky over the years.

I'm pretty happy with the end result but it probably won't be to everyone's taste :)

Drivers side:

photo-5-1.jpg

photo-3-1.jpg

photo-2-1.jpg

Passenger side:

photo-4-1.jpg

Aaand some random engine shots:

photo-9.jpg

photo-8-1.jpg

photo-7.jpg

photo-6-1.jpg

Anyone know where that manifold came from? It looks to me very much like the VW motorsport inlet manifold, but on one side it says "Motorsport" (as you can see in the pic), and on the other, it's all in... foreign. Like, greek or something. I can get a better pic if anyone has any ideas.

Also thanks to MaxMax for helping me out with a fuel pump blanking plate to cover where the old mechanical fuel pump was. No more leaks :)

You can see the chrome dipstick tube in one of the pics - was a pig to fit as you have to sort of bend it to the right shape. I'm sure it's easier with the engine out...

Edited by louisv6

  • 2 weeks later...

looking good mate, loving the twin 40's!

where is the header tank mounted? i can see the hoses running off, but can't see the tank? would like to get mine out of site too, it looks gash :lol:

looking good mate, loving the twin 40's!

where is the header tank mounted? i can see the hoses running off, but can't see the tank? would like to get mine out of site too, it looks gash :lol:

Awsome stuff man, its my sort of car 8-)

Lovely :)

  • Author
looking good mate, loving the twin 40's!

where is the header tank mounted? i can see the hoses running off, but can't see the tank? would like to get mine out of site too, it looks gash :lol:

Header tank is gone. I replaced the radiator for a header-tankless model. I think its actually a radiator from a 1984 1.3. Can't remember exactly which one. I had to chop the top mounting brackets down a bit but after that it fitted perfectly. So the filler cap is now on the rad itself instead of on a separate tank.

The other mod that made a big difference was relocating the washer bottle to the boot. I got a rear washer bottle from a bready, installed it in the boot and ran a long length of tube from the front washers all the way back. Only took a couple of hours to do and makes a big difference to the way the engine bay looks.

  • 3 weeks later...
  • Author

Pics of the boot install and washer bottle mounted in the boot.

The washer bottle itself is one from a bread van as the engine bay one won't fit.

photo-12.jpg

photo-2-2.jpg

photo-1-2.jpg

Next up I'm planning to move the battery to the boot so I can hide the fuel pump and regulator in the battery tray. This might take some time as I have zero budget.

Anyone have a positive battery cable from a 3 series knocking about? :-D

  • 3 months later...

About the carbs manifolds, what information you need?

Ooft... lovely mate

Just wonderful.

I know mine wont have half as much work put into it. - envious.

:thumbsup:

vids please really want to here the sound of this

  • 2 weeks later...

yeah would love to see videos

  • 2 months later...
  • Author

Hmm.. Video... can't say I've ever tried the youtube thing, but I suppose I could give it a go.

Anyway - not been up to much lately. Had a baby, which took up most of the last few months.

Met up with Musto today and bought his old wheels off him so Loki finally has a decent set of wheels... :-D

Photo1.jpg

Need to work out some mild arch clearance issues, but it's looking sweet I reckon, and as a billy bonus she now sits 20mm lower, which means even a dormouse in the road will get more than a haircut if I drive over... :oops:

Create an account or sign in to comment

Recently Browsing 0

  • No registered users viewing this page.

Account

Navigation

Search

Search

Configure browser push notifications

Chrome (Android)
  1. Tap the lock icon next to the address bar.
  2. Tap Permissions → Notifications.
  3. Adjust your preference.
Chrome (Desktop)
  1. Click the padlock icon in the address bar.
  2. Select Site settings.
  3. Find Notifications and adjust your preference.