Skip to content

Polo CL-GT-ABD Project

Featured Replies

Hey,

I thought it was about time I got a project thread underway for my new Polo. Some of you probably know my GT got crashed into and written off in February - here's a link to the thread.

Here's a link to the old project thread I had going for the GT before the crash.

The plan was basically to get the ABD engine fitted to the GT and start doing bits and bobs here and then to improve the torque and power as time went on. Obviously I couldn't do that once the crash had happened, but I still wanted to! While I considered getting other cars (Pug 205 1.9 GTi, Mk2 Golf GTi and a Corrado VR6), there was still a lot I wanted to do to the Polo, so I bought this:

PoloK883SBVasbought.jpg

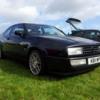
Its a 1992 1043cc Polo CL Coupe. Its done 88k with a full VW service history, all the MOT's and is in original unmodified condition :) Its not 100% mint, but its very tidy, with no major rust and just a few car park dings here and there.

First things first, I had to get rid of the ditchfinder 145/80R13's and get some decent wheels and tyres on. I dug out my GT steelies, got hold of some cheap 175/60R13 A539's and bunged them on. I also got the interior and foglights off the GT, some late-spec rears and pressed steel plates to brighten it up a bit:

Polonewtyres.jpg

The insurance company at this point weren't being very co-operative about the GT. The assessor decided it was a cat 'B', which means it can't be put back on the road and has to be destroyed. They were also being arsey about me salvaging any parts from it, which I wasn't happy with as I'd spent a lot of money on the brakes and running gear.

Anyway, long story short I argued and they've let me keep the car on the proviso I destroy it within one calender month. So today I set about tidying the garage and began the stripdown of the GT.

The plan is to get the GT stripped and gone by next weekend. I have the week following off work, and thats going to be spent swapping everything onto the CL. Handily the MOT run's out on the 17th April, so I can also MOT it at the same time. The list of parts I've got to go on are as follows:

- 1391cc ABD engine with GT head and cam (standard sizes), running GT management and GT gearbox.

- 40/40 H&R Cup Kit (decided on 40/40 because of the amount of country lane driving I do!)

- PPP Stage 3 front subframe/wishbone conversion

- VWII calipers and 239mm vented discs

- Goodridge Braided Hoses

- GT rear beam

- Toad Alarm

- Central Locking Kit

- New front wheel bearings (VAG)

- New top mounts

- New brake pipes and unions

- 22.2mm master cylinder

- New steering arms and TCA's

- Re-wrapped engine loom

I'm also going to fit the full tinted glass set from the GT and also the headlining (which'll be fun!!) to basically convert it into full GT spec. The dash will be coming out to wire the alarm in properly as well as check everything behind there is good before doing the work.

Here's a few pics of the progress today:

The two motors:

2PolosFront.jpg

2Polos.jpg

BackofPollyblack.jpg

The garage as tidy as I can get it (old kitchen lino makes good flooring!):

Insidegarage.jpg

The bench absolutely chocka-block:

bench.jpg

The ABD lump waiting attention:

ABDlump.jpg

And finally where I left off tonight. Hopefully another couple of hours work and the engine/box will be out and I can start on the suspension:

enginebayblackGT.jpg

I'll update this as and when things happen, hopefully a week on friday and it'll all be sorted!!

Edited by Purple Tom

  • 3 weeks later...
  • Replies 52
  • Views 19.4k
  • Created
  • Last Reply

Top Posters In This Topic

Looking good fella. I'm thinking about doing the ABD conversion, you will have to let me know how quick it is when its all done. I might go all out and go for the 1.6 with a lairy cam and P&P head :biggrin: .

Keep us updated mate.

Any progress?

mmm indian metallic red i think, well nice colour as this will be a wee screamer when shes done, good luck and good work so far

Colour is a nice one!

Glad to see I'm not the only person who works in a complete shit tip :lol:

Least you'v got something to work in :lol:

I'm on a cold concrete floor

nice work dude

love the garage, same as mine....but you know where everything is!

  • Author

Lol, thanks for the comments so far!

Kam - I agree it is a bit of a shit-tip, although I do try to keep it tidy but its not easy!

Anyway, the car is on the road, but because I took loads of pictures I may as well bring the story up to date - loads of pics everyone so beware! :D

So, I carried on stripping down the GT:

IMG_1937.jpg

Everyone knows what a bare shelled Mk3 looks like! Then Matt (pettsy) came round and between us we yoinked it onto his trailer and took it to scrappers, bye bye GT!:

IMG_1943.jpg

IMG_1944.jpg

IMG_1942.jpg

While it was on the trailer it seemed the perfect opportunity for Pettsy to get the grinder out and 'liberate' my shell of its sound battery tray to replace his GT's rusty mess, sorted :)

Got it to the scrappers - took a cool pic :D

IMG_1946.jpg

  • Author

Then it was on to the job in hand. Spent a good few hours with a drill and wire brush cleaning and painting all of the suspension components, as well as a few other bits, ready to go on the new shell (the purpley stuff is Kurust):

IMG_1948.jpg

IMG_1949.jpg

IMG_1957.jpg

Then I had a chance to look at the subframe, mmmm:

IMG_1924.jpg

So then I put the CL in the garage and set about stripping it to a pretty much bare shell:

IMG_1967.jpg

IMG_1969.jpg

Then got the engine bay from this:

IMG_1973.jpg

To this:

IMG_1983.jpg

Then some more bits arrived:

IMG_1977.jpg

The H&R Cup Kit (60/40) :)

I had a quick trial fit of the subframe and worked out where I needed to modify. The TCA mounts went straight on, all that was needed was a bit of fettling to the holes on the frame where it bolts to the ARB mounts, they were about 2mm out:

IMG_1990.jpg

  • Author

As well as doing all that I'd fully rebuilt the rear end with a stripped and painted rear axle (with new bushes), stripped and painted fuel pump bracket, and obviously the H&R springs and shocks:

IMG_1985.jpg

IMG_1986.jpg

In amongst doing that I'd fitted new brake lines throughout, in 3/16 Copper-Nickel with new unions, and Goodridge braided hoses! As well as rebuilding the ABD lump with new valve stem oil seals, VW gaskets and lapping the valves in:

IMG_1979.jpg

Pretty much anything that was dirty was cleaned and painted (things like the engine mounts etc).

A couple of pictures of the frame:

IMG_1991.jpg

IMG_1989.jpg

IMG_1992.jpg

After that it was time to fit the new genuine clutch (eBay bargain!!) to the ABD lump:

IMG_1994.jpg

And get it back in the car:

IMG_1995.jpg

IMG_1996.jpg

Then followed a bit of playing around with fitting and wiring various things etc!

moreeee!!!! lol

How much was the H&R kit matey? You still near ilkeston i'll give you £2.50 for a ride in this beast. :)

  • Author

Then it was time to get my new exhaust fitted! Its a full stainless system from the cat back. Its 2", with a single custom built silencer and a downturned hidden TDi style tailpipe:

IMG_1997.jpg

IMG_2000.jpg

IMG_2004.jpg

IMG_2005.jpg

IMG_2006.jpg

What do you think??

I then pressed my new VW front wheel bearings into the nice cleaned and painted front struts, and fitted the H&R kit with new VW top mounts:

IMG_2007.jpg

On went the freshly painted carriers and previously re-conned VWII calipers and 239mm vented discs with the braided hoses:

IMG_2014.jpg

Then on went the new R/H steering arm, and recondition L/H steering arm, complete with a large nut welded on to ease tracking adjustments!:

IMG_2015.jpg

Some pics of the engine and frame and the clearance:

IMG_2010.jpg

IMG_2009.jpg

IMG_2011.jpg

IMG_2012.jpg

  • Author

By now things were starting to come together (this was the friday, after starting on the monday afternoon!):

IMG_2016.jpg

IMG_2017.jpg

I fitted the reconditioned engine wiring loom to the car and plugged everything in:

IMG_2018.jpg

Then fitted more stuff:

IMG_2025.jpg

Then tried to start it.....

I first cranked it with the fuel pump relays and hall sender disconnected, with the plugs out, to see if the oil pressure was any good. After about 5 seconds of cranking the oil light stopped flashing! Not bad for an engine that'd been stood for over a year!

I then plugged the fuel pump relays in and primed the pump a few times (obviously had fitted the GT pump!), to check for leaks - there were none. So in went the Hall sender plug and I guessed at a rough timing setting. Turned the key and broooom! Fired straight into life :D

IMG_2031.jpg

I was happy :D It seemed to idle fine without any horrible noises, so I let it warm up for about 20 minutes to get it up to temperature and bed the cam into the new head, after a little while the tappets went quiet and all was good!

amazing stuff :)

  • Author

The next day was spent re-fitting the dashboard and doing various other jobs before taking it out for its first drive and getting a couple of pics:

IMG_2032.jpg

IMG_2033.jpg

What do you think?

It was back on the road last sunday (13th April) and I've still got loads to do, as always!

However, all I can say to people considering doing an ABD conversion is DO IT! I'm amazed by the difference compared to a standard GT. My ABD engine has no internal modifications whatsoever, the spec consists of:

ABD block

GT head

GT cam

GT flywheel

GT management

GT exhaust manifold

K&N replacement element

Running a standard AHD GT gearbox

It revs so freely with no holding back, even on the standard chip. I've timed a very rough 0-60 as being about 9 seconds at the moment. Bear in mind that I haven't given it to Dan (hardhitter) to be mapped properly yet ;)

I'm not sure if my exhaust system is helping it to breathe a bit easier, its very possible, but it sounds brilliant! I hate chavvy sounding exhausts but this makes a nice quite burble at idle but comes to life when you give it some. Cruising at 70mph (which in a GT is 4000rpm!) is quiet, hardly makes any noise at all!

I'll update this as I do more. Next on the agenda is to get the castor and tracking set up properly (I need access to a flat area and the right tools), and then fit the alarm and interior back in, but, so far so good, and not bad for 6 days work I think! :D

Amazing Tom. Definetly going to do the ABD conversion now.

Wow you've been really busy! You should be really impressed with the H&R springs after a couple of 100 miles, great kit. Let me know how it works with the subframe, yet to put mine on and would like to hear some feed back. Good colour to boot.

  • Author

I have to admit when I first drove it I was a bit shocked, it didn't seem like there was any suspension at all! But I've done about 150 miles and things are improving a lot. The ride is great.

As for the frame, I'm not going to make any comments until I've got it set-up properly. I've not got much castor dialled in yet so the steering feels pretty light, and its so hard to judge the tracking by eye but from the feel of it there's too much toe-in as there's pretty much no natural willingness by the car to turn into a corner!

I'm going to have another tweak over the weekend, try to get a bit more castor on there and dial in a bit more toe-out and see how it feels then, and I'll be in a position to comment further....

Looking good dude!!!

That zaust is class, i want mine hidden but cba to get an entire new system, might just cut the tail pipe off :lol:

loads of progress mate, looking good, it'll be good when you get the suspension geometry sorted out and engine mapped, top work

great job might sound daft but how did you take the front off.

great build. I was thinking of doing a ABD conversion awhile ago, this has made me wanna do it.

Car looks great. Spot on.

Good work

mint!

great work

8-)

That's brill. Love it.

Create an account or sign in to comment

Recently Browsing 0

  • No registered users viewing this page.

Important Information

We have placed cookies on your device to help make this website better. You can adjust your cookie settings, otherwise we'll assume you're okay to continue. Terms of Use Privacy Policy Guidelines

Account

Navigation

Search

Search

Configure browser push notifications

Chrome (Android)
  1. Tap the lock icon next to the address bar.
  2. Tap Permissions → Notifications.
  3. Adjust your preference.
Chrome (Desktop)
  1. Click the padlock icon in the address bar.
  2. Select Site settings.
  3. Find Notifications and adjust your preference.