Skip to content

My MK3 Gt to G40 conversion to MK2 SALOON loveliness!

Featured Replies

Hey all,

Been meaning to post up my pics of the progress for ages, since I got the car and started the build.

Full spec list coming soon!!

Well, the story started when I drove up to Hull from London with my mate to check her out. Saw her and it was love at first sight. Bought her for not much so however long I got out of the engine I was happy with, which it ran well until the day I took the puppy out. Since I drove up there my mate actually drove the little Polo home for me. We drove near 250miles with only 1 petrol brake for 10mins and she didnt miss a beat :D. Went on to drive her daily for about 6months. Drove her everywhere!!

So, here is a pic of when I bought her and one of when I did some little mods, nothing spectacular just to add some character. Dropped 70/60 with some alloys I got from my mate for 50quid.

post-20118-1243452147.jpg

post-20118-1243452157.jpg

Edited by goosyganger

  • Replies 103
  • Views 14.6k
  • Created
  • Last Reply

Top Posters In This Topic

Posted Images

  • Author

Next I decided to change the seats, so got some Cobra buckets bolted to the floor :D and gutted out the back and gave it a little tidy up. Lost all the door cards front and rear, with the spare wheel on show. No pics of the door cards yet as I'm waiting to fill with Ally sheets but cant afford it yet. Will get the pics up once they are rivited in

post-20118-1243452242.jpg

Edited by goosyganger

are they artec wheels? i have some of those, thought thed be to big for the polo. plus i egged one but hitting a kerb at about 20mph! lol

plus i think u should have put tht seat in the drivers side! lol

Edited by captin_urbis

Looking good so far matey.

We need pics of the PY lump ;) plus black mk3s are the best.

  • Author

Probably logical to start with showing the ripping out process! So out with the old little GT, sold it on to someone on here who hopefully will look after it and it will serve well.

The first pic is the gt before she went into the garage behind her and then with its knacked front end :( went in the Garage in December.

post-20118-1243452767.jpg

post-20118-1243452788.jpg

post-20118-1243453459.jpg

Edited by goosyganger

  • Author

Yes they are Artec wheel I didnt think anyone in the world had some lol. They are cool for 50quid. Want some Ronal Turbos really badly :(. Yeah we were just placing that seat up to see what it looked like it went on the drivers side lol.

Thanks Jon, I'm just watching the footty and adding pics so stay logged on to this chanel because the PY build pics are on there way :D

i got mine for £40 with really good tred =] lol

and looking good need to see some engine work! lol

  • Author

Now for the good stuff! Here are the pics of how the rebuild began on my PY Puppy! As you see the engine is how I bought it pretty much. No rocker cover, no alternator or starter, no exhaust mani, no auxilery pulley on the crank, no belts, virtually no sensors, no boost pipes, no charger. Pretty much bugger all lol, but not bad for 400quid.

Had to chop down some m10 rods to use as the fittings to get the engine on the stand thats what the sparks are, not cutting the head off the block haha. Engine was a bit of a state when I got it.

post-20118-1243453273.jpg

post-20118-1243453382.jpg

Edited by goosyganger

I'm just re-jiggling your pics about so they're easier to view.

Think you missed some pics off above???

  • Author

ow your a legand Jon!! Thanks for doing that I have no Idea how to work the formatting on this site so the help is much appreciated :D.

Yeah I posted without pics sorry but they are there now :D

£400? Ouch!

  • Author

The next step was to get the head off and initially just change the gasket, maybe the piston rings, but just like everyone I got carried away and a full dismanttling took place, initially with the head coming apart and getting it taken to my machinist that is like 100years old lol.

Here are the pics of the state of the pistons as you would expect them, yuk! ( later you will see what was the fate of those pistons!). The cam also came out.

post-20118-1243453855.jpg

post-20118-1243454310.jpg

post-20118-1243455604.jpg

post-20118-1243457813.jpg

Edited by goosyganger

  • Author

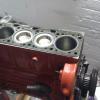
After I took apart the head and took it down to the old boy, I took care of the block. Stripped it knacked and gave the pistons a little seeing to :D

post-20118-1243458196.jpg

post-20118-1243458301.jpg

post-20118-1243458455.jpg

  • Author

Had my machinist man to get me the build kits, got a tasty discount on them so got them prett cheap. :D. However, I had no idea what some of the o-rings were for lol.

post-20118-1243528051.jpg

Edited by goosyganger

  • Author

When I had the head work completed, the valves were angle cut and cleaned up so thought I'd throw in some before and after pics. Ow and a new set of valve stem seals were fitted. The set I got with the gasket kit were the late spec ones so they were 2mm smaller...grrrr, without knowing this there was me trying to force it on and smashing it with a hammer. So I checked with VW if it was a different size and they said 'yes'. So, I luckely sourced 8 10mm ( if i remember correctly) seals locally and picked them up from the dealers and fitted them.

post-20118-1243528424.jpg

post-20118-1243528437.jpg

post-20118-1243528446.jpg

Edited by goosyganger

  • Author

Next was the rebuilding of the head. I love the way it looks at the end, so fresh it almost feels like a crime to run the engine haha. Sorry quite a few pics, tried to get as much detail is as possible.

post-20118-1243529052.jpg

post-20118-1243529064.jpg

post-20118-1243529076.jpg

post-20118-1243529083.jpg

post-20118-1243529107.jpg

post-20118-1243529250.jpg

Edited by goosyganger

  • Author

After the valves went in the camshaft finally went in and gave the head a lick of paint. Next is the assembly of the block! :D

post-20118-1243529592.jpg

  • Author

While I was building the head, I gave the rocker cover a little lick of paint and my mate who is a polishing freak give it a once over. Probably the nicest looking thing in the engine bay haha.

The polished pic isn't the finished product, its the first polish after the painting, I gave it another coat of paint and it had another polish before it went back on the head. Keep looking to see how it turned out

post-20118-1243530145.jpg

post-20118-1243530154.jpg

post-20118-1243530163.jpg

  • Author

Gave the block a few coats of paint. Not great quality, wasn't too bothered about the quality of the block, its not for shows and noone really sees every corner of the block. I gave it another coat after the pic was taken.

post-20118-1243530582.jpg

post-20118-1243530589.jpg

  • Author

I treated the block to a skim, a deblaze, and a full crankshaft/conrod balance. I reassembled the pistons with new rings, and replaced all the bearings in the block with tasty looking rebuild lube. All the obvious was also replaced like gaskets and oil seals.

post-20118-1243531097.jpg

post-20118-1243531375.jpg

post-20118-1243531384.jpg

post-20118-1243531412.jpg

post-20118-1243531500.jpg

post-20118-1243531587.jpg

  • Author

So, here she is as she stands today. Its all assembled minus the exhaust manifold, I'll put that on when its in the car. Unfortunatly, Uni is dominant at the moment with my exams I haven't had the time to put the engine in. Plus I'm waiting on a few bits in order to get it in, so its just resting in my garage :(. But last exam is on tuesday after that I'll be on it everyday until she is finished :D.

post-20118-1243532036.jpg

post-20118-1243532045.jpg

post-20118-1243532512.jpg

Edited by goosyganger

nice work, what did you clean the pistons with??? they look brand new!!!

not too keen on the red though! lol but u went though that a hell of a lot quicker than i am with my 1.6! slow down! lol

  • Author
nice work, what did you clean the pistons with??? they look brand new!!!

not too keen on the red though! lol but u went though that a hell of a lot quicker than i am with my 1.6! slow down! lol

AHH, how did I clean them you ask! Soaked them in deisel for a few days. While I'm cleaning them one by one I left the others soaking in a bucket. There I was scrubbing away with brushes, and washing up pads. My thumbs were aching like a mother! But wasnt getting much done. Along came a decorater and gave me a tip...'trying using a scouring pad, or wire wool'. So, there I was the next day down to B&Q and picked up a load of wire wool (scouring pads) and gave them a good seeing too! came off in no time and my fingers didnt hurt as much lol. You might laugh at the thumbs hurting but it isnt as easy as it looks. Took a few days to get them looking really nice but got it all off in the end and like you say they look brand new! Just how I like them. Wont stay like that for long lol.

I was more keen of the red when I started but now I'm sort of thinking maybe should have done the lot in stealth matt black, but maybe that would look worse. AHH never mind, the next rebuild can always change it. Haha, when I start something I get well into it and want to get it done. But I've had the time really so kind of hasnt been a rush just getting it done gradually but quite quickly. I just want her running again :D. How long you been at your project? I haven't had a proper read yet there is lots there but am planning to give it a proper look to see what your doing.

Edited by goosyganger

Looking mad :-)

how easy is it to fit new piston rings? think one of mine are fucked, while i have engine in peices i may as well do em lol.

so, deisel soaked + scouring pads = new looking pistons....will give it a go!

Create an account or sign in to comment

Recently Browsing 0

  • No registered users viewing this page.

Account

Navigation

Search

Search

Configure browser push notifications

Chrome (Android)
  1. Tap the lock icon next to the address bar.
  2. Tap Permissions → Notifications.
  3. Adjust your preference.
Chrome (Desktop)
  1. Click the padlock icon in the address bar.
  2. Select Site settings.
  3. Find Notifications and adjust your preference.