Skip to content

Mk2 Golf GTi 16v project, lots of pics

Featured Replies

Well i bought a golf around 3 months ago and garaged it with the intentions to start work on it as soon as i got it.

How ever i lost the bug and only just this weekend i began work on it so here it goes

Spec

160k miles :D

16v GTi H reg

Runs sweet as a nut just some body work irssues :)

First few pics are bad quality due to camera phone later pics are by my camera :)

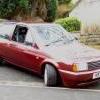
Heres what it looked like the day i picked it up :)

Including a sly shot of my polo :)

ja9l4y.jpg

r0bmtu.jpg

b4g3eu.jpg

Then work began stripping it down of all trim and other bits ready to be rubbed down for respray :) but found a few nasty bits !

2vsg8b9.jpg

10n9sm9.jpg

And after some more scrapping and rooting about on the car i found this on the chasis of the inner wing :(

I allready knew there was some snotty welding but didnt know what it was covering but i took the risk with the car anyway sorry for the bad pic ofthe welding but you get a idea of birdshit :)

2j2esg6.jpg

Here is the rot that its covering on the underside :(

x2up1e.jpg

23vl15h.jpg

So i had to make a decision keep going with this or scrap it for a better shell, i decided hit this head on and sourced a new inner wing for it and chopped it to how i would see fit to fitting onto the car

2qtz7s0.jpg

2gvq1as.jpg

And so began chopping up the car with my home made Jig and a air hacksaw :) scary times :)

Just a rough cut to begin with to take away all the large bit to make it less awrkwurd :)

somk4w.jpg

20tp9gz.jpg

ehjdxy.jpg

Somme drilling of spot welds and cutting through top plates :)

10dgjdd.jpg

The super tidy workzone ! haha ;)

2gsjsrm.jpg

Dayuuuuum underseal got to hate the VW stuff :(

Note the spade in alot of pictures :) This old dog stops me grinding / cutting or burning any unwanted wires

it does the job better than any sheild ! :D

y2blg.jpg

The fine cut with the jig !

2ic5w8l.jpg

The test fit :) Very happy with how it sat first time, wasnt far off at all

2uibwub.jpg

A small gap just required some trimming here and there :)

So back out came the air hack saw after this pic !

an07lj.jpg

So after a little more trimming this is how i left it today

Very happy to say the least after 1 weekend of work, i plan to have this done before christmas now :)

10sbypu.jpg

akubmh.jpg

And this is it with it all clamped up i thought i would sit the wing on and see if everything was aline and playing game,

All bolt holes are lining up perfectly and everything is sitting straight

347tv2x.jpg

And here is the gap between the door and the wing, sorry for the bad picture camera run out of spunk again.

206lb2r.jpg

Note the gap in the top of the strut mount i sorted that after the pics just before i tried the wing on, had abit of sagging and just needed propping up :) sits pretty much bang on now :)

So thats what i have managed this weekend, planning to get it welded up sometime next week when i have got time.

Just got my fingers crossed i can get her all ready before christmas and get her sprayed up :)

And to finish off the day just a quick pic of the polo looking all moody as I'm working on the golf :)

igjng0.jpg

Thankyou for looking any comments welcome good or bad :)

peace out, alex x

  • Replies 11
  • Views 3k
  • Created
  • Last Reply

Top Posters In This Topic

love the work mate, just curious a to why your polo has the black bumpers on again? loved it how it used to be!!

  • Author

Thanks jay :)

i still have the smooth bumpers just dont use them for daily use anymore as they take abit of a beating :(

some one dinged my rear end not so long ago and ruined my rear bumper cant justify that happening again was a real heart breaker :(

  • Author

Oh i never said

The plans for the golf are :

Repair inner wing

Sort all dings and dents

Full respray same colour with black roof

Coilovers

and some deep dish 16s not sure what yet :)

engine rebuild

zorst

and thats it :)

nice repair....are you sure the rest of the shell is good?

back arches , petrol filler , sills etc?

mk2's love rust, good effort on just cracking on with it rather than just doing a reshell.

Giz a shout when you get your new wheels if you're selling those BBSs ;) Feeling the progress btw!

  • Author

checked her over with a fine tooth comb all trim is off, sills are fine rear arches are fine rest of the car is mint. odd littly bubble but nothing difficult to sort :)

The welds on the car look really old could of been 5-10 even 15 years ago, i think it may of been in a front ender and somone has never put the underseal back on properly hence the rot under the welding and seal.

Hopefully get on with some of the welding tonight ill try get some pictures :)

thanks alex x

Edited by boomzor

nice work, i am impressed with this mate, good job =] look forward to seeing more of this

  • Author

Well abit of a update today guys :)

the pics are really bad today sorry again guys :( camera has no spunk what so ever !

pulled the old dog welder out its about 5 years old and i havnt touched it for the last 3 so was worried it wouldnt fire up :D

but she did and she rawred ! :D so here goes :)

Just a little pic of cleaning up the new inner wing some more ready to be tacked into position, I'm a very prep person the more prepping the better the outcome generally !

sq60d1.jpg

Just a shot of me filling in the spot welds that were drilled out. welded and flatted reay for new piece to go ontop

axh2xk.jpg

Had to take a picture of the old dog itself thought i had to take a picture of it :D

made by mac tools so it is the daddy ! :D

2rr3ts4.jpg

Putting a sleeve into the old chasis for the new inner wing to sit on and to make welding alot nicer

nqw6qv.jpg

Didnt get many pictures after this got abit more stuck into it, just got pics now of it all tacked up and testing out were stuff bolts on

testing cross member and front panel to see if its playing game and it just about it :)

izcok7.jpg

A shot of the wing tried on and showing how it lines up with front of bonnet, this is with it bolted into inner wing and front panel

18kljo.jpg

The gap inbetween the bonnet and the wing and just showing how it generally sits, (ie pretty good ! ) wink wink !

4hb9cg.jpg

inside shot again just for refrence :) all that need doing is it all welding up !

34sfi20.jpg

And last but by no means the least ;) the gap between the door and the wing after some riggling and moving about

the wing is aftermarket looking at it, so it will never be 100% anyway :(

118m346.jpg

So moving pretty fast now hope those looking here still enjoying it, trying to keep the progress and you all interested as much as possible :D

Whats left to do on inner wing ! :

double check that everything is aline.

weld, weld wellllllllllllllllllllllllllllllld !

voi la inner wing should be good to rock and roll :)

thanks once again alex x

Respect for getting what looked like a nightmare sorted, must have been some impact from before.

I have patches on mine (8v big bumper) to weld but they are neglect type rusty areas that are not structural like round the petrol flap and a particulary bad bit in the scuttle tray where the windscreen drain was blocked which involves removing a wing.

I'd be paranoid about the geometry on that front leg and the overall integrity but it looks like you've got the skills and the gear. Good to have that battery tray area nice and healthy to. The car looks pretty healthy otherwise.

Was quite inspired by this thread on edition, reminds me of yours..

http://www.edition38.com/forums/index.php?showtopic=261332

I always enjoy/appreciate threads like this helps me keep the faith with mine, just can't get near it because of Uni.

  • Author

Had some more progress tonight guys :)

didnt take any picture though, got one side of the wing all welded up just need to grind the over side out and weld up :)

will have pictures tomorow please dont lose interest its only my 3rd day :D

Create an account or sign in to comment

Recently Browsing 0

  • No registered users viewing this page.

Account

Navigation

Search

Search

Configure browser push notifications

Chrome (Android)
  1. Tap the lock icon next to the address bar.
  2. Tap Permissions → Notifications.
  3. Adjust your preference.
Chrome (Desktop)
  1. Click the padlock icon in the address bar.
  2. Select Site settings.
  3. Find Notifications and adjust your preference.