Skip to content

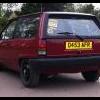
87' Breadvan Project Retro - Going Japanesy

Featured Replies

Model: C

Engine: 1043cc

Suspension: 80/60 PhilJ Springs and Shocks

Brakes: Non Existant

Wheels and Tyres: Standard Steelies

Exterior Styling: Big Lip Splitter, Gt Grill, Custom Filler Cap, De Bumpered Front, Retro Sticker Collection, Tsurikawa (Japanese Subway Ring Handle)

Interior Styling: Custom Gearnob

ICE and Security: A 1980's Boombox :D

Comments: I got my Breadvan last year just before winter so it didn't have very much attention and was sitting on the drive for some time but as soon as the weather picked up i got to work. As soon as i learn to drive this is going to be my daily and i cant wait!!

I began reviving the many rust patches she had, mainly on the doors and random patches, i haven't tried to do the rear arches yet as they are so bad they will need a welder which i dont have :( i'll continue to update this thread as i go along with the project hope you like what i've done.

When I First Got her, The Rubber Duck was the first mod. Excuse the quicksilver in the background use to be my brothers car before he wrote it off :/ now he's got a Lupo!!

Whenifirstgother.jpg

In the winter months next to the lupo :)

Snow2.jpg

The Horror ahhh

ArchesOfDoom.jpg

PassengerDoorHole.jpg

Fixed that hole with some aluminuim mesh and filler

Filleredhole.jpg

The Splitter

Bought a mk1 golf splitter off ebay :D

TwoParts.jpg

trial fitting

Measuring2.jpg

i didn't like the fact they come in two parts and you can see the line down the middle so i fibre glassed them together

SandedDown.jpg

FinishedSanding.jpg

Wet and Dry'n

WetAndDry2.jpg

Primered

Primered1.jpg

Painted Satin Black- did it use to be in 2 pieces? love itt

Painted2.jpg

Went to Dubfreeze 2010 and got some awsome retro stickers

RetroWindow.jpg

Fuel Tank

My fuel tank was leaking so it was time for a new one

up on the ramps

01052010091.jpg

all that mud fell out of there could of made a vegtable patch or somthing with it

01052010092.jpg

old and new

01052010093.jpg

The Custom Gearnob

Theme for my car is retro so whats more retro than a Rubiks cube :D

First i had to mark out the sqaures on the top face and to cut them straight my step dad made a jig

JigCutting.jpg

TopFace.jpg

Then once i'd done all the sides i threaded a hole in the bottom and test fitted it on my gear stick

OnStick.jpg

I then rounded all the edges off, sanded it and primered it

Primered.jpg

Then sprayed it black

Blacked.jpg

Now for stickers :D

03052010095.jpg

Comparison

03052010097.jpg

finally fitted i love the way it came out

20052010125.jpg

Custom Filler Cap

The Design

08052010110.jpg

Primered

06052010099.jpg

Black soo shiny

13052010113.jpg

Stickered

14052010115.jpg

On Car

20052010127.jpg

The Grill

My mate brang round his tape he used to do his bumpers on his mk3 coupe and we done my grill

Before

31052010134.jpg

After

31052010137.jpg

31052010138.jpg

My Car as it is now, the splitter and grill are not on because i need to fix some damage on the front

20052010128.jpg

Tell me what you think , more to come soon :)

Jordan

Edited by BreadVan-Man

  • Replies 69
  • Views 24.2k
  • Created
  • Last Reply

Top Posters In This Topic

looks good mate i love the gear nob.

looks awesome, got any plans for it?

Jesusss, you've done some real cool work there, i assume you're putting the front bumper back on once you've fitted the splitter?

Loving all the work so far!

Alex

Wow! Mk2s are my fave and I love the rubiks design... Retro all over! Will be interesting to see the splitter once on.

  • Author

Thanks for the great comments guys, I'm going to start work on the front tommorow cause i really want to put the splitter on, I'm not sure if i want to put the bumper back on i'd rather try and find some mk1 golf or polo ones been trying to get some wheels atm, looking for ronal turbo's or ats classics, i've got a plan in mind for the ats's :)

Jordan

Edited by BreadVan-Man

i love this thread

seriously this one is chocked full of 80s style win!!!!!

  • Author

Update Time :D

hey peeps thanks for the comments not really a big update but a few random things i've got up to, enjoy!

Rubiks Cube sticker on splitter

06062010157.jpg

Rang up like 20 scrapyards to see if they have my car, eventually one said they did, 2hrs away, so went there and it was a mk3 what a joke, lukily the sun visors are the same and he had some mk2 headlights on a shelf so snatched them up

Put visors on and changed my cracked headlight

11062010164.jpg

The Breadvans been having idling problems and keeps cutting out, turns out it was to do with the air/fuel mixture so adjusted that and now she's running like a dream :D

11062010170.jpg

Started working on the damage on the front, partly my fault and some was there before :/

11062010158.jpg

11062010159.jpg

This kind of worked

11062010160.jpg

looking better now wet and dried it

11062010169.jpg

and fillered still needs sanding though then will be ready for paint have no idea how it will turn out as I have to get halfords to mix my paint which is ment to be metalic when my car is faded :/

13062010196.jpg

Bought an old skool thule roof rack, ebay bargain of £10 bit tatty but i've dismantled it and going to restore it

In the middle

13062010200.jpg

Or on the back

13062010203.jpg

I like it on the middle better, what does everyone else think?

Thats all for now guys, oh yeh I have bought some wheels :D Never seen another set, I'm so glad I'm the new owner they're great

Wheel.jpg

i've been getting water next to the throttle pedal so checked the battery tray and found this

Batterytray2.jpg

Cheers

Jordan

Edited by BreadVan-Man

Love it! looks well good, i prefer the roof rack in the middle also matey. :)

Tom

  • 3 weeks later...
  • Author

The week the Breadvan got its face back :)

I fitted my new wheels on the back to see if they fitted in the arches, i need spacers for the front as they dont get over the calipers :/

30062010228.jpg

30062010229.jpg

I need some camber shims :D

compared with other side

30062010230.jpg

Prepared the bready for primer

29062010217.jpg

my legend of a next door neighbor let me use his garage

29062010221.jpg

29062010224.jpg

wet and dryed ready for Titian Red

01072010235.jpg

first coat

01072010236.jpg

Painted, i love the halfords mixed cans they're so good even though expensive :/

01072010237.jpg

Clear coat

01072010241.jpg

i cant believe how close it is to the original colour, considering mine is majorly faded love it!

03072010250.jpg

got the grill back on

03072010252.jpg

03072010254.jpg

Next time ..... wheels, roof rack, splitter and more i hope :)

cheers

Jordan

Edited by BreadVan-Man

  • 5 weeks later...
  • Author

Quite big update been up to alot recently hope everyone likes it : )

Small things first

Restored these banana trims my mate got me for my birthday, legend

1.jpg

2.jpg

The centercaps were looking tired so i gave them a spray with bumper restorer and painted them

Before

3.jpg

After

4.jpg

Painted

5.jpg

Indicators

Now I'm learning to drive i needed to get the car legal, so indicators were needed, but i didn't want the bumpers back on so it was time for some heavy modding : )

Fit check

6.jpg

Holes drilled eeek i cringed when doing this on the new paint

7.jpg

Both fitted, used silicon sealant round edges to stop water getting it, bit messy but does the job

8.jpg

Lit up, I'm happy to say IT PASSED ITS MOT

9.jpg

Thought it was time to get that splitter on, ended up taking 5 mins don't know what i was worrying about :/

10.jpg

11.jpg

Roof Rack Restoration!

Remember my tatty old £10 roof rack? i decided to revive it

Box of tatty bits

12.jpg

Sanded ready for paint, love having an empty shed

13.jpg

I wanted the bars to be bare metal so took off the plastic coating

14.jpg

Bit of elbow grease and tons of 1200 grit

15.jpg

Original and shiny

16.jpg

Varnishing the wooden slates

17.jpg

Everything ready for assembly

18.jpg

The legs done

19.jpg

Screwing the brackets on the wood

21.jpg

Coming together

22.jpg

23.jpg

Finished

24.jpg

On the breadvan

25.jpg

26.jpg

Photoshopped a polo selecta of my car a few weeks ago

27.jpg

Went to The Polo Show 2010 was really good wish i went on the sunday though :/ brothers lupo next to the breadvan

28.jpg

Few additions to "The Window"

29.jpg

Quick pic

30.jpg

To end on a nice note : )

31.jpg

Cheers Jordan

whats the plan for that rear arch ? looks a bit fragile

  • Author
whats the plan for that rear arch ? looks a bit fragile

When i have the money, gunan get a garage to weld and shape it then i'll just finish it off, bit of a mess really worst part of the car :/

just read all that! awesome mate!! really like the gear knob! always liked bumperless mk1+2 golf and polos!!

This is lookin awsome from start to finish loving the gear knob and restored roof rack and the huge splitter good effort mate keep up the good work :)

Luv the roof rack. Really want it on mine :D

  • 3 weeks later...

Wheels and rack are top class retro goodies - but nothing can beat that 'Scrappage scheme survivor' sticker - i want one!

  • Author
Wheels and rack are top class retro goodies - but nothing can beat that 'Scrappage scheme survivor' sticker - i want one!

Cheers mate, I got the sticker from this guy on Retro Rides forum, nice bloke and tells you the best way to apply the sticker etc

http://retrorides.proboards.com/index.cgi?...mp;thread=84275

Jordan

  • 1 month later...

Jamie wants updates!

  • 1 month later...
  • Author

Updates soon as i get my phone working to take pictures Updates include: 80's boombox, satin black steelies (now with added kerbing from having too much fun in snow, woops), more stickers! :L

still to do when winter decides to jog on!: Lowered 60mm?, the old school wheels on, left over primer painted and rust treated.

Jordan

I have that roof rack! What size are your slats mate?

Everything about this is awesome!

Rubiks stuff is ace

Those wheels are amazing

Not a fan of the window stickers though. But the potential here is high, you have a wild imagination :lol:

quality thread, sweet little bready mate!

really like this bready and that gear nob is amazing. The splitter looks evil to. lots of potential and love what you have done with it :)

  • 4 months later...
  • Author

Time for a long needed update!!

First up GOODIES!!!

Bought a set of ratty tear drops to refurb, couldn't really turn it down for £30 :)

DSCF1773.jpg

Old school centrecaps :)

DSCF1771.jpg

The 20mm spacers so I can fit them ancient alloys on :D

DSCF1769.jpg

And the most exciting, Philj 80/60 Lowering kit, finished fitting it last night the front was an absolute B**ch, but finally got it finished in the end with no end of problems, soo worth it though i will put up some pictures later or tommorow after i've washed it :) Thanks PhilJ !!!

DSCF1768.jpg

Oh yeh thought this was proper random, in the bottom of the package that the suspension came in was this..............

DSCF1772.jpg

Yes german haribo's.....wtf

Thought everyone would like to see my in car entertainment system, very modern, top of the range, probaly as old as the car, plays well though..when it wants to :L

DSCF1770.jpg

Jordan

Edited by BreadVan-Man

Guest
This topic is now closed to further replies.

Recently Browsing 0

  • No registered users viewing this page.

Account

Navigation

Search

Search

Configure browser push notifications

Chrome (Android)
  1. Tap the lock icon next to the address bar.
  2. Tap Permissions → Notifications.
  3. Adjust your preference.
Chrome (Desktop)
  1. Click the padlock icon in the address bar.
  2. Select Site settings.
  3. Find Notifications and adjust your preference.