Skip to content

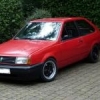
Skolo Coupe

Featured Replies

  • Author
Looks great. You need to stop masking so close to where you're spraying you'll end up with a patchwork car. Best thing to do is mask another 3-4" further out that you are doing, stick the tape down but then peel the inside edge up all the way round. This will help feather the paint in.

Matt

Cheers matt, must try it

  • Replies 167
  • Views 27.3k
  • Created
  • Last Reply

Top Posters In This Topic

Most Popular Posts

  • mini_mayhem
    mini_mayhem

    Well it has been years since an update so: In 2013 I fitted a replacement AFH to cure the burning oil issue, so engine in and tined up, out for a test drive and the diff broke in the box, Change bo

  • mini_mayhem
    mini_mayhem

    Not big update, but the car runs! Over the winter I've got a rebuilt AFH in. I had forgotten how much fun this engine is.   Also managed to get my speedline alloys powder coated, t

  • Author

Well had a productive weekend at the polo. I blame Bazs GT for influencing my polo to misbehave ;)

Starting with the alternator belt deciding it didnt like its job always having to answer to the timing belt so he quit while i was in the city, found a replacement who was glad of the work and no squeeels out of him yet.

Last night I got my new bike mirrors fitted. Easy enough job about 2hours all in.

This is where the door frame broke when the passenger mirror got kicked off news yers eve :angry:

IMG_0384.jpg

How it should look

IMG_0381.jpg

The base plates with the old mirror arms cut back

IMG_0383.jpg

The size diffence. The bike ones are also about half the weight. win

IMG_0382.jpg

Fitted

IMG_0386.jpg

IMG_0385.jpg

Flame suit on

I also cut 50mm from the back legs of the passenger seat as it sat too high for my liking. easy done and welding back up very well.

ill wash the car and get pics up soon

looks like a lot of effort is being put into this! nice to see, as the mk3 seems to have become a rare sight round my way. I'm gonna give you a few tips on spraying...

1. when doing a panel like the door for example, dont mask it. just mask the windows, wing and rear quarter panel.

2. now take a fine scotchpad and take the shine off the paint (allow about 6 inches around the area you have repaired)

3. fan the paint out when spraying it on (you dont need to get paint all the way across the bit where you have taken the shine off, this is the area you blend the paint into the old.)

4. when you cut the fresh paint back using cutting compound, it will bring the shine back into the paint and hopefully blend the paint in nicely

5. I like to use an airbrush rather than aerosols for these types of repair, as it has a lot more control and tbh doesnt cost a lot more. if anything it has saved me money, as I use a tyre pumped up to 60psi to supply air, and the airbrush itself cost £15. I buy my paint from a local automotive paint supplier (for my polo which is also tornado red i use celly based paint which requires no laquer)

I recently did the boot and rear c pillars on mine using the above method (though my paintwork was purely due to the paint being thin (the primer had started to show through on the edges) so i didnt have any rust to deal with)

http://z8.invisionfree.com/POLO3/index.php...=241&st=264

Also there is a good guide by practical classics

http://www.gramheavy.org.uk/junk/images/pr...ticle_page1.jpg

http://www.gramheavy.org.uk/junk/images/pr...ticle_page2.jpg

http://www.gramheavy.org.uk/junk/images/pr...ticle_page3.jpg

http://www.gramheavy.org.uk/junk/images/pr...ticle_page4.jpg

  • Author

thanks for that jon

i'll have to invest in an air brush

  • Author

Well seeing as we had a spot of good weather yesterday and the forrestry gate was conviently open :ph34r: I decided it was time for a few photos.

IMG_0407.jpg

IMG_0399.jpg

IMG_0400.jpg

For when one may surcome to boredom on a long expedition to such activites as Dubshed :p :o

IMG_0401.jpg

IMG_0402.jpg

IMG_0403.jpg

the engine is just getting in to bed with 92,000

IMG_0405.jpg

IMG_0406.jpg

IMG_0408.jpg

my passengers

IMG_0409.jpg

Heavy duty shifter

IMG_0410.jpg

IMG_0411.jpg

IMG_0412.jpg

IMG_0413.jpg

IMG_0414.jpg

The cooling fan for the cd player, on the advice of Adam after blowing up two cd players

IMG_0416.jpg

IMG_0417.jpg

IMG_0418.jpg

IMG_0419.jpg

IMG_0420.jpg

Froza anyone?

IMG_0421.jpg

IMG_0423.jpg

  • Author

IMG_0424.jpg

IMG_0425.jpg

Polos have never ending journeys

IMG_0427.jpg

IMG_0428.jpg

oops

IMG_0429.jpg

IMG_0430.jpg

IMG_0431.jpg

IMG_0432.jpg

  • Author

IMG_0433.jpg

IMG_0435.jpg

IMG_0436.jpg

IMG_0437.jpg

IMG_0438.jpg

IMG_0439.jpg

Dirty bit

IMG_0440.jpg

IMG_0441.jpg

IMG_0442.jpg

IMG_0443-1.jpg

IMG_0444.jpg

IMG_0445.jpg

IMG_0447.jpg

looks awesome, the boot lock idea is really neat. where in cork are you from?

  • Author

near Mallow

  • Author

From

mk3day1.jpg

TO

mk3polo.jpg

  • 2 weeks later...
  • Author

rake coming soon

  • 4 weeks later...
  • Author

spent the day doing my headgasket, going low this weekend

cars coming on well mate, r u bring the the car to dubshed? def needs hit with a lowering stick! lol

  • 2 weeks later...
  • Author

I'm going to Dubshed. Lots of work going on to get it ready

  • 3 weeks later...
  • Author

Well before Dubshed , to get a few jobs done to the car. the biggest being to sort the suspension (get low), the others were small tidy up jobs.

Here's my boxs of parts to start with,

IMG_0496.jpg

How the car was sitting before I started

IMG_0504.jpg

Before I could start this the Coolant had decided to eat away my Headgasket. So a bit of mechanical up keep was in order including a full service

IMG_0502.jpg

So next on the list was to fit the 80mm lowering springs to the front struts.

Out they came

IMG_0505.jpg

  • Author

I then had new wheel bearings fitted to each strut. I stripped them down and gave a lashing of hammerite

IMG_0512.jpg

I also decided I should do my suspension arms, calipers, carriers and discs to match

IMG_0506.jpg

While waiting for that paint to dry. we all know how boring that gets. I decided to make up a plate to protect my down pipes, Which would then be welded on to give some protection.

IMG_0515.jpg

Once the paint was dry I assembled the struts, with the lowering springs and dampers, new castle nuts and resonably fresh top mounts and the old dust caps

IMG_0516.jpg

I then fitted it all back together and had a look. Rake anyone?

IMG_0517.jpg

  • Author

IMG_0518-1.jpg

So then it was time to do the rears, I didnt take any pics of this. its a 20 min job to fit.

As I was sorting the suspension, I thought I might as well change my lower arms and poly bush em.

New genuine arms and bushings

IMG_0519.jpg

Fitted

IMG_0520.jpg

it really tightened up the steering, but the old bushings were fecked so that wasn't hard to do!

  • Author

When I Bought the Mk2 seats of t.d. I also got the rear bench. This wasn't a straight fit like the front seats so I didnt fit it straight away.

I then had the idea of making the rear seats more supportive like the front seats.

so the rear bench was dismantled. the cover kept and the foam butchered, until I had the pieces to fit the rear of the Skolo.

The backs of the Skolo, 1done 1 to go

IMG_0501.jpg

IMG_0500.jpg

the bases done

IMG_0499.jpg

Each of the 4 pieces took in total 6 hours each, including shaping, cutting, pinning and sewing.Until I had a rear bench that matched my front seats.

IMG_0624.jpg

IMG_0625.jpg

They aren't 100% yet, still a little tidying to do here and there, but they are done.

They look hella comfy :-)

  • Author

Before I lowered it had a bit of a smoothing session

Rear badges gone,holes welded and filled.

Side repeaters gone, holes welded and filled

ariel gone, hole welded and filled

B-pillar and door edge sprayed black.

I also fitted a new sunroof seal, but while doing this i broke a part of the sunroof and now it won't close completly or open. :(

Then just before Dubshed the car got a good going over. de-tared and waxed, Bumpers sparyed. steelies straighted and fitted again.

Just before I left saturday morning.

IMG_0539.jpg

IMG_0537.jpg

IMG_0538.jpg

Up at Dubshed

IMG_0608.jpg

IMG_0613.jpg

IMG_0615.jpg

  • Author

my latest aquisition

14x6 speedlines IIRC cheers adam

IMG_0521.jpg

IMG_0522.jpg

IMG_0523.jpg

That's plenty of clearance

IMG_0525.jpg

I'm gonna get new tyres for them either

185/50R14 or 175/55 R14 that should be close enogh to the rolloing radius of the 13s

  • Author
They look hella comfy :-)

pretty cosey alright. my girlfriend wouldnt sit in the front one day because they are so comfy. women! :roll:

  • 2 weeks later...
  • Author

got my bonnet lifters fitted today B)

  • 3 weeks later...
  • Author

I out a few odd stickers on the rear window and chanced fitting the 15x7s off the 6n I'm breaking.

Here are the results

CopyofIMG_0636.jpg

IMG_0634.jpg

IMG_0641.jpg

IMG_0638.jpg

IMG_0640.jpg

  • Author

wee update on the Skolo

I fitted an air intake. bodge speed racing style

IMG_0676.jpg

you can see the bonnet liftrers in this pic too

IMG_0678.jpg

IMG_0677.jpg

I also made an unsuccesful start on tinting my spare headlights. anyone have a pass side headlight?

IMG_0675.jpg

Create an account or sign in to comment

Recently Browsing 0

  • No registered users viewing this page.

Important Information

We have placed cookies on your device to help make this website better. You can adjust your cookie settings, otherwise we'll assume you're okay to continue. Terms of Use Privacy Policy Guidelines

Account

Navigation

Search

Search

Configure browser push notifications

Chrome (Android)
  1. Tap the lock icon next to the address bar.
  2. Tap Permissions → Notifications.
  3. Adjust your preference.
Chrome (Desktop)
  1. Click the padlock icon in the address bar.
  2. Select Site settings.
  3. Find Notifications and adjust your preference.