Skip to content

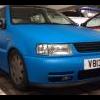
Dansharpy's 6n olop

Featured Replies

Model: 6n 5 door

Engine: 1.4L 8V

Suspension: Collies about -90mm ish

Brakes: standard

Wheels and Tyres: alloys (unknown)

Exterior Styling: removed bump strips, de badged grill, de wipered

Interior Styling: golf centre console (?)

ICE and Security: 12" kenwood sub (set up for quality not quantity!) JVC headunit, standard speakers

Comments: This is my first Polo!! I must admit i wasnt a massive fan when i first got it (had a pug 306 that failed MOT so had to get something in a hurry!) but now I'm addicted!

This is how it all started:

post-34317-1285850820_thumb.jpg

Then got debadged all round, clear front indys and de wipered:

post-34317-1285850907_thumb.jpg

post-34317-1285850958_thumb.jpg

Then had an unfortunate incident with a head gasket! Luckily i had already brought a new engine because it had a brand new cambelt and clutch so i had to put that in (on my own on my mums drive!)

post-34317-1285851110_thumb.jpg:

post-34317-1285851074_thumb.jpg

Then i decided to sort the stance out:

post-34317-1285851196_thumb.jpg

post-34317-1285851230_thumb.jpg

post-34317-1285851265_thumb.jpg

Future plans include: WHEELS!!, uprated brakes, 16v bumpers, speakers, and some other bits and bobs! :-D

So what do u think?? be gentle!! :?

Edited by dansharpy

  • Replies 20
  • Views 4.1k
  • Created
  • Last Reply

Top Posters In This Topic

Posted Images

not sure if the pics or my eyes or a combo of both but there seems to be LOADS of reverse rake?

props on the engine change though!

Edited by stixie mk4

  • Author
not sure if the pics or my eyes or a combo of both but there seems to be LOADS of reverse rake?

props on the engine change though!

well there is a tiny bit or reverse rake, but only like 10mm or less. i think the pics do make it look loads worse (especially the angle I've taken some of the pics and it was on a hill!)! Because of the shitty wheels being as thin cardboard and not filling the arches properly, this also makes it look worse!

Engine change was fun! Never done a full one on my own before so was a bit of a handful, but was super chuffed when it started first time and ran like a dream! :)

Edited by dansharpy

  • Author

New front bumper is on! rear needs a bit of work and then thats going on too!! Hopefully new wheels tonight! pics soon!! :)

  • 1 month later...
  • Author

Lots happened recently!! Got a new shell and engine (cheers Tipu :thumbsup: ) Respraying now! Also got central locking and electric windows (cheers Pete :thumbsup: ) to fit, seat ibiza gti seats, shaving rear door handles, smoothing boot and gotta swap everything over!! Pics coming soon!! :)

Edit: also got 16v brakes to fit!

Edited by dansharpy

  • 3 weeks later...
  • Author

ok, updates time!! So since the last pics above the minty delight got some 16's!

5232296842_9c8ea65058.jpg

08102010041 by dansharpy, on Flickr

5231705441_844f2b3b6d.jpg

08102010043 by dansharpy, on Flickr

5232298264_e0d326a87f.jpg

08102010044 by dansharpy, on Flickr

However i had to raise it about 40mm from where had it and it was STILL scrubbing like fuck!! So they had to go! So i put them on eBay, got an email from a lad with an offer of a ton, he picked them up so i drove to swindon and picked up these:

5232298678_25a1e73e48.jpg

07112010027 by dansharpy, on Flickr

5232299170_dbafcc3786.jpg

07112010028 by dansharpy, on Flickr

5232299586_660e6e1dd9.jpg

07112010030 by dansharpy, on Flickr

Unfortunately the body work was in a VERY sorry state!! Rust everywhere, panels with mis matched colour, dents and scratches. So i went to sunny west london (hayes to be exact!) and picked this up:

5232290278_34a622c560.jpg

30102010016 by dansharpy, on Flickr

5231698585_44fca74dc2.jpg

30102010017 by dansharpy, on Flickr

5231699145_7576e6d17a.jpg

10112010033 by dansharpy, on Flickr

Now came the fun part!! I had to strip all the bits missing off the new shell and put them on the new shell!! I also didnt really fancy the old minty green colour and wasnt too partial to the new canyon red, so i had to fully respray it all as well.......in november.......in a week....... :?

I had many many problems during this transformation!! Weather, seized nuts and bolts, tools breaking (who knew the hinges are different on the 97 and 99 models??!!) etc. etc. and then i took one of the wings off and the bottom bit was completely rusted away!! :( So i set about rebuilding it in fibreglass. Now i haven't used fibreglass much in the past so was pretty proud of the outcome here:

5231700115_2442bbd0ef.jpg

12112010036 by dansharpy, on Flickr

5231700553_5ac9b676bf.jpg

12112010037 by dansharpy, on Flickr

5231700903_edc2a4ce3f.jpg

12112010038 by dansharpy, on Flickr

5231701143_0d6c14f119.jpg

14112010039 by dansharpy, on Flickr

Some pics of the rebuild:

5232301044_60d371e75b.jpg

16112010040 by dansharpy, on Flickr

5231709611_ce03b7234f.jpg

16112010041 by dansharpy, on Flickr

5231710167_69a88f5841.jpg

16112010042 by dansharpy, on Flickr

5231710631_eee9513898.jpg

16112010043 by dansharpy, on Flickr

As well as just swapping stuff over and spraying it i also had some extra bits to fit! I got some central locking latches and loom, new backbox, 7-pin headlights and an HiD upgrade (also got electric windows but yet to fit them yet!!) Here's some pics of the HiD upgrade:

Before:

5232307592_d39d0f1eec.jpg

IMAG0011 by dansharpy, on Flickr

After:

5232308500_efe354e1f7.jpg

IMAG0020 by dansharpy, on Flickr

This kit is AMAZING!! Delivered day after ordering it, sooo easy to fit (didnt have to put any extra wires in, plugs into existing loom!) and makes a MASSIVE difference to night-time driving!!

And so to some pics of the car in its current state!! I've still got to fit electric windows, 16v brakes, black side repeaters, and fix a few bits ready for MOT coming up very soon, but i think i did pretty well considering all this was done in 1 WEEK!!!!

5231711433_a514d4835a.jpg

IMAG0023 by dansharpy, on Flickr

5231712335_1529c74070.jpg

IMAG0026 by dansharpy, on Flickr

5231712845_3ba06a030a.jpg

IMAG0028 by dansharpy, on Flickr

Before anyone says it, YES this is a matte/satin blue, NO i didnt copy the fast car cover!! I didnt even know about that car until someone pointed it out to me and by that point i had already bought the paint!! To be honest i dont care, i like the colour and I'm the one who has to drive it!! :)

So let me know what you think......... be gentle though :)

Edited by dansharpy

loving the colour mate, ( also like the fast car as well) ;) lol

smooth the top vents and plate recess and it will be top dollar fella keep it up

yeh quite a long way round to do things mate lol but its nice to see someone else undertaking this kinda work and just having a go =D

not a fan of the colour but well done and good luck with the other bits and pieces youve got to get done

  • Author

matty-6n: was thinkin of smoothing the top vents but i dont like the idea of not being able to get the fog lights off! i did have to do some plastic welding to fix the glx bumpers though so maybe ill give it a go and see how it looks! Am thinkin of keepin the plate recess though, i think it looks more natural (and symetrical!) to keep the plate where it is!

seanvw: i did used to do car mods as a living and was a mechanic for a while so the task didnt daunt me too much! (although to do it all in a week was probably pushing it!) if i hadnt done it like this it probably would of meant the death of 2 more 6n's from the planet and i couldnt let that happen! :) I wasnt sure of the colour either when i first did it (i expected it to be a bit darker) but its growing on me!

hopefully 16v brakes and leccy windows being fitted tomorrow! :)

Edited by dansharpy

wow man. Epic! haha. Wheels and colour dont work together, cant think of why though!

Love it so far mate. Great work ;)

I was the one that pointed out about the fast car cover, to be honest I'm glad you have done it looks beautiful. Well done (Y)

how easy was the engine swap as I'm thinking of doing one to mine i have some engine experience but i wonder how much of a strugle it actually is?

Love the coulor mate, very diffrent!

  • Author
wow man. Epic! haha. Wheels and colour dont work together, cant think of why though!

Cheers bud! I know what you mean, they do somehow look out of place! I think they are a bit un-dramatic compared to the colour! I have got a refurb planned when it gets a bit warmer, hopefully this will help them 'fit in' better!!

Love it so far mate. Great work ;)

Thanks.

I was the one that pointed out about the fast car cover, to be honest I'm glad you have done it looks beautiful. Well done (Y)

how easy was the engine swap as I'm thinking of doing one to mine i have some engine experience but i wonder how much of a strugle it actually is?

Cheers mate! Was a bit worried what people would think when i started spraying it because of how close it actually is to the fast car cover car!! As i said though, i like it!! :)

Engine change was pretty straightforward if its a straight swap. Top recommendation is a haynes manual!! :) This was a bloody lifesaver! Label everything when you take it off so you know where to put it back. The main tools you need are spline sockets, star sockets (and star shaped allen keys if you know what i mean!!), socket set and ring spanners. I did it on my own so had to hire a crane but if you've got some hench mates get them to come round and lift it for you! :) Good luck!!

Love the coulor mate, very diffrent!

Thanks bud! :)

how easy was it to spray yourself?

  • Author
how easy was it to spray yourself?

Fairly easy. I used to modify cars for a living so have had a bit of practice, but that was in a spray booth with a compressor and proper gun!!

For this i used Montana (MTN) 94 spray with a pink dot fat cap. This is ideal paint for the job, its low pressure so doesnt spit, and the fat cap gives a fairly good spray pattern for large areas. It is alot different to a normal rattle can though (halfrauds type) and takes a bit of getting used to!

I got the paint from here- http://cgi.ebay.co.uk/ws/eBayISAPI.dll?Vie...T#ht_1080wt_905 the guy was really helpful and sent the stuff out super quick when i ordered it!

If you need any more tips/help then give me a shout!! :)

  • Author

16V brakes went on today!! Work sooo much better than standard ones! Also found a good way of seperating ball joints, undo the nut until it is flush with the end of the thread, then undo 1 more turn, then spray with wd-40, hit with a hammer!! I did it on all the ball joints today and it worked everytime, because the nut is still on the thread it stops the thread getting fucked, and this way doesnt wreck any of the parts so they can all be used again!!

Good times :)

WOW your really good with a rattle can :| lmao, i wasnt expecting you to say that, makes me want to do it!

  • Author
WOW your really good with a rattle can :| lmao, i wasnt expecting you to say that, makes me want to do it!

Haha cheers bud! Its all about being smooth with a rattle can. I also did it in my garage and sprayed the shell itself outside, so temp and moisture didnt seem to affect the paint finish. :thumbsup:

good work bud alot of effort put into that keep it up :thumbsup:

  • Author
good work bud alot of effort put into that keep it up :thumbsup:

Cheers bud! We'll have to have another meet soon!! :thumbsup:

Create an account or sign in to comment

Recently Browsing 0

  • No registered users viewing this page.

Account

Navigation

Search

Search

Configure browser push notifications

Chrome (Android)
  1. Tap the lock icon next to the address bar.
  2. Tap Permissions → Notifications.
  3. Adjust your preference.
Chrome (Desktop)
  1. Click the padlock icon in the address bar.
  2. Select Site settings.
  3. Find Notifications and adjust your preference.