Skip to content

Michael's MK4

Featured Replies

  • Author

Hi all,

There are things being done to the car, but it wasn't worth uploading such as I've bought set of 165/45/16 Nankang NSII tyres but then decided to go for 165/40/16 so I've sent them back and now waiting to have my money refunded. Also bought metal valves for the wheels, to finish them off nicely.

Another thing is that I bought brand new front springs for my coilovers which will be with me on monday so hopefully I will put the coilovers on begining of the next week. :)

My floor carpet wasn't in its best condition so I decided to remove it and dye it black. The difference is huge, IMO it looks a lot better.

Here are some pictures of the progress. Excuse the quality but camera battery was flat so had to take the pictures with my iPhone.

That's how we started.

IMG_0001.jpg

IMG_0002.jpg

The first coat of dye, half of carpet done.

IMG_0006.jpg

IMG_0008.jpg

That's the final result.

IMG_0013.jpg

IMG_0010.jpg

IMG_0012.jpg

Also, I decided to dye the parcel shelf.

That's how we started.

IMG_0003.jpg

Half way through.

IMG_0004.jpg

The final result.

IMG_0007.jpg

I will take better pictures when I put it back into the car. Hope you like. :)

  • Replies 229
  • Views 39.1k
  • Created
  • Last Reply

Top Posters In This Topic

  • Author

It was carpet dye off eBay, really easy to find. I've bought 5liters bottle, but could easily do another carpet with what's left.

Big thanks to xkarinx as she told me what to get. :)

  • Author

Here are some better pictures. It has dried out now, and looks a lot better than when it was still wet. :) I'm well happy with the result.

DSC_0107.jpg

DSC_0105.jpg

DSC_0106.jpg

That's just what I need to do, looks perfect.

How difficult was it to remove the carpet, is it just the two front seats you need to take out?

  • Author
That's just what I need to do, looks perfect.

How difficult was it to remove the carpet, is it just the two front seats you need to take out?

Two front seats are the easiest bit, they only hold on once screw. You have to take a lot of plastic bits off, which is more time consuming than difficult. The centre console needs to be off, footrest, bolts under the rear bench, plastic bits on the side, unscrew the bonnet popper, a lot of things to be honest. Also, a bit of metal under the dash (where the centre console was) needs to be off - it hold on like 3 screws and one bolt.

It's hard to explain, but you will work it out once you get going. Hope that helps.

Oh man, sounds like there is a lot more to it than I thought haha.

Think I'll wait til the summer to have a go at this.

Cheers though :D

It's really easy tbh, (this is for the 3 door)

Start with the front seats, it's just one bolt at the front in the middle by the slider handle, undo, the pull the slider handle and slide the seat back off the runners (remove the plastic caps off the back of the runners first, they just pull off) next the back seats, the bases just unclip, don't bend the bar (it is quite hard thought) the backs just need to be popped out, I used a screw driver to just push the retaining clips off the pin, next use a flat blade or a plastic push pin remover to pop all the rear pins off around the base of the rear door cards, next remove the plastics around the bottom of the doors, (you will now be able to start removing the carpet from the back to front, don't pull it all the way as the best bit (and the fiddle-e-ist) is yet to come) start in the centre, the handbrqke cover is held on by 4 clips (1 in each corner), the gear gaitor just lifts off after some prising, the centre console the unscrews by the bolts underneath the gaitor, the cubby hole or dump bin infront of the gear stick is screwed on by a single torque screw at the back (a ratchet and long reach attachments with a torque bit really help) this all the pulls away (carful to push the gaitor through the centre console) you can the start on the drivers foot well, this is just a case of unbolting all the plastics and bonnet popper, the carpet should the come out (apart from behind the heating unit behind the dash, I solved this problem by simply cutting a vertical line on the carpet behind the dash where noone will see)

Hope that helps :)

  • Author

No need to cut any bits of carpet, the bit off the heating unit is easy too. As I said, 3 screws and one bolt :)

Real good job on the car dude, looks sweet as! I took the door cards off my mk3 as they were grey and decided to spray them black.. what a fail! dont bother going down this route as it just rubs off and goes shitty looking.. now on the look out for black front door cards :).. nice car man

whow man, great job with the floor!!

Nice job dude :) we can do some proper shots when you here so we all can see the good job!

  • 2 weeks later...
  • Author

The rubber is now on! They're 165/40 R16 Nankangs NSII :) Also got the adapters on the way, 22mm for the front and 26mm for the back. Arches have been rolled, the coilovers are now on, so just waiting for the adapters and will be putting the wheels on! Hopefully before the UD!

10032011065.jpg

10032011067.jpg

Zdjecie0468.jpg

Those wheels are gonna be blinding other road users! Dangerous!! Look amazing though, love them!! Can't wait to see them on the car!

  • Author

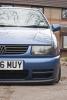
The adapters arrived yesterday, so couldn't help my self and went to put the wheels on! I finished really late, and it was too low and undrivable yesterday, although it looked awesome! Here's a little pic of how it looked yesterday:

DSC_0110.jpg

unfortunately i had to rise it up, and today it looks like this:

DSC_0126.jpg

DSC_0119.jpg

DSC_0117.jpg

DSC_0124.jpg

DSC_0125.jpg

DSC_0120.jpg

DSC_0113.jpg

DSC_0116.jpg

DSC_0121.jpg

DSC_0123.jpg

DSC_0114.jpg

The pics are not great because they're only phone quality, and the car isn't the cleanest but it was raining all night. ;(

The valver bumper will be going back on as soon as it comes back from the sprayer!

I'm really pleased with how it came out, it's sits very nicely and the stance isn't too bad either. The picture from the back looks awesome, hehe.

Michael

Wheels look sexy mate good job!

epic mate!!!!! looks spot on there, does it have a 16v rear bumper??? so pleased for you that its turned out perfect, pleasure to meet you at UD too

  • Author

thanks ;) was please to meet you too

Hehe, it says under the pics that the valver bumper goes back on as soon as it comes back from the sprayer. :D

Looks spot on mate!

Rear valver bumper will finish it off nicely :thumbsup:

thanks ;) was please to meet you too

Hehe, it says under the pics that the valver bumper goes back on as soon as it comes back from the sprayer. :D

ahhh didnt notice that but I'm a bit out of it since being in my accident on tuesday lol =(

cant wait to see it with the bumper on

Looks really tidy and am loving the wheels and the colour :D

Car looks awesome mate love the wheels .

Love the wheels mate, look awsome.

And what dye did you use, whats it like?

As I'm thinking of doing my headliner black.

Thanks,

Pete.

Not usually a 6n fan dude, but this i like :)

sweet!

Them wheels look mint

Create an account or sign in to comment

Recently Browsing 0

  • No registered users viewing this page.

Account

Navigation

Search

Search

Configure browser push notifications

Chrome (Android)
  1. Tap the lock icon next to the address bar.
  2. Tap Permissions → Notifications.
  3. Adjust your preference.
Chrome (Desktop)
  1. Click the padlock icon in the address bar.
  2. Select Site settings.
  3. Find Notifications and adjust your preference.