Skip to content

Ryan's 6n2

Featured Replies

  • Author

1234oxx.jpg

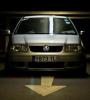
A quick shot to show the LED numberplate bulbs, much better than the fuzzy orange glow that the old bulbs gave.

I really need to stop being lazy and use a real camera rather than my crappy iPhone. Once its all cleaned and polished I will get some propper pics up.

IMG_0596.jpg

Halfords special rubber gromet with a nice reflection of Lewis*B

Edited by ryekye

  • Replies 131
  • Views 46.4k
  • Created
  • Last Reply

Top Posters In This Topic

  • Author

1302387272_resized.jpg

Fixed the leaking CV joint boot

1302387282_resized.jpg

1302387291_resized.jpg

Dirty wheel arch

1302386220_resized.jpg

Gunk!

1302386201_resized.jpg

Degreased and jet washed

1302386237_resized.jpg

1302386289_resized.jpg

Time for a break

1302386228_resized.jpg

Polishing time

1302386270_resized.jpg

After that I gave it a good clean and dressed the tyres with Meguiars tyre gel but forgot to take some pics!

Edited by ryekye

  • Author

P4110094.jpg

This picture is from ages ago but I thought it was worth uploading, if anyone wants one they are easy to find on ebay and cost a few quid.

IMG_0630.jpg

It was then time to give the car the most thorough clean its had since i've owned it, but as my luck goes it rained about an hour after I finished :(

IMG_0632.jpg

These also arrived in the post AFTER I cleaned the car, not sure if they are any good but probably better than washing up liquid!

P4110095.jpg

P4110096.jpg

25rc87r.jpg

A quick photoshop, dont look at it too long as there are loads of faults :p

Should be getting coilovers in about 3 weeks :D

Edited by ryekye

  • Author

Went to the breakers today to get a new coolant tank as mine was leaking and came across this beast! :p

IMG_0646.jpg

IMG_0648.jpg

custom rear strut brace time!

IMG_0649.jpg

All welded up, perfect fit surprisingly :-D

IMG_0650.jpg

IMG_0653.jpg

Painted it with smooth white hammerite but may do it silver at some point.

Will get some pics tomorrow when its back on.

Edit:

IMG_0654.jpg

Found some flat grey paint in the shed, might find a nice sticker to go in the middle to break it up a bit.

Edited by ryekye

Nice little touches have been done to this car.

keep it up, looking good.

looks awsome bud bilt not bought !!!!

Looking good keep up the good work :thumbsup:

  • Author

Thanks for the comments :)

Haven't really had the money to do anything to the car recently but I have a lot planned over the next month.

IMG_06701.jpg

:D

5651440835_88a602eea5_b.jpg

An edit done by a mate of mine.

  • Author

Today I decided that I wanted the 2* 12" subs back in the car but I also wanted to keep as much boot space as possible so it was time for a little boot build!

IMG_0716.jpg

Took the subs out of the old enclosure, luckily they are quite low profile in design.

IMG_0718.jpg

IMG_0720.jpg

IMG_0721.jpg

The box is going to be split into 3 sections, each sub will be in a sealed partition and the centre section will be used to hide the amp and all the wiring.

IMG_0722.jpg

IMG_0723.jpg

Also bought some thin carpet to cover the build.

IMG_0726.jpg

Roughly how its going to be layed out, please ignore the little amp haha.

IMG_0724.jpg

IMG_0725.jpg

Ignore the 6x9 cuts, I'm going to cover the back of the parcel shelf with a pieace of carpeted hardboard.

Edited by ryekye

  • Author

A little more progress on the box:

IMG_0738.jpg

Decided against having the amps in the box aswell as it would make the sub enclosures way too small. Instead they are going to mounted elsewhere in the boot.

IMG_0739.jpg

PVA'd and sealed

IMG_0740.jpg

Those holes aren't ports, they are for quick release connectors for the + and - wires.

Edited by ryekye

  • Author

The sub enclosures are now finished and I've ordered some Jackson Tuning coilovers.

IMG_0743.jpg

IMG_0746.jpg

IMG_0747.jpg

IMG_0750.jpg

In the future I will have some 12 inch circles of wood covered in carpet to sit on top of the subs in the recess, this will make the boot completely flat for luggage. In this circumstance the subs would be turned off.

IMG_0745.jpg

Cable connectors.

IMG_0752.jpg

IMG_0754.jpg

I have an Alpine amp on order to power the subs, I should have that fitted and mounted within the next week.

Edited by ryekye

Lookin smart as shit this bud, keep it up :)

Very tidy, nice work

sub box looks soo sick! you have given me some ideas for my next one. cheers for all the pictures :)

How much better did the subs sound after you installed the rabbit?? 8-)

  • Author

Thanks for the comments everyone! The rabbit added loads of bass at first but after he filled the box with rabbit rasins it wasn't too good :(

Also..

IMG_0762.jpg

225444_10150233760938125_777093124_86232

Edited by ryekye

The rabbit added loads of bass at first but after he filled the box with rabbit rasins it wasn't too good :(

:lol:

  • Author

IMG_0770.jpg

old struts off

IMG_0763-1.jpg

I greased the threads and wond them down after

IMG_0764.jpg

93049b9a.jpg

This is with 25mm thread left all round. I could see it was going to rub so didn't bother trying any lower.

IMG_0768.jpg

This was straight after lowering, it settled about 10-15mm lower over night

IMG_0769.jpg

Found this hidden behind the carpet!!

IMG_0771-1-2.jpg

This is how its sitting now, the lowest I can go without any rubbing (tested with 2 passengers and boot build). I have 60mm of thread left all round, to go lower I need some spacers to stop the front wheels rubbing the springs and some stretched or lower profile tyres.

Edited by ryekye

what widths are your cups? i have 15x7's on 165/50;s and they dont took my archs and the coilovers are down full!

what did you do to polish them up like that?

  • Author
what widths are your cups? i have 15x7's on 165/50;s and they dont took my archs and the coilovers are down full!

what did you do to polish them up like that?

My cups are also 15x7, 195/45 front and 195/50 rear.

I used Halfords rubbing compound on a rag followed by Autosol to polish them up. It would be alot easier with a drill attachement as it took me a good few hours by hand :p

looks awsome love the install bilt nt bought is always more woth while !!

Where can I buy these coilovers ? I didn't found them on ebay. thx

lookin very good :D loving your work!

do your wheels rub the inner arches at all? i want to drop mine more 2 (running on coilies with teledials and stretched nankangs) i was thinking of taking the inner arches out?

  • Author
lookin very good :D loving your work!

do your wheels rub the inner arches at all? i want to drop mine more 2 (running on coilies with teledials and stretched nankangs) i was thinking of taking the inner arches out?

The tyres lick the insides of the rear arches on every speed bump when theres 2 or more people on the car but I am running huuuuge 195/50 tyres on the rear. I will be replacing them with smaller ones but theres loads of life left in them yet.

Taking out the liners sounds interesting, I'm not sure if it would be a good idea or not but would be interested if anyone has done it?

Create an account or sign in to comment

Recently Browsing 0

  • No registered users viewing this page.

Account

Navigation

Search

Search

Configure browser push notifications

Chrome (Android)
  1. Tap the lock icon next to the address bar.
  2. Tap Permissions → Notifications.
  3. Adjust your preference.
Chrome (Desktop)
  1. Click the padlock icon in the address bar.
  2. Select Site settings.
  3. Find Notifications and adjust your preference.