Skip to content

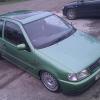
Mattie's 6n Polo 1.8 20 Valve Turbo Project

Featured Replies

Looking forward to seeing this dash finished.

Great work overall man.

  • Replies 501
  • Views 103.3k
  • Created
  • Last Reply

Top Posters In This Topic

Most Popular Posts

  • Well its been a hell of a long time since I've updated this build thread! So lets blow some dust off it and get up to scratch! First of all the start of this year we again moved units but th

  • Okay been a long time since i updated, been far to busy trying to get my stupid 22 year old body in shape for a lads trip to Zante in july but then trying to balance that with drinking, smoking, havin

  • Got the rest of the passenger side boost pipes on today with all new clips and connector hoses. Then when round the bay and did a thorough check over to see what I had forgotten. 20160610_145104_

Great work all round,fair play for doing something different with the dash,should be sweet when its finished

  • Author

wish i was able to do stuff like this -.- id balls things up no doubt.

Well you dont try you wont know!

Looking forward to seeing this dash finished.

Great work overall man.

Yeah I am too, alot of work left to do though!

Great work all round,fair play for doing something different with the dash,should be sweet when its finished

Thanks alot, yeah nice to be different.

Amazing, I hope you pull the dash off, will be massive credit if you do!!!

  • Author

Amazing, I hope you pull the dash off, will be massive credit if you do!!!

Thanks Higgo! Pretty much eggs in one basket is how I've built the whole car! :D

But how hard can it be!?

Well last night I made a bit of a mess in the unit! DUST DUST EVERYWHERE!

But good progress was made, so not all so bad happy.png

12515540353_475b90b0ba.jpg

DSC_0320 by Mattie20vt, on Flickr

Really happy with how its taking shape now, gave it its first skim of filler last night. Slapped it on, let it dry then sanded it down.

You can kind of get the jist of what I'm aiming for, a very minimalistic but dash that catches your eye. The Big space in the center console where the heater controls etc used to go will be covered by an Aluminium plate that will house my Hazard Switch, Headlight Switch and Ignition Switch, Not sure where to put my Gauges yet but thinking of having them just under the clocks where the stereo would have been.

12515425395_8ee8721d79.jpg

DSC_0316 by Mattie20vt, on Flickr

12515886904_06c471e7ca.jpg

DSC_0317 by Mattie20vt, on Flickr

Deleting the Passenger side heater vent... who needs heaters!?

12515424435_c257905efd.jpg

DSC_0318 by Mattie20vt, on Flickr

After a quick DA.

12515424065_ae9be9e579.jpg

DSC_0319 by Mattie20vt, on Flickr

Will get some more done over the weekend, hope you like it guys and if anyones got any tips dont be afraid to shout up! First time I'm doing custom dash work. Fingers crossed it comes out well.

Ciao.

all the best mate, coming along nicely!

Good work my man! :smile:

  • Author

all the best mate, coming along nicely!

Good work my man! :smile:

Thanks boys! Trying my best to be different!

attention whore ;) love it

  • Author

attention whore ;) love it

I don't know what you mean Teag! Nice to actually find someway of modding a 6n and being different! :D

Looking like it's gonna be a sweet 1 off dash mate :)

Edited by jimbub

  • Author

Looking like it's gonna be a sweet 1 off dash mate :)

Cheers buddy!

isn't it going to be hard to see the dials ?

i imagine you've checked this, but just making sure :P

  • Author

isn't it going to be hard to see the dials ?

i imagine you've checked this, but just making sure :P

If you look at one of the pictures its taken as per the drivers view.

Everyone who has been to my unit has sat in the drivers seat with the dash in and can't believe how good the set up is. Its literally perfect mate, opened up the windscreen and because the clock pod was angled towards the driver you can still see everything.

  • Author

Well just got a few update photos on my dash work and some front end work.

Finally decided i'd fit up the front end for the last time with the radiator (1.9tdi aaz) and the 12" slimline fan. i wanted to run a twin fan set up as i have the wiring for it to go straight on but i have a few clearence issues...

12664693834_ab0c8432b8.jpg
DSC_0350 by Mattie20vt, on Flickr

Check out ma FAN.

12664352903_82903d02a5.jpg
DSC_0351 by Mattie20vt, on Flickr

Couple of photos here of the current state of the dashboard, been talking to the guy whos flocking it too (Flocking Fantastic on Facebook) and he says that it doesnt have to be prerfect for him to do it as he likes to do his own prep anyway but its not too far off now, so hoping to take it too him along with the headlining next week. The top is nearly done bar some low marks then can finish off the front too. As the front still needs alot of work.

12664235955_253655f0e9.jpg
DSC_0362 by Mattie20vt, on Flickr

Speaker delete done.

12664352093_5e35fd3098.jpg
DSC_0363 by Mattie20vt, on Flickr

Main part that still needs work.

12664692754_a0a0145dae.jpg
DSC_0364 by Mattie20vt, on Flickr

12664692534_068e28ff5c.jpg
DSC_0365 by Mattie20vt, on Flickr

12664692094_bb5542d839.jpg
DSC_0367 by Mattie20vt, on Flickr

12664235095_8a46700da4.jpg
DSC_0368 by Mattie20vt, on Flickr

More updates later this week.

  • Author

Just ordered my custom driveshafts from Driveshafts UK.

Top set of guys there, really helpful and have a great customer service. Highly recommended and have a 4 working day turn around!

  • Author

Another bit of an update with lots of pictures! Who doesnt like photo time!?

Start off i received another hybrid bumper as last time i wasnt happy with the lack of material around the mounting points so specified i will drill the mounting holes myself. So got drilling this morning. 6mm holes all round. Then dropped it off at LW Smart in Alfreton to get some paint laid down. They are doing it to show standard so will be waiting around 2 weeks to get it back as theres a couple of bits that need attention with it being GRP.

12818363705_0fb0961325.jpg
DSC_0380 by Mattie20vt, on Flickr

12818362975_3827ab71c0.jpg
DSC_0381 by Mattie20vt, on Flickr

This is how the intercooler kind of sits, I've literally just now knocked up some 30mm spacers for the bolts holding it up. had to cut a rather large chuck out of my crashbar... oh well dont plan on crashing and I'm sure the intercooler will take most of the brunt!

12818444403_2824fac4c5.jpg
DSC_0382 by Mattie20vt, on Flickr

12818444073_cefa5429c0.jpg
DSC_0383 by Mattie20vt, on Flickr

Its rough but will do for now.

12818443253_773c2b1eff.jpg
DSC_0384 by Mattie20vt, on Flickr

I've been trying to perfect the boost hoses all last week and finally about there just waiting on some 90deg silicone reducer joiners for the intercooler then its done as the pipework is 2.5" and the intercooler is 2.25".

All the jubilees that are on at the moment will be swapped out for proper t-bar clamps. This is just for mocking up.

Throttle body to cooler.

12818360355_ec023f9fea.jpg
DSC_0386 by Mattie20vt, on Flickr

12818359945_95894d22e4.jpg
DSC_0387 by Mattie20vt, on Flickr

12818773354_978c769772.jpg
DSC_0388 by Mattie20vt, on Flickr

12818359105_7e1f75744e.jpg
DSC_0389 by Mattie20vt, on Flickr

Turbo to Cooler.

12818358685_446602e9a1.jpg
DSC_0390 by Mattie20vt, on Flickr

12818439773_f577bae76d.jpg
DSC_0392 by Mattie20vt, on Flickr

12818439313_b081a18d34.jpg
DSC_0393 by Mattie20vt, on Flickr

Area and bay shot. Moving out of this unit at the end of March so trying to get this properly road worthy by then.

12818360835_07ba8a4bb0.jpg
DSC_0385 by Mattie20vt, on Flickr

She needs a good clean!!

12818438673_1ae5c487c9.jpg
DSC_0394 by Mattie20vt, on Flickr

  • 2 months later...
  • Author

Just to keep the thread alive...had abit of trouble with the quality of my hyrbud bumper. So I had it re made and re-inforced.

So now its a fibreglass 6n/6n2 gti hyrbid fully skinned on the inside with carbon fibre to strengthen it all up abit without adding much weight.

Had it painted by LW Smart in Alfreton who have done a brilliant job and exactly what i asked for.

Bumper painted in LC9Z black magic and the splitter has been texturised.

13941454768_e4f2708b37.jpg
DSC_0461 by Mattie20vt, on Flickr

Nice to see another of my bumpers all painted really looking forward to seeing it on the car :-)

  • 4 weeks later...
  • Author

Okay been a long time since i updated, been far to busy trying to get my stupid 22 year old body in shape for a lads trip to Zante in july but then trying to balance that with drinking, smoking, having fun and keeping the mrs happy is a little hard so the polo has got a back seat once again.

BUT!...I've managed to squeeze abit of time in over the passed couple of weeks which ivolved finishing off all the sensor wiring in the engine bay along with getting every single light working as they should, wipers working, headlight adjusters working etc.

So I have done quite alot of fiddly jobs. My dash has been re-started from scratch due to some erm...complications? (too much filler) so that was taken back to the drawing board but will basically be what i was doing anyway...just minus the 5kg of filler!

Everything is going smoothly anyway and I've been cracking on with my exhaust system. Originally i had planned on taking it to Tony Banks in leeds to have a full custom system made...but then me being me i decided to take it on myself...HOW HARD CAN IT BE!?

Turns out...what a ballache, but came out sweet.

The costs are...

MJ Performance boxes 2 off £60

1meter of 2.5" stainless £15

3" V band clamp 2 off £40

2.5" V band clamp £15

2.5" over axle bend £30

3" to 2.5" reducer 2 off £20

Argon/C02 Gas bottle £20

MIG wire £8

All together everything stainless T304 high quality... £208.

Really happy with it, bearing in mind most places wanted around the £300 mark to make it.

I dont value my time when I'm working on my most loved item i own either :-o

Anyway heres some pictures...

3" downpipe to 3" center box

14346329572_707818d67f.jpg
DSC_0588 by Mattie20vt, on Flickr

3" center box to 2.5" mid/rear section

14161324610_500a26e6fa.jpg
DSC_0589 by Mattie20vt, on Flickr

2.5" mid section over rear axle

14161271388_898c3f7e3b.jpg
DSC_0590 by Mattie20vt, on Flickr

14161271398_47ef7ea3bc.jpg
DSC_0591 by Mattie20vt, on Flickr

I've also done the back box with a 3" outward rolled tip but the picture didnt come through...

But yeah work is progressing, sorry for the lack of progress updates but its going well and looks like i may just make MIVW in it.

Thanks :air_kiss:

  • 1 month later...

You must be pretty close with this now :wub:

  • Author

You must be pretty close with this now :wub:

Its stupidly close mate, but unfortunatley the mapping session and MOT among a few little jobs had to take a back seat as my Grandma died on the 24th of June so I had to do the family duties plus i was in no mind set to work on the car.

Then I had a holiday from the 2nd to 9th of july so she wont be seeing the road till late August now.

I did go down to my unit today to see the girl she looks unhappy. Waiting on my dash being finished and the rest of the interior to come together but she drives ;)

Edited by Mattnaz

  • 1 month later...
  • Author

A much overdue update as ever, lots has been going on then a big boot comes and kicks me in the ass.

Everything is working brilliantly except a lack of oil pressure and a battery not charging... which turned out to be a duff sensor and lack of an earth on the alternator :')

So in hindsight its all going well! The last of the body panels are fitted up including the Hyrbid front bumper, just need to fit the honeycomb grills onto it.

The custom dashboard is coming back tonight to have its final fitment check for clearence of stalks etc... then this will be going back to the flocking guy for the last time to get refinished in black.

Just receieved today my thermo couple and temperature controller for the fan switch that I'm retrofitting, which deletes the use of the OEM fan control box and wiring. This is more for my peice of mind and I can calibrate to the degree.

Waiting on a brake cyclinder spacer to then bleed up my brakes and I'm good to go wink.png

Nothing exciting but heres a couple of pictures to show your were I'm at (wheels are getting painted)

14780111520_93ee92f93d.jpg
DSC_0673 by Mattie20vt, on Flickr

14780100929_2e3ce0d8e3.jpg
DSC_0674 by Mattie20vt, on Flickr

And one of mine and my mate "ELVS" BBM VR6 MK2 Golf on Work Equips.

14963689761_a2c18dbc9b.jpg
DSC_0718 by Mattie20vt, on Flickr

Cheers y'all. wub.png

8>)

  • Author

8>)

Your banned from commenting on my threads Harry for the following reasons...

1- You stripped and sold your 20vt 6n

2- You bought my favourite Golf.

3- Your a w a n k e r.

:fool:

Create an account or sign in to comment

Recently Browsing 0

  • No registered users viewing this page.

Account

Navigation

Search

Search

Configure browser push notifications

Chrome (Android)
  1. Tap the lock icon next to the address bar.
  2. Tap Permissions → Notifications.
  3. Adjust your preference.
Chrome (Desktop)
  1. Click the padlock icon in the address bar.
  2. Select Site settings.
  3. Find Notifications and adjust your preference.