Skip to content

Dave's mercato many door

Featured Replies

Model:

TDI SE

Engine:

1.4

Re-map

Suspension:

Standard

Brakes:

Standard front and rear disks

Wheels and Tyres:

Standard SE Alloys

Exterior Styling:

Gti grill

Rear spoiler (non gti)

Interior Styling:

Carbon wrap bits

Footwell lights

ICE and Security:

Remote central locking

Eonon Double DIN stereo

Fli component speakers

2 x Fli 1000W subwoofers

Comments:

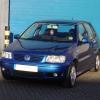
Picked this up in Sept 2007 for peanuts at the time, owned it for the last 4 years! Only had 50,000 when I picked it up, have done 30,000 since then :) It's a great little runner in a tidy colour and I'm getting like 60mpg :D. Love driving it, its a hoot. Haven't had any major problems, just perishables replaced *Fingers crossed*. Some c*** did key the door in quite an artistic fashion, and a guy at work didn't put his handbrake on properly and rolled into mine :/ but got these sorted.

I've been told by a mate who's foreman used to own the car that it's chipped :D so I'm just taking his word for it. I Haven't really got any immediate plans for it - Just bought some RX2s today that I'll get refurbed and pictures up. It would already be lowered if it wasn't for darn insurance, I can just about afford it as is, let alone with any modifications, and don't really want to void my insurance .. Daffodil I know.

Sorry about the crappy pics.

Current pics:

IMG_1680.jpg

IMG_1691copy.jpg

Some recent immature mileage:

1ec2879b.jpg

Have done a few minor things since I've had it

Replaced this:

2f5d6720.jpg

With this:

a1ff7a6a.jpg

Think this one had seen it's best:

adbfc848.jpg

Carbon wrapped a few bits:

a801ea7f.jpg

IMG_1729.jpg

IMG_1731.jpg

19c8e872.jpg

Got a double din stereo:

5caf6873.jpg

Fitted a chavy sub:

DSC01554.jpg

and a discrete switch for it (will change the heater logo to a speaker soon):

IMG_1733.jpg

Got two cup holders:

7ff1f24c.jpg

Fitted footwell lights:

IMG_2248.jpg

Using two of these:

7f2251ab.jpg

The artistic work:

DSC00601.jpg

The less attractive scuff:

DSC01507.jpg

Comments welcome :) and I know it needs a good whipping with a lowering stick!

Edited by farmsrcool

  • Replies 9
  • Views 2.9k
  • Created
  • Last Reply

Top Posters In This Topic

Most Popular Posts

  • farmsrcool
    farmsrcool

    Not updated in a while, or much: 5 and a half years owning now! Had a huge service this month, replaced all the oils, cambelt and water pump, and new lower arms. Also found a new tailgate and f

how did you do the foot well lights mate?? that looks like a really cool mod imo,

  • Author
how did you do the foot well lights mate?? that looks like a really cool mod imo,

Cheers bud.

Got two interior lights from 6n's and just ran some extra wire from the current interior light down to the footwells (hidden behind the trim) so they come on when I open the door or turn on the middle light on. I mounted them by bending back the metal tabs used to secure the light units in and drilling holes, but I think I ended up just using strong double sided tape as they held well. The passenger footwell was easy to mount but the drivers one I put on top of the footrest and used an existing screw so I'm not putting holes under my dash.

I only ran two wires down to the lights but you could do all 3 so they can come on independently

Also replaced the lights with LEDs - v cheap of eBay :D

Got the lights from a scrappy for £4, LEDs for £3 (for 3) and cable off eBay for £2 :)

Such a simple idea, that i think, looks very good, abit like the puddle lights that come on the new range rovers, when they're unlocked, check them out, they're crazy

  • 2 months later...
  • Author

Bought these a while back off wilwyn0708 (Top bloke) had them on for a bit

080d20e6.jpg

Got them off now ready to refurb over winter. Got two bolts with shredded heads :/ should be fun to get out. Plan is to get them refurbed the same colour.

d479826d.jpg

But that's on hold as I've just got a T4 van that I'm going to convert into a camper :)

91eb50e4.jpg

I love the colour of this!

  • 8 months later...
  • Author

Update :)

Re-furbed the RXII's, come out good, my mate prepped and sprayed them but they were so corroded the finish isn't great, but my mates done a better job than I could have!

Condition before:

Wheels_Before.png

Split them, only had 2 bolts which where a pain to remove, got local garage to vibrate them out. Putting them back together was the pain! I torqued the bolts up but a lot of them just ripped the thread in the alloy. Got a M7 x 1.0 Helicoil kit and set about replacing the threads, this wheel was the worst! red dots needing new threads:

IMG_2259.jpg

Once replaced the threads got them all torqued up to the right torque.

IMG_2260.jpg

Also used Loctite to make sure the bolts don't vibrate loose

IMG_2217.jpg

Did the long winded task of cleaning and polishing all 64 odd bolts :s

before:

IMG_3675.jpg

Let soak in coke:

IMG_3677.jpg

Finished, all shiny!

IMG_3708.jpg

Got the tyres back on and fitted:

IMG_2265.jpg

IMG_2269.jpg

Preffered the SE alloys when I first put them on but growing on me now

Lovely colour mate, get her dropped and some 20mm spacers on the rear and it'll look brilliant!

  • 3 weeks later...

looks awesome!

i managed to rip the thread in two bolt holes on one of my wheels :/ got the helicoil kit to fix them tho

coke! such a simple idea! haha

i soaked mine in Nitromors, and cleaned them up one by one with a drill; now that took bloody ages!

how did you get the badge on the front btw?

  • 7 months later...
  • Author

Not updated in a while, or much:

5 and a half years owning now!

Had a huge service this month, replaced all the oils, cambelt and water pump, and new lower arms.

Also found a new tailgate and fitted that this week, because the old one was a bit crusty:

IMG_3778_zpsa3163a2f.jpg

Got a rear aero wiper whilst I was at it to neaten it up a bit, still need to switch the spoiler over.

IMG_3799_zps6ab6594a.jpg

Some hints if replacing the tailgate;

The boot lid its self is only attached by 4 bolts, can remove with 8mm spanner. The harder part is all the wiring and components

To take the handle out you have to remove the locking barrel, and to do this you have to remove the metal clip from the back:

This like a lot of 6n2s was really corroded so didn't want to budge, took a good coating of WD40 and fiddling with a screw driver, once the clip is off I knocked the barrel through using a socket and hammer to push it through.

IMG_3784_zps9920fa8c.jpg

IMG_3786_zps052d290d.jpg

The third brake light is a pain, there's two grommets on the inside and these need to be levered with a screw driver to release the springs, pic:

IMG_3794_zps64304bc7.jpg

The other tool needed is a multi-spline to remove the locking mechanism, or could carefully do it with a flat head screwdriver. The wiring loom goes right back to the rear seat rest, so all the c pillar trim etc came out also :s

Been messing with camera also:

IMG_2264_zps4558c0bc.jpg

Thinking of selling this later in the year and getting a lupo gti in raven blue or anthracite grey, but just know I'm going to miss the 50+ mpg!

Create an account or sign in to comment

Recently Browsing 0

  • No registered users viewing this page.

Account

Navigation

Search

Search

Configure browser push notifications

Chrome (Android)
  1. Tap the lock icon next to the address bar.
  2. Tap Permissions → Notifications.
  3. Adjust your preference.
Chrome (Desktop)
  1. Click the padlock icon in the address bar.
  2. Select Site settings.
  3. Find Notifications and adjust your preference.