Skip to content

1995 - 5 Door Polo 6n

Featured Replies

Hi! Finaly Decided to make my build thread.

So, history is pretty rough for that car. Was about to go in scrapyard. Has been alot done mechanicaly. Before Polo i had 1997 Civic hatchback. I crashed it, and in unusual place - 100m from my home. So i bought polo out from my home owner who I'm rentin from. The rust bucket was lying here for a long time, that car used to owned by old lady.

Anyway, I'm starting to put my details of car and what plan to do.

Year - 1995

Engine - 1.3 ADX Carburetor :D

Milage - 66k (when i got, now its 68200 i guess)

Whats done -

Brake pads - fitted them in week after i got her. - They were completley worn

New timing belt, other belts, pulleys

Changed oil and filter

New spark plugs, Spark leads, distributor cap and rotor

Carburetor has been cleaned

Seat Covers on - Drivers seat was with alot of cigarette burns.

General interior cleaning - Interior was rotten + locked my cat in it for 2 days (i was wonderin where the hell did he dissapear)

Removed side impactors

Bootlid fixed somehow + debbaged.

Closed the rust holes at side skirts

rear right door handle fixed - was smashed in and stuck.

Mesh inside of grill - Didnt make any odds...

Camera hook :D

Keep the car :D

What has to be done -

Change tyres

Get oem exhaust end silencer - Other one broke off week ago

What i plan to do -

Get debagged grillie

Get different models bootlid

Get alloys

Foglights

Repaint In black

do Some work with interior

Get lowering springs + keep original

get different tail gate lights, probably other models

get angel eyes headlights

get a Welder kit

Paint rims in white colour

Here is pictures before:

IMG_0428.jpg

IMG_0425.jpg

IMG_0427.jpg

Some progress of work what i was doing.

Filled dent filler.

IMG_0431.jpg

IMG_0541.jpg

IMG_0547.jpg

IMG_0546.jpg

Camera hook - Dont laugh :D this toy migh come handy

DSC00084.jpg

DSC00083.jpg

Side skirt rust holes repair and other body repairs

IMG_0528.jpg

IMG_0529.jpg

IMG_0531.jpg

Made a mistake on this one - shouldnt use masking tape so close as resulted a small line :(

IMG_0533.jpg

Bootlid - drilled few holes, filled up with firbo paste, car dent paste and more fibro paste

IMG_0536.jpg

IMG_0537.jpg

IMG_0539.jpg

IMG_0542.jpg

This is how it looks like now

IMG_0577.jpg

IMG_0581.jpg

IMG_0576.jpg

IMG_0578.jpg

Edited by ricardo1989

  • Replies 13
  • Views 3.3k
  • Created
  • Last Reply

Top Posters In This Topic

Arent you just filling your car with....filler?

Could be wrong as i know nothing about bodywork

  • Author

I'm not a body specialist either, thats a filler, later i filled in with dent filling paste, otherwise the hole was way too big to fill in paste. Thats why i want buy welder kit, and re - do the job properly.

I'm not slating your work, its great to see you having a go :)

Fair play if your going to do it again properly but surely you shouldnt have bothered in the first place and done the job right first time?

  • Author

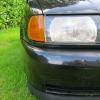
On a way back home today - was driving behind a car, and suddenly something flew white on my car with bang - couldnt understand, did driver afront of me hit a cat (atleast looked like a cat) or something solid... too bad i forgot to turn on my camera :(

IMG_0589.jpg

Ain't too bad, at least indicator's are cheap...

I got a set of amber indi's at ED38 for 2quid even though i offered the guy a fiver..

What a Plank :lol:

There are bargain's to be had... :)

  • Author

They are cheap yea, like 15 quids, or in a scrapyard can get cheaper.... but i might look for somethin like that http://www.micksgarage.ie/proddetails.aspx...79&pk=B386D

+ i plan to put headlights in a oven ;D... to paint inside of it.

Thank god that thing didnt fly on windscreen, but I'm now bit pissed i didnt take video of it

Edited by ricardo1989

  • 1 month later...
  • Author

Well well well, have some free time and spending my free time with this -

IMG_0668.jpg

Time to cook... on mark between 5 and 6 for 3 minutes...

IMG_0665.jpg

IMG_0666.jpg

IMG_0669.jpg

IMG_0670.jpg

This took me around 1h and 40 minutes i guess, to get headlights out >.< + had to deal with some rusty screws. Atleast it took only 25 minutes to put all together.

IMG_0671.jpg

High temp paint on with serval coats ^.^

IMG_0679.jpg

Both Assambled.

IMG_0680.jpg

IMG_0681.jpg

IMG_0682.jpg

IMG_0683.jpg

Brake drums and callipers

IMG_0657.jpg

IMG_0658.jpg

Wheel painting ^.^ on honda polar white colour

IMG_0677.jpg

IMG_0661.jpg

IMG_0710.jpg

IMG_0712.jpg

IMG_0715.jpg

IMG_0713.jpg

Will be back soon i guess....

  • Author

Got tyres for them

IMG_0720.jpg

IMG_0719.jpg

IMG_0721.jpg

  • 1 month later...
  • Author

SO, got bit different hub caps for nothin, as they were in crap state.

Didnt take before picture :( - forgot.

Squeezed out last primer.

DSC00147.jpg

Paint process

DSC00148.jpg

And clear lacequer

DSC00149.jpg

DSC00151.jpg

Finished product

DSC00154.jpg

DSC00155.jpg

IMG_0766.jpg

And so this is how my Polo looks like now, but I'm still not satisfied.

IMG_0762.jpg

IMG_0763.jpg

IMG_0764.jpg

IMG_0765.jpg

IMG_0767.jpg

  • 1 year later...

Your wheels look so much better than mine, I don't think I sanded and prepped enough. It would have been so much easier with the tyres off. Where did you get the badges to put on your hub caps, do you have a link?

  • Author

mm, I got them hubcaps from scrapyard, car doesnt look like that anymore :D. alot of little bits are changed :) I&#39;m just waiting for donor 6n2 polo.

Wheels Look Beautiful Dude!! I'm currently in the process of painting my steelies Matt White, the rust on these is unbelievable! Hats off too you. Is your polo lowered?

  • Author

Well, the wheeles now are bit buckled, + paint is ruined, since i was using them wheels to protect myself when i was workin underneath car. For the moment i prepeared car for MOT (changed bushings, couple brake lines, wheels, suspension, ect) anyway allmost all running gear, as it was gone.

can't do any work on it now either, as I&#39;m learning to drive trucks, for future job.

Create an account or sign in to comment

Recently Browsing 0

  • No registered users viewing this page.

Account

Navigation

Search

Search

Configure browser push notifications

Chrome (Android)
  1. Tap the lock icon next to the address bar.
  2. Tap Permissions → Notifications.
  3. Adjust your preference.
Chrome (Desktop)
  1. Click the padlock icon in the address bar.
  2. Select Site settings.
  3. Find Notifications and adjust your preference.