Skip to content

New Here MK3 Polo Breadvan project build thread

Featured Replies

Hi

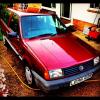
just got a Breadvan, so thought i would build a thread to show progress and discuss furture plans and get advice etc.

4f084b64f5fc11e1b0f022000a1de67b_7.jpg

upload photo

bf86fe94f5f711e18a3522000a1c86c8_7.jpg

picture hosting

its a genesis 1ltr 68k

okay so the plan so far..

clean the dirty engine bay!!! here it is, i will update this week once i have finished cleaning it. I'm looking for a mk3 golf 1.4 elbow if anyone has one so i can get rid of the pancake filter.

dirty_engine_bay.jpg

free image hosting

i have also got some clear front indicators, i wont bother photoing the parts but il take a shot once there on after the deep clean!

even though the standard wheels and hub caps are growing on me more and more i also have some wolfrace thurst alloys with centre caps. I'm missing one of the locking bolts though if anyone has one of those as well!!

wolfrace_thrust.jpg

upload photo

thats about it so far. il take some interior shots once its clean in there although it is staying standard apart form a cd player.

Parts wanted:

Splitter - I'm thinking mk2/mk3 golf or renault espace laguna or mk1 clio just depends what anyone/the scappy have.

mk3 golf 1.4 elbow

lowering springs

Edited by jprm89

  • Replies 40
  • Views 6.8k
  • Created
  • Last Reply

Top Posters In This Topic

  • Author

buying a 60/60 lowering kit this week, with 14 x 6 wheels what tyres would i need to fit them under? also advice on if il need to roll or just push in the arch lip would be good too. anyone got a new set of top mounts they fancy getting rid of?

14x6 with a 60mm drop might be tight with the rear arches if you're running standard profile tyres (60mm sidewall or so) Depends though, your offset could save you. I'm not speaking from experience though, I've never owned a breadvan! Front end, with the normal arches should clear alright even with balloon tyres.

As for the rest of the car, it looks like a lovely colour! Your engine bay won't take much to clean up, pull off anything that's rusted (filter cover/rocker cover) and strip the paint off (thinners/nitro mors/wire brush/wire wheel) and repaint in VHT black. When these parts are off you can clean up the rest of the bay.

Whilst you're painting things, I'd highly advise you pull off your bumpers, clean them and give them a coat of gloss black, it really transforms the car and prevents wasting time with all those chemicals that re blacken your bumpers for a short period of time.

And, while i'm at it, that's a lovely choice of wheels.

Damn gorgeous colour.

As for tire size, 185/50 R14's 60mm down will be fine on the front. As for the rear, you might just have to raise it up a tad.

Rake is good. 8-)

195/45 tbh for tyres!

Absolutly love the wheels!! Are they new (asin, could i go buy them now) or are they old refurbished or what?

  • Author
14x6 with a 60mm drop might be tight with the rear arches if you're running standard profile tyres (60mm sidewall or so) Depends though, your offset could save you. I'm not speaking from experience though, I've never owned a breadvan! Front end, with the normal arches should clear alright even with balloon tyres.

As for the rest of the car, it looks like a lovely colour! Your engine bay won't take much to clean up, pull off anything that's rusted (filter cover/rocker cover) and strip the paint off (thinners/nitro mors/wire brush/wire wheel) and repaint in VHT black. When these parts are off you can clean up the rest of the bay.

Whilst you're painting things, I'd highly advise you pull off your bumpers, clean them and give them a coat of gloss black, it really transforms the car and prevents wasting time with all those chemicals that re blacken your bumpers for a short period of time.

And, while i'm at it, that's a lovely choice of wheels.

yeah i am a little worried about the 60 drop at the back il get the hair dryer out and rol the arches a little.... or at least fold them in to start with. any easy way to raise it up a bit of a weitec 60/60 kit?

iv ordered some forever black to do the bumpers, side strips and door handle strips, the dull grayness is really annoying me!! i sprayed some wd40 in a vain attempt to see what it would look like with darker bumpers but it literally didn't do anything. their so dead it just sat on top of the bumper! how easy are they to get off? as i was trying to decide weather to take them off and do it for a better effect or just be very careful with the die and do it in situ

@RobWhite1992 i ideally wanted it to be 60/40 for some rake ... we'll see, i might end up getting a -40 spring kit if thats poss on -60 shocks? if the fold doesnt work/there are no other options.

the wheels are lush there old late 80's early 90's theyv just had a refurb though still in the box from when the last owner had them done. I'm missing one of the locking bolts for it any one got any idea where i could get another one? or ideas for me to steal a set from something else i was looking at the renault ones which look similar ... :ninja:

here is the update on parts @matt646 sold me his weitec 60/60 kit and kindly chucked in some top mounts and g40 bump stops.

Photo1_2.jpg

upload pictures

Photo1_1.jpg

picture hosting

I like the wheels man diffrent to what you normaly see .

  • Author
I like the wheels man diffrent to what you normaly see .

thanks I'm just trying to source some cheap tyres 185/14 and lower at the moment. il update you when iv got some on them!

  • Author

okay.. so little update finished cleaning the engine bay.. found the bits that have perished or just need replacing.

the list is... brake reservoir cap.. as mines broken in two.. the thread is stll on the reservoir and the top is only attached by a small piece of plastic at the back..

any one have one kicking around?!?!

crank breather pipe is perished and the manifold cover pipe is shabby but that wont be a problem once iv got an elbow on there.

so yeah .. sourcing tyres..for the alloys.. and a mate is lending me a couple of spring compressors so it will be slammed by sunder (fingers crossed nothing goes wrong..)

here is a before an after picture of the engine bay

before ...

http://s16.postimage.org/oryioi7ad/dirty_engine_bay.jpg

after

photo_1.jpg

free image hosting

and just a quick shot with the bonnet open.

photo_2.jpg

free picture hosting

bit of finance just to keep track of things.. not inc. cans of wd40 etc or cleaning products as i dont want to know how much that quickly tallys up to!!!

initial outlay for the car: £300

alloys: £40

60/60 inc. top mounts

and bump stops : £70

forever black: £15

clear side repeaters £15

-----------------------------------

total so far: £450

if i can get my tyres + fitment for 50 and under i will be happy as larry!

  • Author

didnt get a lot done tonight as the 5 minute job of changing the indicators took forever after a slight cock up.. i didnt line the right indicator up properly so it didnt slot in properly and got wedged so the washer 'bottle' more like VAT had to come out.

wouldnt have been hard but couldnt find a 10mm socket. bad organisation on my part...

but here she is.. no indicators

photo_5.jpg

picture hosting

side by side

photo_4.jpg

photo upload

fitted... looks a bit weird in my opinion.. might just be different or because the bonnets up.. il take another shot tomorrow when i dont need the flash and the bonnets down.

photo_3.jpg

upload pictures

  • Author

okay..

stil haven't got my compressors yet, may have to give in and rent some, so shes still sitting high at the moment

today hasnt been lost though. inside is not not only clean but now doesnt smell smell like an old boat! shampood all the seats and parcel shelf. shes got a bit of a leak. think its just the cracked left cluster.. any one know of any other places breadys normally leak from if waters getting in the boot?

took a picture of the front with the bonnet down. glad iv done the indicators now looking much nicer.

photo_12.jpg

upload photo

toyed with the idea of using forever black on the bumpers in situ but knew i wouldnt get enough of the bumpers blacked, especially on the front. the rear was left on though.

looked up on some other forums the best method for doing forever black. i chose to use a really strong cleaner i used on the engine bay its 100/1 dilute!! then meths as i couldnt find ipa cleaner in b&q or hellfrauds seemed to work okay at cutting through the grease etc. then the cleaner supplied that smelt a bit like bubble mixture (that kids use to blow bubbles), and then the forever black! a bit long winded but iv heard it can go streaky other wise.

off came the front bumper.. the underneath was dirty as expected!

photo_10.jpg

photo hosting

quick clean

photo_6.jpg

picture hosting

bumper before hand

photo_8.jpg

free picture hosting

i opted to use a rag instead of the applicator on the top of the bottle which is like a liquid shoe polish bottle.

first coat looked great when wet but just soaked right in and went really gray and streaky i was a bit worried!! but a couple of coats later and it looked like this! the strips and rear were no where near as bad a the dusty white front bumper and looked good after the first coat but they got a second anyway.

photo_9.jpg

upload picture

didnt have time today to put it back on though :(

sorry the pictures so bad in the dark here the rear though

photo_7.jpg

free picture hosting

i forgot to use gloves and my hands were covered!! i was pleasantly surprised though when it came off really easy with a bit of hot soapy water.. although did leave my hands looking like a 14yr old goth...

photo_11.jpg

upload picture

that came off with a bit of nail varnish remover.. and back to normal.

over all rating id say is an 8 as its a fair amount of hassle... but the results are good although its not cheap so guess you get what you pay for etc. the test of time will be the real review though.

Robbodiniho from club polo is sorting me a new brake reservoir cap, thankyou.

Edited by jprm89

Looks good man, really like the choice of wheels!

I see your from Southampton, you should come down to the next Sovag meet at empress of blandings between cadnam and romsey, be good to meet you :thumbsup:

  • Author
Looks good man, really like the choice of wheels!

I see your from Southampton, you should come down to the next Sovag meet at empress of blandings between cadnam and romsey, be good to meet you :thumbsup:

sounds good, when is it? do bournemouth have any meets as I'm down there a lot too.

Sovag is first Monday of every month, 7pm. Not much goes on in Bournemouth but there's tidy vag in poole. On the second Sunday of the month at 2pm at dfs

  • Author
Sovag is first Monday of every month, 7pm. Not much goes on in Bournemouth but there's tidy vag in poole. On the second Sunday of the month at 2pm at dfs

Sounds good il try and get them both next month or at least the Southampton one!

Sovag is first Monday of every month, 7pm. Not much goes on in Bournemouth but there's tidy vag in poole. On the second Sunday of the month at 2pm at dfs

Sounds good il try and get them both next month or at least the Southampton one!

Yes Bournemouth/poole and christchurch have regular meets.

I also read you need tyres, give me a size and i'll see what i can do part worn wise, i work in Romsey at a garage so can fit too.

  • Author
Sovag is first Monday of every month, 7pm. Not much goes on in Bournemouth but there's tidy vag in poole. On the second Sunday of the month at 2pm at dfs

Sounds good il try and get them both next month or at least the Southampton one!

Yes Bournemouth/poole and christchurch have regular meets.

I also read you need tyres, give me a size and i'll see what i can do part worn wise, i work in Romsey at a garage so can fit too.

well for the back ideally 165 14's to get under the arch.. on the front anything up to 185 14's please.. that would be great if you could sort me some as I'm in romsey fairly often anyway, thanks dude.

  • Author

okay, heres a little catch up...

so here is the bumpers after the forever black back on the car.

photo_1_1.jpg

anonymous picture upload

just another angle because i thought its nice..

photo_3_1.jpg

temp img uploader

a shot from the back .. my family were down the dump and saw the muffler tip so got it for me as a bit of a joke! iv put it on just to see if it would lower the tone and quite like it now :)

photo_1.jpg

keep photos online

put the photo through a filter

photo_4_1.jpg

keep photos online

the badges have come off front and back and have been cleaned. before primer, enamel spray and lacquer

photo_2.jpg

instant image upload and sharing without account

photo_5.jpg

instant image upload and sharing without account

primer time

photo_3.jpg

4free image uploader

gave it a light sand and the paint went on .. 2 coats of primer.. 3 coats of paint

photo_16.jpg

temporary image hosting

the first coat of lacquer is drying atm...

oh and these have been laying around the house for a decade or so..

photo_2_1.jpg

instant image upload and sharing without account

italian air horns... iv already been told off by a mate as he reminded me that this is a polo .. not a saxo.. haha

photo_5_2.jpg

where can i host image for free

they are soo loud.. looking forward to using them on some unsuspecting mates.

  • Author

okay.. just a quicky.. lowered at the back now.. front will be tackled early next week!

big thanks to a mate who did a lot of the work :) think il have to give his bay a deep clean and get a few rounds in to say thanks.

Edited by jprm89

  • Author

Bump..

New tyres £50 for four Yokohama a509 2 are new 2 are as new very little wear.

Anyone care to place a bet on if the 175's combined with the ?offset of wolfrace thrust alloys will fit under te arch with a -60mm drop?!?

Also fitted a temp badgeless grill while the paint/lacquer hardens. New left rear cluster so fingers crossed that stops the leak too

  • 2 weeks later...
  • Author

okay so a bit of catch up here photo wise..

heres what we are working with here lowering the backs..

5875CF83-C6E6-4683-A7FF-9D5EDCB9829B-125

resulting in ..

D0AEAC7F-C511-42EE-BBB5-48BE7B22DB61-125

looks shabby with out the trim on but you can see the sag a bit ..

fully 60/60 with the badgeless grill

D3BD8E35-EE39-41B9-AC5E-D4B67DFFD2B1-123

686CACAC-6DC4-4F13-9998-28FBDEB6CF8D-123

E7F8E399-7AC1-436A-A539-FC23108F1392-123

No way that can be a 60/60 drop, surely?

  • Author
No way that can be a 60/60 drop, surely?

apparently so.. the kit wasnt new though. what drop do you think it is?

  • Author

just catching up again :)

heres the tyres...

70B2C213-29E7-4E5F-859D-1E339351838B-123

48457256-A4F9-404B-BA66-7870A0585D2B-123

just a nice shot..

AC0BBD3B-2E95-461C-8F80-0FA0E1C69523-123

rear badge back on now the lacquers dried nicely

1581A34B-1CF3-4B24-9D41-6B94E9FCCC5E-123

and a close up..

0BCAAD64-D9AC-43C8-99F9-D994D764C728-123

think iv done an okay job?!

and the front badge and grill back on fed up of debadged and mufler tip so its back to stock apart from the drop :)

35628087-7E4B-4B61-989B-408AA18A8E73-123

looks like a 40mm drop that, needs another 20/30 on the front but the rear looks ok as it is

dont worry about the claimed numbers, people always say are you sure thats 70mm to me but i know mine needs lowering still, I'm not bothered about the figure i just want it to look good

like i said another 20-30mm will look good!

Edited by JordonVW

Create an account or sign in to comment

Recently Browsing 0

  • No registered users viewing this page.

Important Information

We have placed cookies on your device to help make this website better. You can adjust your cookie settings, otherwise we'll assume you're okay to continue. Terms of Use Privacy Policy Guidelines

Account

Navigation

Search

Search

Configure browser push notifications

Chrome (Android)
  1. Tap the lock icon next to the address bar.
  2. Tap Permissions → Notifications.
  3. Adjust your preference.
Chrome (Desktop)
  1. Click the padlock icon in the address bar.
  2. Select Site settings.
  3. Find Notifications and adjust your preference.