Skip to content

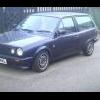
Richmans Mk 2 bready helious blue:)

Featured Replies

hello guys

after owning my mk 2 for nearly 2 years it had come to the point of needing welding ( dam filler neck ), it also had a few small problems that i kept meaning to do but never got round to, but any heres how it started:

utf-8BSU1BRzAwMTcuanBn.jpg

utf-8BSU1BRzAwMTkuanBn.jpg

i drove it around for around 3 months when the clutch went:( i managed to get it done on the following sunday, sadly this was the start of of about of a chain of gearbox changes, i had basically swapped the original box for one that whined so bad you had to laugh, the next i think had a bad lay shaft bearing as it kept bending the release guide plus it sounded like a chainsaw at idle lol. i did fit another but cant remember the fault with that one, in the end i slapped the original one back in and just but up with whine in 2nd an 3rd plus the sledge hammer gear change required to get second.

ok so heres how it stood when i brought a bora and parked the bready up for some loving:

Breadvan003.jpg

Breadvan005.jpg

Breadvan001.jpg

ok so at this point the plan is:

- finish re-building gt engine + fit

- Replace outter sill on drivers side

- inspect car for any more rust

- fit new front wings and modify to take more lows

- re-seal front calipers

- Buy/fit bonnet lfters

- polish wheels

- Source/fit new interior

- Try to find way to raise engine

- repair rear valence

- Replace front valence

- Prep surface rust on bodywork for paint

- Source all the odd bits i need, parcel shelf, new headlight etc

- and the priority at the moment, buy a good mig set

Tbh there's probably more but hell if i can remember right now, the basic principle of this whole mini resto/build thread is to turn the bready in to a much more reliable and tidier car.

Model: polo match

Engine: 1043cc

Suspension: front: phil j coilvers rear: phil j shocks and springs

Brakes: vw2 up front, rears standard

Wheels and Tyres: fiat 126 alloys

Exterior Styling: bump strips removed, overall standard

Interior Styling: standard

ICE and Security: no ice other than a poor set of sony 6x9's in the boot ( fitted by previous owner )

Cheers for ready guys, ill update soon but be warned this is going to be a slow and steady project:)

any advice is welcome:)

post-39314-1363717971_thumb.jpg

  • Replies 16
  • Views 2k
  • Created
  • Last Reply

Top Posters In This Topic

Posted Images

Looking good Rich nice to see a build thread finally

What's wrong with your old wings that your putting new ones on

  • Author

hello

the passenger side has took a few knocks due to wheel contact and has mangled the lip. plus both have rust on the top of the archs, going to have to grind them back and see if they are save able:(

we will see lol

btw I've seen your build thread, some amazing work going on there:)

Thanks mate an I'm only in Corby so if you ever need help or any thing machining or making let me know ;)

  • Author

ah kl kl I'm in corby my self, thank you:)

Ah nice for some reason I thought you were in Wellingborough or something

  • 2 weeks later...

those wheels look lovely on it. i have a picture of this saved on my computer

Helious blue FTW!!!

  • Author

Hello guys

Glad to hear you like the wheels, I get some pretty mixed responses about them, personaly I love them although I'm a bit gutted they are only 5j

Gotta love a bit of helious blue, lovely colour when its all polished and waxed

I'll have a update for you all in the next week hopefully:)

Cheers

Kyle

  • 3 weeks later...

Looks awesome pal

its my breadys twin :)

  • Author

hello guys,just a small update for any watching:)

haven't spent nearly as much time on th bready as i wanted too lately but I'm progressing. The biggest problem is my work area, its only a single garage basically the plan is to do all the welding/ body repairs one side at a time what tbh is just a pain but it needs doing so here we go:)

Heres the old gal sitting on her axle stands feeling sorry for her self, i removed the axle and threw it in the shed ( suspect its a bit twisted as tracking always showed that the rear passenger side had excessive toe out), removed the tank, i plan to scrap this for a new one that i can coat it to prevent rust, next is to remove the front wing and try save it, obv i need to spend as little as possible so any could make will be made lol. please ignore the messy garage;)

IMAG0712.jpg

ok so once i had her up in the air with the back end stripped i quickly checked for rust, heres what i found

IMAG0714.jpg

IMAG0716.jpg

IMAG0717.jpg

IMAG0718.jpg

IMAG0719.jpg

IMAG0720.jpg

over all not to bad i dont think all looks repairable/replaceable, at first glance before i took the car off the road this side a appeared to be the worse so fingers crossed once i have soreted the filler neck area it should be clean sailing:)

although now I'm left a bit lost as i cant really go too much further with out buying my self a mig set so if any happens to be selling one drop me a pm:) alos if any one has any advice or tips for doing this repairs it would be much appreciated:)

cheers

kyle

Edited by Richman711

if you think your garage is messy and tight you should seriously see mine lol

Good progress another place to look for rust that I found mine was real bad is at the very end of the rear chassis rails right where they come to meet the rear valance mine was so bad here and its quite a structural point especially as your toe eye is attached to that area

  • 3 months later...
  • Author

hi guys

well the poor bready has been sat in the dust for too long now, due to working silly hours i just couldnt drag my sorry arse out and into the garage.

ok so a few weeks back i decided i really needed to get the ball rolling again so i started looking for a good mig set, found a clarke 151en new on the bay for £236 ( i was very happy with the price ), i then got a y size bottle of argon light from boc for £72 so now I've got the welding set up and running :)

20130727_150822.jpg

and the mess lol, tbh i hadnt done much to the car so i really needed to started getting the old sill off so i began to drill all the spot welds out ( omfg why so many!?!??!! ) on the lip of the sill.

20130727_150711.jpg

I've got pretty much all the spot welds drilled, although I'm sure it will need some persuasion but i think for now the lip can be left alone, I'm planning to make a cut 2 inch down from the door in the sill and cut the new panel down to size bit by bit and then seam weld

20130727_150631.jpg

belive it or not this was the main reason to pull it of the road ( its more rotten than it looks ), I've started to clean up several bits of surface rust that i had noticed once it was off the road.

any way cheers for looking, it feels good to finally be making progress again, I've got a week off soon so hopefully i can get a lot done then

  • Author

Hi guys

went out this morning and decided to carry on with the bready, started by finally cutting off the outer sill what went pretty well, although I'm not looking forward to welding all the spot welds again lol.

20130804_162040.jpg

20130804_162106.jpg

and then I noticed this:((

20130804_162128.jpg

20130804_162153.jpg

doesnt seem to bad overall but um not looking forward to trying to remove that dam pipe, I'm planning to have another good look through mark_crox's build thread again as I know he has talked this same problem.

things to do:

Straighten lip in sill and tack back together as the two panels have split at certain points and I'm worryed that this may be a spot to cause rust. Any advice?

Remove rusty pipe and replace with some kind off rubber hose?

Try get access to inside of rear quater to clean of surface rust

Patch up lip at filler neck area

refit sill

cheers for looking:)

I had the same rusty tube in mine. Just yanked it out... I cant tell you about long term effects because it has only been out for a few months. the hole that went to the filler neck is now filled in though so road muck doesnt get inside the car

ahh the pipe of doom!

yup took mine out and replaced it with a plastic one...

  • 4 weeks later...
  • Author

Hello again guys.

well as normal progress is slow but at least there is progress lol ( sort of )

I started by cutting off part of the sill lip as it was bent/corroded, all as planned except I thinned the floor pan a bit as I cut off the lip, no problem I thought I could just weld a small panel of the floor back in and bingo sorted.

And then I noticed to my amazement that the inner sill is crumpled, the pics dont show it well at all but basically the half way up the inner it has bent out while the bottom of the inner sill has bent up with the floor. Basically its compressed from what appears to be from being repeatedly jacked up on the lip of the sill, I'm pretty surprised at it tbh.

20130827_183456.jpg

20130827_183411.jpg

20130827_183327.jpg

my plan of attack is now to get a panel cut off another mk 2 as shown by the masking tape, and attempt to remove and replace that section of inner sill and floor.

also has any one ever removed the square protruding sections( jacking points???) of the floor that sit just behind each wheel? Need to really remove mine

P.s ignore thebpoor welding shown in the pics

cheers

kyle

Edited by Richman711

Create an account or sign in to comment

Recently Browsing 0

  • No registered users viewing this page.

Account

Navigation

Search

Search

Configure browser push notifications

Chrome (Android)
  1. Tap the lock icon next to the address bar.
  2. Tap Permissions → Notifications.
  3. Adjust your preference.
Chrome (Desktop)
  1. Click the padlock icon in the address bar.
  2. Select Site settings.
  3. Find Notifications and adjust your preference.