Skip to content

1989 Breadvan Build Diary

Featured Replies

Hi Guys

Thought i`d pop up some progress photos of my breadvan project,

I`ve always been after another polo since i sold my coupe a couple of years ago so have been casually looking about for

a new project,

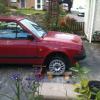
Then my dad finds a cherry red m2 breadvan in a carpark out the back of his neighbours house a couple of days later i bought it for £260

with the intention of tidying it up and using as a daily driver,

We got it started and popped it in for an mot which it failed on rust on both rear sill ends and the dreaded rust behind the fuel filler pipes a tyre and emissions (not bad for a 24 year old car)

bready6_zps055963a0.jpg

bready3_zps2f2190fe.jpg

bready2_zps573cd7f0.jpg

bready5_zpsfbb035d8.jpg

We had the option of patching her up for mot or stripping her apart and doing it properly,

We chose the latter

The front lower valance was badly bent which we have straightened just needs a light skim of filler and some stonechip/paint

polo2_zps827a545b.jpg

Then dropped the rear beam,fuel tank and suspension out the way so we can see what we had (turns out the fuel filler neck had rusted through as well)

photo19_zpse0c5f826.jpg

photo18_zps743fcb21.jpg

photo15_zps0fe1ee72.jpg

  • Replies 5
  • Views 1.9k
  • Created
  • Last Reply

Top Posters In This Topic

  • Author

So shes pretty rusty underneath but all is not lost as my mate is an awesome welder fabricator,

We thought it was easier to fix the rust by removing a section of the outer 1/4 panel for more access

photo14_zps44a76f25.jpg

This also meant we could replace the totally knackered breather tube

photo13_zpsfa5a1039.jpg

It turns out the section behind the filler neck is really complicated and is made up of about 4 different layers of metal which had to be cut out and replaced

one layer at a time

photo10_zpsefa8a8d0.jpg

photo9_zpsb21dbe1e.jpg

photo8_zpsa47046ae.jpgphoto7_zps4be8e3f0.jpg

photo5_zpsc2113021.jpg

photo4_zpsa7943248.jpg

photo3_zpsfaff0675.jpg

2_zpsa3d08d7b.jpg

Had to do the same sill repair on my bready

Fully agree that it's a nightmare due to all the layers

Looks like you're heading in the right direction with it though :)

nasty job to have to do ...mines a bit frilly in there , but i cba with it lol

  • Author

Hope this isnt to boring for you guys??

This is as far as the welding has got because the weather has been awful since

So i`ve cracked on getting other bits done,

Powdercoated the rear beam and fitted polybushes

beam1_zps283a5e2e.jpg

Made blanking plates for the box sections on the frone shocks and welded them in then powdercoated

strut_zpsa73fa17f.jpg

Removed the fan shroud and powdercoated and replaced the original sticker

photo21_zps0a06cd7a.jpg

photo20_zps26267586.jpg

Couldnt resist giving her a bit of a polish

polo_zps23b8c8b7.jpg

And trial fitting a set of alloys i have

polo3_zpsbaafb542.jpg

The wheels won`t be staying as i`ve ordered a custom made set of 14" minilites and my welder friend cant resisit

making up some banded steels for me

Good to see the panel work there, that is the No.1 problem area on these cars, they all go there and whilst its a bit scary, its enlightening to see more pics of how to sort it.

Create an account or sign in to comment

Recently Browsing 0

  • No registered users viewing this page.

Account

Navigation

Search

Search

Configure browser push notifications

Chrome (Android)
  1. Tap the lock icon next to the address bar.
  2. Tap Permissions → Notifications.
  3. Adjust your preference.
Chrome (Desktop)
  1. Click the padlock icon in the address bar.
  2. Select Site settings.
  3. Find Notifications and adjust your preference.