Skip to content

Girl Friends 6n Project

Featured Replies

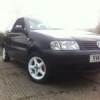
Girl friend would not stop nagging at me to find her a good car for her first car so i jumped at the opportunity to pick this up for £160

IMG_0260_zps2a61768e.jpg

Admittedly it is a bit 'dog rough'

IMG_0375_zps043eb247.jpg

IMG_0378_zps729aac4a.jpgIMG_0380_zps360176fa.jpg

Last owner decided to scratch his name into the peeling lacquer on the roof

IMG_0381_zps841db21f.jpg

And here comes the rust

IMG_0382_zpsd5a858a4.jpg

IMG_04161_zps03c150bf.jpg

Began to start treating it with Ku-rust hope it will help stop it, any ideas what would be better here I'm thinking new arch? or fibreglass / filler?

Let me know what you guys think, things to do at the minute:

Sand back paint as most panels have lacquer peel or large sections of rust bubbling,

Cure rust with rust killer,

Patch passenger side sill and drivers side rear arch where rust has rotted holes,

Respray - Cant decide to stay with the standard red or go metallic blue,

Fix / Fit central locking (unsure if it has it or not),

Refurbish wheels respraying them silver,

Remove rubber strips down each side of the roof and replace with plastic ones from a 6n2,

Service the engine and fix leaky power steering, looks like someone has put some kind of putty over the banjo where the pipes bolt onto the power steering rack, last owner bought the car with this problem,

Fit clear indicators to the front and possibly 6n2 rear lights,

Want to get some VW mud flaps for the back of the car.

Any other ideas for my 'never-ending' list feel free to reply.

Update soon to follow once i get some more pictures.

PS can anyone shine me some light as to how the heck i take the rear bumper off i have removed the 4 bolts under the boot lid and the two from each arch but seems to me like something is still holding it in the middle of the bumper, i really need to buy a Haynes manual!

  • Replies 23
  • Views 3.7k
  • Created
  • Last Reply

Top Posters In This Topic

Most Popular Posts

  • Looks nice!! Bet you can't wait to get it back together now! I wouldn't let my girlfriend drive it after all that hard work

  • Orange peel shouldn't be a problem as long as there's enough paint just sand it then machine polish it, loads of good guides online. I'd replace my girlfriend's hairspray with impact adhesive if she

Hey there, looking forward to the updates! The thing holding the bumper on in the middle are plastic 'spike' looking clips, there are 4 along the middle. You just need to give it a good heave and it should come free, as long as all the bolts are out

  • Author

thats great thanks i thought it may be the case but i didnt want to break it haha

  • Author

Update - been and done some more work to the car - sanded and primered the bonnet and drivers wing (just been sprayed with aerosol for the moment until I get some cellulose ordered then I'll wet and dry the whole car and spray it all in one go. Also sanded down the drivers door and treated the rust using ku rust then also sprayed the door in grey primer. Then I attacked the drivers side arch with the grinder to reveal more rust than i had hoped for next step is going to be to sand and spray the rear door and the back 1/4 then weld a new arch in.

Photos to follow when I get home

  • Author

As promised -

photo%202_zpsfm0eyc6r.jpg

photo%201_zpsk5nwrytc.jpg

photo%203_zpseattbsoa.jpgphoto%204_zpskyqae7hp.jpgphoto%205_zpsxfeqebhr.jpgphoto%201-2_zpsyfvjzwch.jpgphoto%202-2_zpsxqfbdua3.jpgphoto%203-2_zpsi13b2thh.jpgphoto%205-2_zps30y2kdhn.jpg

More updates next week will hopefully get the doors and bumpers off next week

Good project mate! Much to do underneath?

  • Author

Underneath is like new had a look at it up on the ramp before I paid for it and everything is covered in power steering fluid so no rust! Haha

  • Author

Finally got my self to halfords and bought a Haynes manual i think it is going to come in very handy when i begin to diagnose the central locking as i think there may be either a bad connection or a broken fuse or the main pump may be broken as you cannot hear it whining when you turn the key like you can in my 6n2. More updates on friday night as I'm hoping to spend a whole day on her.

Bye for now.

I'm not sure if that spec has central locking. It looks like a 1.0l which had no power steering, electric windows or central locking :/

  • Author

It's a 1.4 but the basic one it has manual windows and had a look in the boot today and it doesn't have central locking either so will be a future upgrade I can't decide weather I should buy a cheap electric kit or salvage a standard polo kit

  • Author

Doesn't feel like iv'e made much progress today but non the less here is some photos to keep this thread alive:

IMG_04311_zps4f4be1df.jpgIMG_04321_zpsfa7ed48d.jpg

Removed both bumpers and side repeaters, then primered the rear drivers side door.

IMG_04341_zpsc6999d8b.jpg

Then sanded the tail gate and primered it.

Next step is to order a new back arch so i can fix the big hole. Then to move onto the other side.

  • 2 weeks later...
  • Author

Went and got some more done yesterday didnt get many pictures though,

IMG_04391_zps0049c247.jpgIMG_04401_zpsb60644a8.jpg

Began smoothing the badge hole on the tail gate, anyone got any tips for this i keep getting a dip in it when i sand the filler back, also removed bonnet and passenger wing as well as peppered the roof and the rear bumper, thinking of relocating the number plate and filling the recess on the tailgate with fibre glass or something any one have any idea where i could put the number plate?

Arch arrived today so will hopefuly get that welded in place this weekend then hopefully wont be long until i start to spray some parts up.

IMG_04451_zpsbd9d727b.jpg

Thanks for looking guys, check back in a couple of days for another update.

Probably should have welded a circle plate in the badge recess, would have made it easier to smooth and won't run the risk of it cracking and falling out. But try skim the filler all the way across not just in the circle part

  • Author

yeah i thought about that but I've primered in behind the filler so I'm hoping it should have a pretty good grip, its getting there now just one tiny little dip left

  • Author

It may seem that I have given up on taking photos but I haven't I just keep forgetting! was there again on sat, got the old back arch cut out and the new one welded in and filled over, also started work on the passenger side sill and rear door using some offcuts from the new back arch, also been to the scrap yard and acquired a new passenger side headlight, a front grill and got some clear front indicators! really can't wait to get the car sprayed up and back together, however I have some bad news, took the passenger side wing off and i think the car has been involved in an accident at some point as the wing and door has a large amount of filler in it where it appears there has been a big scrape, not to worry though it has been finished pretty well, ill just tidy it up a little bit as the bump strip looks as though it wasn't removed when this work was carried out so some of the filler covers a little bit of the bump strip. Whilst at the scrap yard I found a 1.4CL so if anyone needs anything give me a shout and i will do my best to get what you are after and will be able to post it, it has central locking, does anyone know how difficult it will be to remove this and fit it to my polo,

Thats all for now.

yeah i thought about that but I've primered in behind the filler so I'm hoping it should have a pretty good grip, its getting there now just one tiny little dip left

When applying filler it should be to BARE METAL...

  • 1 month later...
  • Author

A lot has happened since last update, haven't had the time to update haha. I'm now starting to see the light at the end of the tunnel, i finally feel like the last three months have been worth the effort.

So where to begin I ask myself,

Well I've now finished the body prep work here's a pic of the rear valance:

IMG_04641_zps7ee3edd4.jpg

Not in the best condition so might get some 16v bumpers if i can find some going cheap (message me if you have some for sale, I'm in Penrith,Cumbria)

Went to my local Machine Mart and bought myself a new toy

IMG_04731_zps8d3c7018.jpgIMG_04741_zpsbd138a9e.jpg

Was only £30 thought was worth it for the big job I had on my hands.

So i got there! Started spraying the car, here's some of the parts after they had been primered.

IMG_04711_zps7151b2b7.jpgIMG_04701_zps29cf8a01.jpgIMG_04721_zps573fc876.jpg

Then Yesterday I began spraying the car it's self, only got the etch primer on but looks goo so far:

IMG_05001_zps442693d7.jpgIMG_05011_zpsedd6a9e1.jpgIMG_05041_zps18c9c221.jpgIMG_05021_zpse876e161.jpg

IMG_05031_zpse9f1bae1.jpg

Also looking for some strips that run down the gutter on either side of the roof from a 6n2 as i think they look better than the black rubber ones on a 6n.

Today i got the front valance and two wings sprayed red all they need now is a light wet sand with some 2500-3000 grit and a final coat.

IMG_05051_zps4f36dfce.jpgIMG_05061_zpsf05ec3cc.jpgIMG_05081_zps8f204ab0.jpg

So let me know what you think of it so far, anyone who has a pair of 16v bumpers for sale please feel free to get in touch also anyone with a pair of roof strips off a 6n2 please get in touch.

Thanks for looking.

Looking forward to seeing the end result!

Like seeing how DIY paintjobs come out. All mine seem to have come out very well but only done small-medium size objects not a whole car! Seems good so far.

  • Author

done some small bits in the past mainly bike parts and car wheels hoping it will all come out pretty good will defiantly keep you posted, should be able to see the end result in a week or two.

  • Author

So finally the day has come! Not quiet there but the car is now red again!

Here's the bumpers after primer

IMG_0519_zps9dd60f83.jpg?t=1417296025IMG_0520_zps46ed1b42.jpg?t=1417296060

And the car

IMG_0521_zps5d8af6c8.jpg?t=1417296035

And finally the moment i thought was never coming.

IMG_0522_zps100186d0.jpg?t=1417296039

IMG_0523_zpsdc23b131.jpg?t=1417296073

/\First coat of Red :D

IMG_0524_zps5a7c7d90.jpg?t=1417296097

IMG_0525_zps47f2b8ca.jpg?t=1417296123

/\ End result (almost)

Some other parts that are now finished.

IMG_0526_zps18fb7118.jpg?t=1417296173IMG_0527_zpsb4fb4149.jpg?t=1417296135IMG_0528_zps3ee8c697.jpg?t=1417296169IMG_0529_zps9ff11742.jpg?t=1417296203IMG_0532_zpsb178924d.jpg?t=1417296223

And some cheeky over head shots 8>T

IMG_0530_zps3834572a.jpg?t=1417296167IMG_0531_zpsd59cd0ce.jpg?t=1417296226IMG_0533_zps4a3eb0e0.jpg?t=1417296232

Next on the list:

  • Some final little bits to spray.
  • All bodywork and panels to rub down with 5000 grit.
  • GOOD polish.
  • Reassemble.
  • Fix a minor mechanical issue.
  • Start Modifying 8>)

Parts on order:

  • New radio
  • 6n2 rear lights
  • fresh set of steel wheels

Thats all for now, let me know what you guys think.

Looks nice!! Bet you can't wait to get it back together now!

I wouldn't let my girlfriend drive it after all that hard work :lol:

  • Author

I really cant I'm going to have to find something to occupy me for the next few days i dont want to do anything too soon and damage all the paint. Bit gutted about the orange peel that has occured I'm going to have to get the machine polisher and t-cut out next weekend before i reassemble i think. if all goes to plan it will be back together next weekend (fingers crossed) went back today and took off all the masking tape and cleaned the windows up looks alot better when you can see more than just a red shell haha. Iv'e told her she will get her ar5e kicked if she scratches it!

Orange peel shouldn't be a problem as long as there's enough paint just sand it then machine polish it, loads of good guides online.

I'd replace my girlfriend's hairspray with impact adhesive if she scratched something after all that work :P

  • Author

yeah I've had a good rummage on the web borrowed a friends machine polisher and ordered some rubbing compound to rub it down with so will give it a bash this weekend or before if i get time!

Create an account or sign in to comment

Recently Browsing 0

  • No registered users viewing this page.

Account

Navigation

Search

Search

Configure browser push notifications

Chrome (Android)
  1. Tap the lock icon next to the address bar.
  2. Tap Permissions → Notifications.
  3. Adjust your preference.
Chrome (Desktop)
  1. Click the padlock icon in the address bar.
  2. Select Site settings.
  3. Find Notifications and adjust your preference.