Skip to content

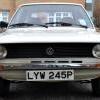
'87 Breadvan Ranger

Featured Replies

The cars a 1.3 ranger with a weber dmtl

TA coilovers

ats classics

The car came from the factory in tornado red and the previous owner to me had it painted very poorly in purple i got it almost 2 years ago now for just over £700 which was probably to much for a rusty bready, anyhow I've always had the thought of respraying it my self and its slowing happening but now i have the task of rear arches :-( to say they need replacing would be an understatement

this is the night i got it

18126415854_6f23840cb8_z.jpgDSC_0562 by lukeherbert1, on Flickr

18561265448_bcb53d6792_z.jpgDSC_0764 by lukeherbert1, on Flickr

then i painted the wheels black :|

18722757636_06d2f8130d_z.jpgDSC_0783 by lukeherbert1, on Flickr

then i cut the springs and fitted some classics and painted the front for a halloween meet

14018730066_d138dde060_z.jpgUntitled by lukeherbert1, on Flickr

i then started sanding off the purple to reveal the red and at this point the car was on -80mm lowering springs with -20mm lower spring seats

18561475080_3340f27244_z.jpgUntitled by lukeherbert1, on Flickr

and then shortly followed with coilovers all round

then started the prep for paint with new wings a bonnet

18749342045_d80b7d3b06_z.jpgUntitled by lukeherbert1, on Flickr

18561608290_d879b3aec9_z.jpgUntitled by lukeherbert1, on Flickr

18561607010_532f213ce4_z.jpgUntitled by lukeherbert1, on Flickr

Edited by lukeherbert

  • Replies 52
  • Views 6.6k
  • Created
  • Last Reply

Top Posters In This Topic

Most Popular Posts

  • lukeherbert
    lukeherbert

    fuel filler area is almost done now Untitled by lukeherbert1, on Flickr

  • lukeherbert
    lukeherbert

    took 3 days of work and got the polo in the garage and cracked on with the intention of painting it the following week when i go of for training as i can paint it for free but hat never happened and i

  • lukeherbert
    lukeherbert

    and finally the rest of the car is painted! but I'm going to redo the bonnet and n/s wing Untitled by lukeherbert1, on Flickr Untitled by lukeherbert1, on Flickr Untitled by lukeherbert1,

  • Author

this is when it gets exciting i took it to college and painted some bits

18128663903_0042386bd0_z.jpgUntitled by lukeherbert1, on Flickr

18751788661_a4c7c620a3_z.jpgUntitled by lukeherbert1, on Flickr

18561546938_7c8f47f7b1_z.jpgUntitled by lukeherbert1, on Flickr

18749210215_00c3d59ca4_z.jpgUntitled by lukeherbert1, on Flickr

18749199255_3b1ee9f281_z.jpgUntitled by lukeherbert1, on Flickr

18722895866_3454d62a19_z.jpgUntitled by lukeherbert1, on Flickr

18563018629_a2d57eafdf_z.jpgUntitled by lukeherbert1, on Flickr

and heres my next challenge

18561380768_55a6c995e1_z.jpgUntitled by lukeherbert1, on Flickr

turns out a mk2 golf repair panel is perfect

18561463720_f03f9bd32d_z.jpgUntitled by lukeherbert1, on Flickr

sorry for the picture whoring :D

Edited by lukeherbert

Good progress, nice and low.

How are you finding the TA coilovers?

Lovely thread

  • Author

Good progress, nice and low.

How are you finding the TA coilovers?

The fronts are quite nice but the rears are way to soft

coilovers not too rough over bumps?

the standard ta technix spring and shock kits are horrific so I was put off the coilovers. I'm looking for something not much harder than standard really for comfort

  • Author

coilovers not too rough over bumps?

the standard ta technix spring and shock kits are horrific so I was put off the coilovers. I'm looking for something not much harder than standard really for comfort

No the ta coilovers are completely different to the ta shock kit, I'd recommend the the coilovers

  • Author

i got my maxrpm topmounts and caster correction arb mounts

18158402234_3cc5e15913_z.jpgUntitled by lukeherbert1, on Flickr

and today i started cutting :-(

18776054302_9087888f77_z.jpgUntitled by lukeherbert1, on Flickr

18781007955_acc50da909_z.jpgUntitled by lukeherbert1, on Flickr

Edited by lukeherbert

I'm enjoying this thread already, keep up the good work!

  • Author

Bit more cutting today, I spent the day mostly making panels

18809195872_79a7ee8426_z.jpgUntitled by lukeherbert1, on Flickr

Edited by lukeherbert

  • 4 weeks later...
  • Author

got a fair bit of welding done in the last few days but still loads to do

19091805058_51c4e3b499_z.jpgUntitled by lukeherbert1, on Flickr

18658850233_270e7896ab_z.jpg by lukeherbert1, on Flickr

its funny how the bottom of the back of the arch has absolutely no rust but just above its paper thin

19540210051_b5159d2333_z.jpg by lukeherbert1, on Flickr

19509833336_2c4e819f9c_z.jpg by lukeherbert1, on Flickr

18915073183_4bf91f6e4f_z.jpg by lukeherbert1, on Flickr

Edited by lukeherbert

  • Author

fuel filler area is almost done now

19644790925_ceeae71b39_z.jpgUntitled by lukeherbert1, on Flickr

Been following your progress on Instagram. Looking really good :)

Great work!
Keep going, bud.

  • Author

forgot to update this so heres whats happened in the last 2 weeks

arch on

19842439616_5fe8b31e7e_k.jpgUntitled by lukeherbert1, on Flickr

then the sill

19682028029_92a0b327fb_b.jpgUntitled by lukeherbert1, on Flickr

19682041769_f551ea4b1f_k.jpgUntitled by lukeherbert1, on Flickr

19680637230_c0cc3c09f7_b.jpgUntitled by lukeherbert1, on Flickr

then filler, primer, seam sealer followed by stonechip

19766759280_e8ebe86ca5_k.jpgUntitled by lukeherbert1, on Flickr

and then brushed on polyurethane top coat

19928523386_35a0b5fbe5_k.jpgUntitled by lukeherbert1, on Flickr

19928514126_2d7606e298_b.jpgUntitled by lukeherbert1, on Flickr

19947097992_07426d55c2_b.jpgUntitled by lukeherbert1, on Flickr

Awesome work mate the rear arch looks brilliant. I'm a novice to welding who is looking to undertake the same work on my 91 breadvan rear arch/sill popular grot spot. Is it difficult to do ie could I self teach and have a go as I have all the repair panels ? Are you mega experienced as the repair looks superb and I am aiming for the same proper long term repair.

  • Author

Thanks man there's been a hell of a lot of man hours in this, I could weld very well when I started this but I had some idea of what I was doing as I work in a body shop, this is the first time ever done this sort of fabrication and sill, arch replacement, it's a massive learning process. If you're busy all the time expect to spend at least 1-2months on this area, it's quite a difficult repair as you need to make the tank you're repairs. The rot in mine was really bad and I had to make the whole jacking point and inner sill

Nice metalwork, I've seen a few pictures of it on instagram too. How much hardener did you use in the paint when brushing it on? I Need to do a few bits on mine

Edited by Fungus

  • 1 month later...
  • Author

its been a while since I've been able to update but I've put in some serious man hours and I've really impressed myself, and to say i've done all the metal work, filler and paint is something to be proud of

20771118864_74b4e01f19_b.jpgUntitled by lukeherbert1, on Flickr

21382981942_1d07fc5d19_k.jpgUntitled by lukeherbert1, on Flickr

21206941719_329fdbd6ab_b.jpgUntitled by lukeherbert1, on Flickr

primer

21367603616_463fd34cfb_k.jpgUntitled by lukeherbert1, on Flickr

wet on wet self level primer for extra sealing and coverage

21205753820_55df4e9330_k.jpgUntitled by lukeherbert1, on Flickr

21382986852_921fbf939c_k.jpgUntitled by lukeherbert1, on Flickr

20771163524_ac9c5376b9_k.jpgUntitled by lukeherbert1, on Flickr

20771170974_40b37591ee_k.jpgUntitled by lukeherbert1, on Flickr

21383011922_20505bf43d_k.jpgUntitled by lukeherbert1, on Flickr

Edited by lukeherbert

Paint looks amazing and a few good shots there!

car look superb, good for you.

you put the work so I hope you enjoy it, love the front wheels

Agreed, the front looks well stanced and the paint looks good from here too.

What are your plans for the rear?

A job well done 👍

Create an account or sign in to comment

Recently Browsing 0

  • No registered users viewing this page.

Account

Navigation

Search

Search

Configure browser push notifications

Chrome (Android)
  1. Tap the lock icon next to the address bar.
  2. Tap Permissions → Notifications.
  3. Adjust your preference.
Chrome (Desktop)
  1. Click the padlock icon in the address bar.
  2. Select Site settings.
  3. Find Notifications and adjust your preference.