Skip to content

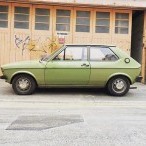
1977 Mk1 Polo Manila

Featured Replies

  • Author

First winter upgrade: brakes


I hadn't had any problems with the original style square-pad calipers and 8mm solid discs which I had previous been restored by https://www.biggred.co.uk (circa £160). Maybe I don't drive fast enough. However, the TA Technix airride struts (future winter upgrade spoiler there) are Mk2f type not the early front struts I have been running. Actually the front struts I have been running are even earlier than the car as I picked up some '74 Audi 50 ones already powder coated to replace my well-used '77 ones, the difference being no return lip on the support where the bottom of the spring sits and these are the ones shown in very early manuals.

The change of front strut design  meant I wouldn’t be able to use the early 8mm solid discs as the hub return on those discs is too high (36mm) so the discs would foul on the splash guard. I still want to be able to run small high-offset wheels so decided to move to a stock Mk2 VW1 setup using solid 10mm discs which have a 29mm hub depth.

spacer.png

spacer.png


For some insane reason the 19.7mm thick stock part-number pads wouldn’t fit and I was informed by someone with a huge amount of Mk2 expertise that this is normal?! Maybe alot of apprentices at VW Dealerships in the early 80s (before thinner pads came out to allow thicker discs to be used) had to spend time sanding pads down to fit.

spacer.png

spacer.png


There are two types of thinner pads; 17.3mm for VW11 12mm thick solid discs and 15.3mm for VW11 20mm vented discs (e.g. G40). The 17mm pads would have fitted easily on the piston side of the caliper but looked to be tight on the outer side so I just jumped straight to the 15mm pads, popped on a bit of copper anti-sieze and they went on easily.

spacer.png


Brakes bled, sorted so on to the next...

Edited by foreststu

  • 5 weeks later...
  • Replies 108
  • Views 17.7k
  • Created
  • Last Reply

Top Posters In This Topic

Most Popular Posts

  • Loving the Ziebart sticker, my grandad had a Cortina with the same one. It worked well, there wasn't a spot of rust on the sticker.   The rest of the car..... different story.

  • Sorry for the lack of updates, progress has been a bit slow getting all the bodywork issues sorted to be honest and a lot of it has ended up in the dustpan! Plus issues with the fitment of the existin

  • foreststu
    foreststu

    Ok since my last post things have mostly been getting rid of the crumbly and welding the good....   ... floors, valance, rear wings...   ... inner wings...  

Posted Images

  • Author

Second winter upgrade: exhaust


It's been mentioned to me a few times that my exhaust looked small.. so rude. ...in all seriousness I had been considering this for a while to help the engine pump air more efficiently as is their way. I realise the normal route would be just to get a mandrel bent stainless setup made but I was intrigued that there are so many different combinations of part numbers on Etka for various Mk1-Mk2f Coupe/Hatchback applications; single/twin downpipes, 42.5, 45.5, 48.5, 49.5mm clamps, long/short middle sections, long/short silencer back boxes. Also there are a lot of exhaust parts available NOS from Volkswagen Classic Parts. So I made a spreadsheet of the options then started hunting.


The Polo originally had a 895cc HA exhaust:

HA single outlet cast manifold > HA combined single downpipe and middle section piece 38mm OD with no resonator or cat > 42.5mm clamp > short silencer


I then upgraded this to a 1272 HH exhaust which would have been the largest available on a Mk1:

HH twin outlet cast manifold > GK non-cat twin downpipe section (as HH would have had a port from the inlet heater) > 42.5mm clamp > flexible section > 42.5mm clamp > HH long middle section with resonator (as GK would have been too big at the end for my silencer) > 42.5mm clamp > short silencer


I then tried the below ending with a Mk2f silencer but it didn't work as I'll come to:

HH Twin outlet cast manifold > 3F non-cat twin downpipe section (no inlet heat, no cat, still 38mm OD each but 50:50 pipe join instead of side entry join and goes over flexible section not into it) > 45.5mm clamp > flexible section > 45.5mm clamp > 3F non-cat short middle section with large resonator > 48.5mm clamp (although Etka said it would need 49.5mm) > PY (G40) long silencer


I'll go though some photos but where I've ended up is a Mk2 setup essentially:

HH Twin outlet cast manifold > 3F non-cat twin downpipe section (no inlet heat, no cat, 50:50 pipe join instead of side entry join) > 45.5mm clamp > flexible section > 45.5mm clamp > 75PS GK long middle section with resonator > 48.5mm clamp > 75PS GK short silencer


So it'll run though logically from the engine. The HA was a single outlet cast exhaust manifold with a V-clamp so I'd changed already to a HH twin outlet exhaust manifold. The PY (G40) cast exhaust manifold has very slightly larger twin outlets so has a different gasket between the manifold and downpipe (the same as some Passat) but all PY downpipes are cat so not something I thought I would have space for easily or wanted to do. All other cast twin outlet exhaust manifolds are the same outlet size so I stayed with the HH one.


The HA was a coolant heated inlet manifold so had no interaction with the exhaust when I ran it stock or with the twin DCOE40s. Although the HH is an exhaust heated inlet manifold so would then have a flexible section down from the inlet manifold to take the exhaust gas into the downpipe near where the gearbox hanger is I have always run it with the twin Weber carb set up with no inlet heating. So I used a GK non-cat twin downpipe section as GK is also not an exhaust heated inlet engine, this had the two downpipes join by one entering the side of the other then the pipe where they joined going into the ID of the flexible section. I have upgraded this to a 3F engine code non-cat twin downpipe section which also has no exhaust port for inlet manifold heating, no cat strangely (there is a cat version) but notably it has a 50:50 pipe join instead of side entry join and it goes over the OD of the flexible section not into the ID of it so has a larger clamp.

In the photo below 3F is top and GK is bottom.

spacer.png


When I put the HH exhaust on I used a stainless braid flexible section as it was much cheaper than the corrugated original type ones I could find at the time. This time round I located the corrugated type (direct from Volkswagen Classic Parts actually during free-shipping Black Friday) but it's worth noting that the cat downpipes don't need these and the 3F/GK engines state a different part number but they are all the same part. The only difference is that 3F/GK parts clamp to the outside of the flexible section and others go inside the flexible section hence the smaller clamp.

spacer.png


The HA engine middle section goes all the way from the single outlet cast exhaust manifold as a single 38mm OD pipe to the silencer back box and I'd been using a NOS VW back box which connected using a 42.5mm clamp. When I changed to the twin downpipe I used a HH long middle section with resonator which used a 42.5 mm clamp at either end. For the new arrangement I have used a 75PS GK long middle section with resonator which is over the OD of the flexible section so a 45.5mm clamp and then has a short engine specific silencer back box which uses a 48.5mm clamp. The below photo shows the difference with the HH going into and the GK over the middle section.

In the photo below GK is top and HH is bottom.

spacer.png


Prior to the final arrangement I had tried using a PY (G40) silencer back box with a 3F non-cat short middle section with large resonator. Unfortunately whilst the combination of short middle and long silencer did the same job as a long middle and short silencer in terms of lining everything up \9e.g. the rear axel dip) the rear valence got in the way. The rear valence of a Mk1 curves around quite a lot compared to the mostly vertical Mk2 and the Mk2f which benefits from a larger bumper too. The space between the rear axel dip and the mounting bracket is the same for each but the Mk2f's larger tail pipe takes up more space making its curves and also has almost no downward drop so the silencer box itself pretty much touched the rear valence even if the tail pipe was totally chopped off. The Mk2 GK silencer back box had a decent downward drop on the tail pipe which was similar to the Mk1 silencer back box but clearly the pipe was still bigger taking up more space past the exhaust hanger point where the rear valence curved into.

In the photo below the PY is top -eft, GK is bottom-right and Mk1 is bottom-left and top-right.

spacer.png


The photo below better shows the vertical drop on the GK tailpipe where the PY had almost no vertical drop. It all also shows that to fit the GK silencer back box I had to move the mounting bracket 1" back to allow for the larger tailpipe inside the rear valence. A friend removed this and tig welded it in place for me which turned out great and it sits happily in the Mk1 valence hole.

spacer.png

spacer.png


The eagle-eyed amongst us will have spotted more progress with another winter upgrade but for now, Merry Christmas!


  • 2 weeks later...
  • Author

Third winter upgrade: Air Ride


Getting the Polo over the threshold of my garage has always necessitated some carefully placed pieces of scaffold plank to avoid me catching the fuel pipe clips or other low-hanging parts of the underside. This has only become more tricky since going a bit lower on the 14" wheels with 55 profile tyres. I've always fancied doing air ride to help with getting into the garage but also for the look when parked up so I've jumped in!


I picked up the TA Technic air bags which have a dual-bellow on the front and sleeve bag on the rear and are based on a late Mk2F front strut design. I was originally going to use the Air Lift Performance manual dual paddle-switch manifold and twin-needle pressure gauge pod but a new digital 3P Management System came up at a good price and that was the system I really wanted. The 3P system has a wired remote from the manifold and also bluetooth so it can be controlled from a smart phone app when the engine is on or if it is in 'show mode'.

spacer.png


Because the front struts are late Mk2F design I needed to change a few things starting with moving from Mk1 14mm ball-joint track control arms to the Mk2 17mm ones. Also, as mentioned in a previous post, discs with a much shallower hub-return which also mean't moving to VW1 type Mk2 brake callipers. In addition I also had to change the strut brake hose guide; the Mk1/Mk2 type have a tab on the side of the strut and the hose sits in this with a grommet around it. These late Mk2F type have the same design as some (maybe all) Mk2/Mk3 Golfs which use a rubber piece with a slot on one end to slide onto the strut and a hoop on the other end for the brake hose. There were a few other things which are the same but I used new ones: hubs, hub bearings, top mounts, top caps.

spacer.png

spacer.png


The TA Technix struts are (1/8" BPS) whilst the Air Lift Performance leader lines are (1/4" NPT) so to connect I used a 90-degree 1/8" BPS then a straight 1/8" BPS to 1/4" NPT adapter for the leader line to connect to then a 90-degree 1/4" NPT to 6mm Push-To-Connect (PTC) all sealed with Loctite 586 instead of PTFE tape or the dry red sealant which comes on the Air Lift Performance parts (removed with a small wire brush). Use a few P-clips to take the weight of the leader line off the joint and also to keep it out of the way of the wheels.

spacer.png

spacer.png

spacer.png


Inside the front struts I'm told the bump stop is segmented so can be cut off so the bag will compress more when aired-out. Whilst the car was on jack stands I jacked up the strut below the track control arm and wasn't quite able to bottom out the strut onto this bump stop on the drivers side so had to remove a small crescent of the inner wheel-well overhang on the chassis leg, this has already been partially done by a previous owner presumably one of the times it was lowered on coilovers. This now gives plenty of room around the drive shaft for the car to drop onto the front strut internal bump stops. If I wanted to reduce the height of the bump stop to get lower I'd have to do an inclined notch.

spacer.png


The installation of the rear bags was very similar to the front except that the stand-off spacer on top didn't leave sufficient damper rod for the stock rear rubber top mount bushings so I ordered a pair of shorter ones (M10 clearance 20mm diameter and 20mm length).

spacer.png

spacer.png


The kit came with a rather long Air Lift Performance aluminium tank which probably wouldn't have been my choice but I made it work. I wanted to still be able to keep the spare wheel and be able to get it out without disconnecting any air lines. I used a Fab53 bracket to mount the manifold on the seat-back using rivnuts as high as I would whilst still being able to fit the parcel shelf. I then made a bracket from some flat aluminium which allowed the tank to sit beneath the manifold with the drain-port pointing down again mounted to the seat-back with rivnuts. I mounted the compressor to the boot floor with an anti-vibration kit with the factory-fitted steel-braid swivel line curved to allow the rear seat-back to still move forwards enough to move the air tank out of the way when lifting the spare wheel out over the central threaded bar which holds the spare wheel down. All of the air line fittings are 1/4" NPT PTC and the lines curve down to the rear seat-back hinges so that again the seat-back can move without snagging them. The rear air lines exit straight into the rear wheel-wells using a hole with a grommet. The front air lines go under the back seat, under the drivers-side rear side-card into the rear quarter cavity then down and out exiting near the fuel tank breather pipe and then following the fuel line to the front and accessing the bags via the steering arm holes. The wiring also exits under the rear seat then under the carpet along the drivers-side sill and up behind the dash with the battery connections and ignition live going though the into the engine bay behind the battery. The wired remote control sits in the under dash tray and the excess wire is coiled-up and cable tied behind the dash. I slit the boot carpet so that it can be removed without unbolting the compressor.

spacer.png

spacer.png


When setting up the 3P system I increased pressure until the car didn't rise anymore and set that as the all-up preset which is 50 PSI on each corner. Then I set a drive height with was around the same height as I was at when lowered static which is 20 PSI in the front and 28 PSI in the rear. The car drives well, not bouncy or hard and when aired-out sits with an even gap between the rim and arch so happy with that.

spacer.png

spacer.png

spacer.png


Merry Christmas and a Happy New Year to you all!

  • 3 weeks later...
On 23/11/2023 at 00:17, foreststu said:

First winter upgrade: brakes


I hadn't had any problems with the original style square-pad calipers and 8mm solid discs which I had previous been restored by https://www.biggred.co.uk (circa £160). Maybe I don't drive fast enough. However, the TA Technix airride struts (future winter upgrade spoiler there) are Mk2f type not the early front struts I have been running. Actually the front struts I have been running are even earlier than the car as I picked up some '74 Audi 50 ones already powder coated to replace my well-used '77 ones, the difference being no return lip on the support where the bottom of the spring sits and these are the ones shown in very early manuals.

The change of front strut design  meant I wouldn’t be able to use the early 8mm solid discs as the hub return on those discs is too high (36mm) so the discs would foul on the splash guard. I still want to be able to run small high-offset wheels so decided to move to a stock Mk2 VW1 setup using solid 10mm discs which have a 29mm hub depth.

spacer.png

spacer.png


For some insane reason the 19.7mm thick stock part-number pads wouldn’t fit and I was informed by someone with a huge amount of Mk2 expertise that this is normal?! Maybe alot of apprentices at VW Dealerships in the early 80s (before thinner pads came out to allow thicker discs to be used) had to spend time sanding pads down to fit.

spacer.png

spacer.png


There are two types of thinner pads; 17.3mm for VW11 12mm thick solid discs and 15.3mm for VW11 20mm vented discs (e.g. G40). The 17mm pads would have fitted easily on the piston side of the caliper but looked to be tight on the outer side so I just jumped straight to the 15mm pads, popped on a bit of copper anti-sieze and they went on easily.

spacer.png


Brakes bled, sorted so on to the next...

Hello! I want to change my front brake system to the 20 mm vent disks, but i have old type front struts. In your opinion, can be WWII calipers installed on mk1 struts?

Your car is fantastic, i glad to see these changes for this few years. These wheels and air suspension look great!

  • Author
9 hours ago, Vsevolod2002 said:

Hello! I want to change my front brake system to the 20 mm vent disks, but i have old type front struts. In your opinion, can be WWII calipers installed on mk1 struts?

Your car is fantastic, i glad to see these changes for this few years. These wheels and air suspension look great!


Thanks!


The bolt holes for them all are in the same place so they will definitely bolt-on but my concern is if the centreline of the disc will be in the right place to sit between the two pads because of the 7mm difference in stock disc hub-return (wheel mounting surface to outer disc face). If you were fitting 10mm solid discs then you could use the 15mm thick pads and have a few mm of wriggle room for the caliper to float on the carrier and centralise. However with the 20mm vented discs you'll need it to be spot on to slot the pads over the disc. It really depends on how much extra float there is in the VW11 calipers and how the wider discs are designed i.e. where the centreline is. So sorry I don't know, someone might come along here with the answer or try google or posting on one of the Facebook Polo pages.


If they do fit you will need VW11 calipers, 15mm thickness pads and you have the option of running the VW1 carrier or the VW11 carrier. These carriers are basically the same except the VW11 has a brace around the outer side of it for strength. The reason you may want to run the VW1 carrier is that without the brace you have space to run smaller diameter wheels and/or run wheels with a higher offset which sit closer to the brakes. If you don't need the clearance then I guess I would run the stronger VW11 carriers.


Good luck

Edited by foreststu

1 hour ago, foreststu said:


Thanks!


The bolt holes for them all are in the same place so they will definitely bolt-on but my concern is if the centreline of the disc will be in the right place to sit between the two pads because of the 7mm difference in stock disc hub-return (wheel mounting surface to outer disc face). If you were fitting 10mm solid discs then you could use the 15mm thick pads and have a few mm of wriggle room for the caliper to float on the carrier and centralise. However with the 20mm vented discs you'll need it to be spot on to slot the pads over the disc. It really depends on how much extra float there is in the VW11 calipers and how the wider discs are designed i.e. where the centreline is. So sorry I don't know, someone might come along here with the answer or try google or posting on one of the Facebook Polo pages.


If they do fit you will need VW11 calipers, 15mm thickness pads and you have the option of running the VW1 carrier or the VW11 carrier. These carriers are basically the same except the VW11 has a brace around the outer side of it for strength. The reason you may want to run the VW1 carrier is that without the brace you have space to run smaller diameter wheels and/or run wheels with a higher offset which sit closer to the brakes. If you don't need the clearance then I guess I would run the stronger VW11 carriers.


Good luck

Thank you for answer!

  • 3 months later...
  • Author

Spring is coming so I started off by refreshing a few items I had previously just done a DIY tidy-up on. Fitted NOS wiper arms and a refinished 4-speed engine/gearbox mount.

spacer.png

spacer.png


With those huge upgrades(!) completed I popped the Kamei front splitter back on and headed down to Sandown Racecourse for Volksworld Show. This was to be part of a 50 car outdoor display of 'retro' watercooled VWs on the Sunday organised by Performance VW Magazine who are part of the same publishing group as Volksworld Magazine. Whilst the main show itself was still adamantly aircooled-only I thought it was worth the 3hr drive each way to be part of the first watercooled group to be included. Rain and planned closure of the nearest motorway junction meant it was quieter than people expected but still a good day and lots of interesting cars to see. There was even another Type 86 car there, Ellis' MK1F Derby. I also got a shot of the show programme alongside my Issue 1 of PVW and Issue 1 of Volksworld.

spacer.png

spacer.png

spacer.png

spacer.png

spacer.png


Then at the start of April it was a local show for me, Coleford Carnival of Transport which started off bright but then got wet in the afternoon.

spacer.png


The next show for me will be Edition Reloaded (previously Edition 38's "Early Edition") in May. If anyone arrives in a Type 86 Mk1 Polo/Derby/Audi 50 then come and find us or drop a message on Facebook/Instagram and we will reposition in the afternoon for a line-up photo.

spacer.png

  • 2 months later...
  • Author

Hi all,


So lets catch up on the start to the summer...

As one of my last winter mods this season I wanted to change up the bakelite steering wheel for something a bit more sporty. I like the Scirocco TS steering wheel which is 38cm, flat and has 3 holes in each spoke but I wanted something a bit smaller as that was the same diameter as the stock bakelite wheel. I found that the manufacturer of that wheel, Petri, made 3 versions: the 38cm flat Scirocco TS wheel, a 40cm concave version for the Passat TS and a 35cm concave version with a different boss for a 70's BMW. I fancied a 35cm flat version so I sourced a Scirocco TS boss and scoured the internet for a suitable flat 35cm 3 spoke wheel with 3 holes in each spoke finding a 1960's Italian sports wheel by an OEM Fiat manufacturer in Egypt. After some customisation to the wheel it all fitted together.

spacer.png


Edition 38's smaller 1-day show 'Early Edition' now their sole show of 'Edition Reloaded' was awesome with great weather and an unreal array of mostly water-cooled cars. 

spacer.png


Next up in May was the Rothfink Industries Barryfornia show held on the promenade of Barry Island beach in South Wales, again the weather and cars were awesome.

spacer.png


After a family holiday in France I came home only to head out again to Bristol Volksfest where the good weather continued as well as the excellent quality of cars.

spacer.png


Unrelated-to, but after, this show I was contacted by Rich from polodriver.com who were looking for a Mk1 Polo to join one of two static displays at the Goodwood Festival of Speed celebrating the career of Bertone car designer Marcello Gandini, the first being Lamborghinis and the second being everything else. I drove the 3 hours down to Goodwood and dropped the Polo and keys off next to a Zonda! This turned into an amazing weekend where I was able to park on the coveted Cartier Style et Luxe concours d'elegance lawn, be treated as a driver, attend the Bonhams car auction, attend the Goodwood Summer Ball, attend the Cartier Summer Garden Party and generally have fun watching the hill-climb racing. It was awesome, thank you Rich.

spacer.png

spacer.png


As the show was winding down on Sunday, especially as a football final had drawn some people away early, I did air-out the car for 20 minutes to watch the confused looks on peoples faces (whether they had seen it earlier air-ed up looking stock or not). 

spacer.png


The following week it was back to a local show, Dubs at the castle, in Caldicot where I was surprised to pick up the Judge's choice best 'Daily Driver' trophy. I'd spoken to a few people about the torrentially wet drive associated with Goodwood so can only assume they took this aversion to a trailer or transporter to be a regular thing (I do commute in it on the odd sunny day). Either way I was happy to be recognised by the Judges and, with a trip to America looming, this might have been the last show of 2024. That said, I'll probably try and fit something in later in the year...

spacer.png

  • 8 months later...
  • Author

It's been a while! So to catch you up I did make it to one more show in 2024, Westside Show in September. A good mix of cars including a lot of Mk1-2 Golfs but also non-VWs in the relaxed setting of Chalfont-St-Peter cricket club. I was lucky to be selected as winner of the Polo class and received a very cool CNC aluminium trophy made by G23 Engineering featuring an OZ Turbo wheel design.

3Vn8MT2.jpg

rmwHmuH.jpg

Some photos of the Polo at Goodwood Festival of Speed made it into the Performance VW magazine October 2024 issue along with some nice words from the Editor. I still can't really believe that I was part of the Cartier Style et Luxe concours lawn, a very surreal weekend.

img%5D

Then I had a big Bucket List thing ticked-off with an article on the Polo and some of the other random VW stuff I've picked up over the years in the Performance VW magazine March 2025 issue! I'd held off doing any winter upgrades (and I have a few planned as usual) until this was completed and I think it neatly captures the build-era for me. I'm mid-way though this years changes which I plan to have completed by the end of Spring...

img%5D

Edited by foreststu

Create an account or sign in to comment

Recently Browsing 0

  • No registered users viewing this page.

Important Information

We have placed cookies on your device to help make this website better. You can adjust your cookie settings, otherwise we'll assume you're okay to continue. Terms of Use Privacy Policy Guidelines

Account

Navigation

Search

Search

Configure browser push notifications

Chrome (Android)
  1. Tap the lock icon next to the address bar.
  2. Tap Permissions → Notifications.
  3. Adjust your preference.
Chrome (Desktop)
  1. Click the padlock icon in the address bar.
  2. Select Site settings.
  3. Find Notifications and adjust your preference.