Skip to content

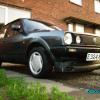
my mk2 coupe s

Featured Replies

recent purchases

weber 32 dmtr carb

carb.jpg

and smoked rear mhw lights

464d_1.jpg

:D

and also chrome bumper inserts

new wheels in a few months (pending funds )

(13" Ulbricht Bremen Cup)

bremen20cup-425x425.jpg

finished product ?

mk2coup.jpg

then body work time :D

Edited by a$h

  • Replies 11
  • Views 2.8k
  • Created
  • Last Reply

Top Posters In This Topic

  • Author

OMG WHAT HAVE I DONE NOW ?

stripped out :strange:

PICT0343.jpg

PICT0346.jpg

new lights

PICT0345.jpg

I love the colour, my only personal gripe are those wheels - if TSW Venom's put on a few pounds they'd look like that

You would get more replies if this was in the correct section.

PHOTO GALLERY or MEMBER'S GALLERY.

Sorry just pisses me off when people post photos of their car in Polo Chat thinking it will get more views/replies.

Nice car btw. :)

^- what Danny said.

Words like 'Halfords' and 'Clio' spring to mind..

Are they squareback lights?

Keep at it, my car went through nearly an identical process in the early stages, and it's never a bad thing to have a sporty-mk2-to-be in the fold.

Also moved.

  • Author

engine bay pics

the only problem I'm having is not knowing where each hose has to go?

PICT0352.jpg

PICT0351.jpg

PICT0350.jpg

PICT0349.jpg

also got the choke cabe and other bit

PICT0353.jpg

Edited by a$h

The pipe coming up from below through the gap between the manifold and the head is a coolant pipe, it used to attach to your autochoke on the old pieberg, and it needs joining back up to the pipe of similar diameter which I can see flying free at the back corner. If you don't have anything suitable, you can detach the autochoke module from your pierberg and use that as a bridge - I've done it, hypojam's done it, some other will have done it too because they don't have a coupler.

the fuel pipe coming from your fuel pump needs to connect to the right fuel stub on the front of the carb. The fuel pipe going back to the tank needs to join to the other stub right next to it on the left. Because your carb has both an inlet and outlet, you will not need a swirl pot at all.

The stub on the right side of the carb pointing to the passenger side wing needs connecting to your distributor vacuum advance module, I'm assuming it has one? This usually involves a thin plastic pipe with two pipe sleeves at each end to fix onto the stubs.

The thin stub at the lower front of the carb is the vacuum for the hot/cold air selector on the standard airboxes - if you decide to keep the pancake, you will want it. If you don't, it needs blocking off, but it looks like someone has already done that with some rubber pipe and a screw.

The round thing in the bottom pic is an airbox adaptor - this is used to allow you to fit the pancake airbox to the top of the carb as the bolt pattern is different. You still are only able to fix the pancake by 2 of the 3 bolts, but it still works as it should. Given the time of year, the pancake airbox is as good an idea as any for now.

When you have done all of this and hooked it all up, it is suitable for running. The pipes and carb will need some additional churning time to fill with fuel. If it does not start (although it should), tweak both the idle speed screw clockwise a turn (spring-loaded screw at the back of the carb) and the fuel mixture screw anti-clockwise a turn (tiny screw right at the base of the carb at the back, approach from the passenger side an you'll see it - use a thin screwdriver.)

When the engine is fairly warm and the choke has been pushed fully in, tweak those screws back down so as to help set the proper idle speed and mixture. First take the mixture screw down by turning it clockwise (inwards) until you hear a noticeable dip and unevenness begin to creep into the engine sound. When you hear it, stop and do one half turn back out. Then set the idle speed. Take the car for a run, and pay attention to any abnormal behaviour.

  • Author
The pipe coming up from below through the gap between the manifold and the head is a coolant pipe, it used to attach to your autochoke on the old pieberg, and it needs joining back up to the pipe of similar diameter which I can see flying free at the back corner. If you don't have anything suitable, you can detach the autochoke module from your pierberg and use that as a bridge - I've done it, hypojam's done it, some other will have done it too because they don't have a coupler.

the fuel pipe coming from your fuel pump needs to connect to the right fuel stub on the front of the carb. The fuel pipe going back to the tank needs to join to the other stub right next to it on the left. Because your carb has both an inlet and outlet, you will not need a swirl pot at all.

The stub on the right side of the carb pointing to the passenger side wing needs connecting to your distributor vacuum advance module, I'm assuming it has one? This usually involves a thin plastic pipe with two pipe sleeves at each end to fix onto the stubs.

The thin stub at the lower front of the carb is the vacuum for the hot/cold air selector on the standard airboxes - if you decide to keep the pancake, you will want it. If you don't, it needs blocking off, but it looks like someone has already done that with some rubber pipe and a screw.

The round thing in the bottom pic is an airbox adaptor - this is used to allow you to fit the pancake airbox to the top of the carb as the bolt pattern is different. You still are only able to fix the pancake by 2 of the 3 bolts, but it still works as it should. Given the time of year, the pancake airbox is as good an idea as any for now.

your a legend !!

goign to get it working now then cheers !!

before you wrote that i was clueless

thank the the help

fuel pipe it other way unless am reading wrong

the petrol feed from pump goes on the left one (the pipe with the wider dia)

the return to the tank goes on the right hand one

(am tlaking from looking at front of car )

if you look on carb the large fuel pipe has an arrow pointing up

you might find it tricky getting two fuel lines and clips on as there aint much space

That is actually true, good thing you pointed it out, although I should hope he would spot the arrows anyway.

That is actually true, good thing you pointed it out, although I should hope he would spot the arrows anyway.

i only knew as mines sat in the kitchen atm :-(

Create an account or sign in to comment

Recently Browsing 0

  • No registered users viewing this page.

Account

Navigation

Search

Search

Configure browser push notifications

Chrome (Android)
  1. Tap the lock icon next to the address bar.
  2. Tap Permissions → Notifications.
  3. Adjust your preference.
Chrome (Desktop)
  1. Click the padlock icon in the address bar.
  2. Select Site settings.
  3. Find Notifications and adjust your preference.