Skip to content

Gt to G40 conversion

Featured Replies

thought i would put some pics up of todays work, first half of the conversion complete

cars out of the garage

DSC00849.jpg

gt engine out

DSC00851.jpg

gt engine cleaned - going in another polo

DSC00852.jpg

surface rust found once the engine was removed

DSC00855.jpg

kurust to the rescue

DSC00856.jpg

area preped and sprayed over / blended into the rest of the bay

DSC00858.jpg

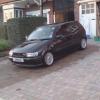
most of you will remember the car

DSC00578-1.jpg

once i collect the new clutch tomorrow, the gearbox will be mounted and the engine ready to go in

then after that all the wiring etc needs to be sorted!

Edited by BLACK6N_POLO

  • Replies 21
  • Views 3.5k
  • Created
  • Last Reply

Top Posters In This Topic

nice project....guna see how this progresses then ino wether to do it to mine :)

  • Author

you have to have a charger in your life

well thats my excuse any ways

my mk1 golf gti campaign is my pimp wagon

this is my bit of fun to go fast

i wonder if there will be a bit of competition between you and your brother for who has the fastest g :lol:

where is the gt lump going?

  • Author

my bro will always have the faster g lol

my golf is where the majority of my money goes/will go and is my main car

my g is my side project, it only has a g-larder charger (a jabba one) where as my bro's is not hehe

the gt lump is going in my bros new daily

Edited by BLACK6N_POLO

  • Author

new clutch and release bearing today

along with mounting the gearbox

and attatching the remaining parts, alternator, super charger bracket, starter motor etc

forgot the camera so no pics today lol

all work carried out inbetween uni lectures

  • 5 months later...
  • Author

update: so i fit the engine and get it started to find it not running right, firstly i took the rocker cover off to investigate, i then discover that the head is a non-g40 item. GREAT! the guy who sold this to my brother is a crook, but lets forget this now as it has allowed me to build the car exactly how i like.

so whip the head off to find more surprises

Image022.jpg

Image023.jpg

so the cut outs in the piston heads which can be seen above are from valve contact, ie snapped cambelt! so as you can see this led to a full engine rebuild.

on to removing the pistons etc

Image028.jpg

Image029.jpg

Image027.jpg

pistons removed along with all the other parts (sorry cant find the pics) and block inspected

Image030.jpg

Image031.jpg

next it was time to source a g40 head and strip the head down and rebuild it whilst i waited for the parts for the block

look at the lovely straight valves! NOT!

Image036.jpg

Image037.jpg

i then purchased all the parts i needed to rebuild my new head

next i got my new vw g40 valves, both intake and exhaust, i then had the inlet vales backcut and tweaked to aid air flow and inprove my cfm reading by 5%, therefore hopefully increasing the bhp.

add new seals and refurbed springs and tappets etc cost = :( :o

had the head skimmed as well

next jop, lap the valves in, i took my time and made sure they were lapped in properly. no point rushing.

Image042.jpg

Image041.jpg

nicely lapped in

Image043.jpg

cleaned the head and fitted the valves and oil seals

Image052.jpg

add the springs, double springs, what should be there, not single spring like the original head!

Image051.jpg

add the rest of the bits and complete this part of the head rebuild

Image053.jpg

  • Author

following on

Image054.jpg

seal

Image055.jpg

tappets

Image056.jpg

lick of paint and fit the cams etc

Image058.jpg

Image059.jpg

so that was the head!

now for the block

honed the block, thanks to jp for the use of his tools and the head paint!

new piston head, rings, rods, bearings etc etc

Image061.jpg

Image062.jpg

all other parts for the block all refitted and put back together, sorry forgot to take the camera with me this day, therefore no pics.

fit it all back in the car

Image064.jpg

on to the charger, fully rebuilt and ported, rebuild done by steve at the famous psd (now closed) and porting by jabba stage 4

Image081.jpg

Image078.jpg

refurb the outlet elbow and casing

Image076.jpg

Image075.jpg

new top quality blankin plate

Image073.jpg

charger all put back together

Image086.jpg

Image079.jpg

engine fitted with charger, intercooler oil lines and all the other parts. engine conversion and rebuild complete!

started straight away without any problems! now mot and tax and i can drive it.

Image096.jpg

Image097.jpg

Image098.jpg

to stop the g i opted to upgrade the brakes to 256mm golf 16v items, a deal came up i could not resist lol, i added some braided lines for good measure. dunno about the red yet, ill have to get that sorted, thats how they came.

Image083.jpg

Image085.jpg

Good work :D8-)

nice work cant eait for update

  • Author

oh i forgot to add that the charger is running a 65mm pulley.

updates will come when the exhaust system is properly finished.

the car is cleaned properly

and the new bbs au's get there tyres

dude its cumming along nicely man, when we gunna see this bad boy on the rolling road at uni? lol..

  • Author

once i run the engine in it will be on the uni rollers you have to wait till then hahahah or catch me with it at santa pod. the running in will just take some time. soon though

what are you doing with all the GT stuff??........

wouldnt mind a conversion myself

great stuff! this is the kind of threads i like to see none of this. 'look at my new lights' shite.

did you buy new pistons and rings from vw? :-D can you pm me what sort of price you paid for the rings and pistons? cheers

  • Author
what are you doing with all the GT stuff??........

wouldnt mind a conversion myself

all the gt stuff went to my brother and we fitted it to his mk2 loon

great stuff! this is the kind of threads i like to see none of this. 'look at my new lights' shite.

did you buy new pistons and rings from vw? :-D can you pm me what sort of price you paid for the rings and pistons? cheers

i agree with all these crappy update threads, real work and real build threads ftw

i got the rings from vw, ill find the bill and let you know

the pistons and rods etc were sourced from some where else ;)

cheers for all the comments

Must have been gutted when you saw the engine condition.

Amazing work though mate, threads like this give me the motivation.

keep me posted J

Wow, you made that look so easy!

Looks like you are doing a proper job mate!

Lots of effort as well as cash,

Hope you are head and block were uber clean when u fitted the headgasket as I did this with mine then the little biatch dripped oil in the bottom left a tiny bit grrr. so annoying.

Will look brilliant when its done!

Happy poloing in the garage at its best.

looks like a great convertion !!! cant wait to see more updates :D

  • Author
Looks like you are doing a proper job mate!

Lots of effort as well as cash,

Hope you are head and block were uber clean when u fitted the headgasket as I did this with mine then the little biatch dripped oil in the bottom left a tiny bit grrr. so annoying.

Will look brilliant when its done!

Happy poloing in the garage at its best.

thanks mate, i made it uber clean for that exact reason! it has cost me a lot yes but i reckon its worth it in the long run reliability wise. poloing in the garage is all i can do, will be on the road very soon hopefully.

looks like a great convertion !!! cant wait to see more updates :D

they will come soon, i can only work on the car on weekend's or evenings so its not slow progress but steady. the longest thing is waiting for parts, most of them are special order from germany!

Create an account or sign in to comment

Recently Browsing 0

  • No registered users viewing this page.

Account

Navigation

Search

Search

Configure browser push notifications

Chrome (Android)
  1. Tap the lock icon next to the address bar.
  2. Tap Permissions → Notifications.
  3. Adjust your preference.
Chrome (Desktop)
  1. Click the padlock icon in the address bar.
  2. Select Site settings.
  3. Find Notifications and adjust your preference.